Rum Balls Recipe Without Rum
I love the deep chocolate and spice flavors of rum balls, but I also wanted a version everyone can enjoy. I worked in the kitchen until I found a no-alcohol recipe that keeps the same rich texture and festive taste without using rum.
I’ll share a simple method and practical tips so you can make these treats at home with common pantry ingredients. You’ll learn how to mix, shape, and store them, plus a few easy swaps to match your diet or taste.
Key Takeaways
- These rum-ball-style treats keep the classic taste and texture without alcohol.
- The recipe uses simple pantry ingredients and easy, no-bake steps.
- You can store them easily and swap ingredients to suit diets or flavors.
What Are Rum Balls Without Rum?
I make bite-sized chocolate confections that keep the classic truffle feel but skip the alcohol. They use crushed cookies or cake crumbs mixed with cocoa or melted chocolate, a sweet binder like condensed milk or nut butter, and flavorings such as vanilla, orange zest, or coffee to add depth. I often fold in chopped nuts or dried fruit for texture, then roll the mixture into balls and coat them with cocoa, coconut, or sprinkles.
These treats suit kids, pregnant people, and anyone avoiding alcohol. They store well and need no baking, so they’re quick to prepare for gatherings or gifts.
Why You’ll Love These Rum Balls Without Rum
I make these rum-free balls because they’re simple and forgiving. The recipe uses basic pantry items, so I rarely need a special trip to the store. I can mix them in one bowl and shape them by hand, which saves time and keeps cleanup minimal.
I also like how easy they are to change. I swap nuts, citrus zest, or coatings to match tastes or whatever I have on hand. Kids and adults both enjoy them—no alcohol means everyone can dig in.
- Quick to make
- Flexible flavor options
- Great for parties, gifts, or snacks
The Ingredients
I gather the supplies below to make the no-rum chocolate balls. I use quality items so the flavor turns out rich and smooth.
- 1 1/4 cups powdered sugar
- 16 oz dark chocolate chips
- 3 tbsp cocoa nibs
- 2/3 cup unsalted butter, softened
- 1 tsp vanilla extract
- 1/4 tsp sea salt
I recommend picking good chocolate and fresh butter for best results.
Step-by-Step Instructions
Step 1: Gather and measure everything
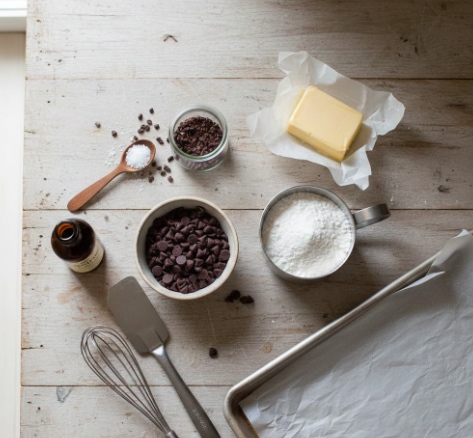
I lay out all ingredients and tools before I start. I measure the chocolate, butter, powdered sugar, cocoa nibs (or cocoa powder), salt, and vanilla so I don’t pause midway. Having a lined baking sheet and a spatula ready speeds the process.
Step 2: Gently melt the chocolate
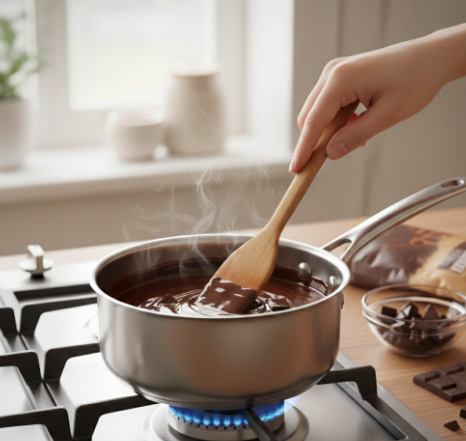
I melt the dark chocolate slowly over low heat in a small saucepan, stirring until smooth. Alternatively, I use the microwave in 15–20 second bursts, stirring between bursts to avoid burning. The chocolate should be silky, with no lumps.
Step 3: Stir in the butter
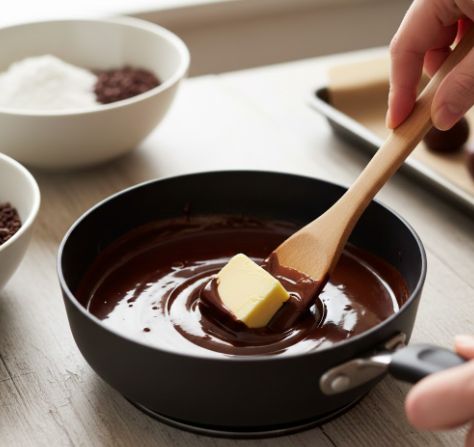
With the heat off, I add softened butter to the melted chocolate and stir until the mixture is glossy and even. If the butter is too cold the chocolate can seize, so I make sure it’s at room temperature first.
Step 4: Blend the dry mix
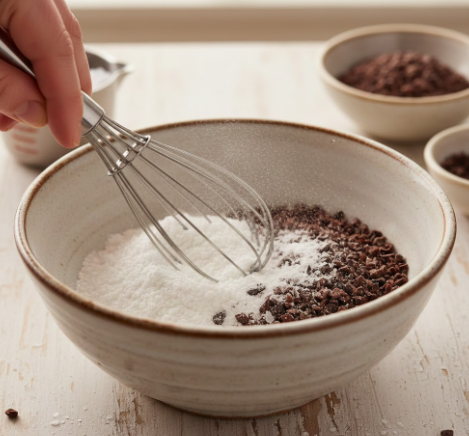
In a separate bowl I whisk together the powdered sugar, cocoa nibs or cocoa powder, and a pinch of sea salt. Mixing these dry ingredients before combining them helps the flavor spread evenly through the mixture.
Step 5: Fold the dry mix into the chocolate
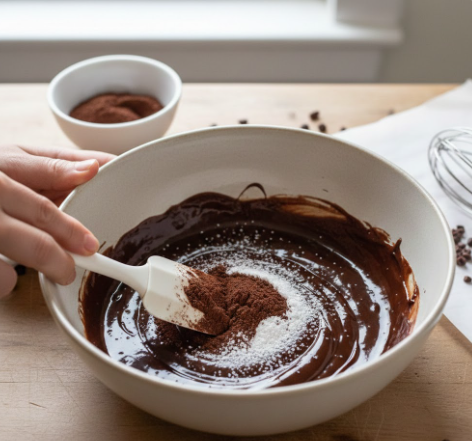
I add the dry mixture gradually to the chocolate-butter base, using a spatula to fold until well combined. I scrape the sides of the bowl and press any stubborn bits so the texture is uniform and holds together when formed.
Step 6: Add the vanilla
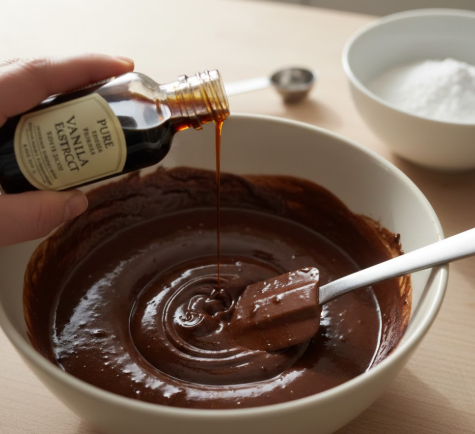
I pour in vanilla extract and stir gently until it’s fully incorporated. The vanilla brightens the chocolate flavor without changing the mixture’s consistency.
Step 7: Shape into balls
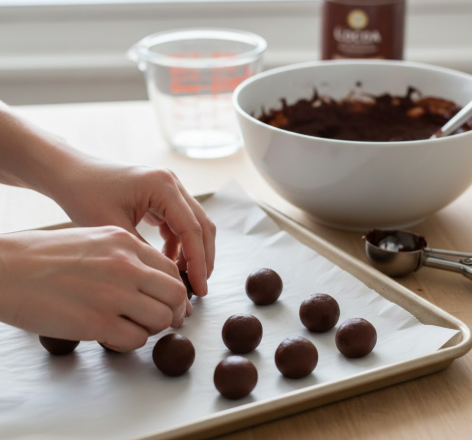
I scoop small portions—about one inch across—and roll them between my palms into smooth rounds. I work quickly so the mixture doesn’t warm too much. I place each ball on the lined baking sheet, spacing them a bit apart.
Step 8: Chill to set
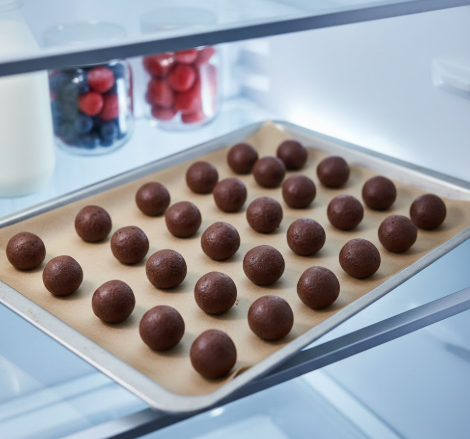
I transfer the baking sheet to the refrigerator and chill the balls for at least one hour. Cooling firms them up so they hold shape and slice cleanly if needed.
Step 9: Plate and enjoy
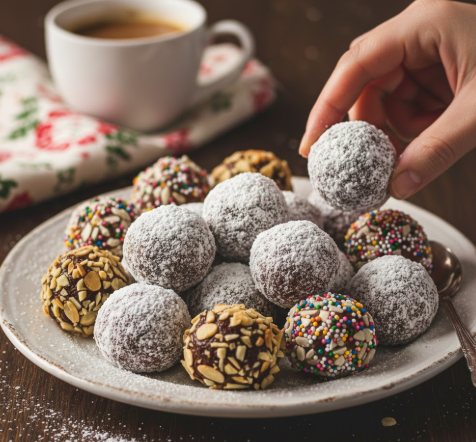
After chilling, I dust them with extra powdered sugar or cocoa, or roll them in sprinkles or chopped nuts for a final touch. I arrange them on a serving plate and enjoy.
Tips & Tricks
I pick good chocolate — it changes the taste and texture. I melt chocolate slowly over low heat to avoid burning. I wear disposable gloves when I roll the balls to keep my hands clean and stop sticking. I add a small pinch of cinnamon or nutmeg to boost flavor without overpowering. I store finished balls in an airtight container in the fridge to keep them fresh and chewy.
Can I Keep Rum-Free Balls Fresh?
I store them in an airtight container in the fridge and they stay good for up to two weeks.
For longer storage, I freeze them for about three months, layering parchment between pieces to stop sticking.
Thaw frozen balls in the fridge before serving to keep texture and flavor intact.
What to Pair with Rum Balls That Have No Alcohol
I like serving rum balls without rum with warm drinks like coffee or tea to bring out the chocolate.
Milk or plant-based milk works well, especially for kids.
Fresh fruit—berries or orange slices—adds a bright contrast.
A simple cheese board or other sweets (cookies, brownies, ice cream) turns them into a fuller dessert spread.
Variations
Ingredients I swap or add
I often change what goes into the mix to suit taste or mood. For crunch, I stir in about 1/2 cup chopped nuts (walnuts, almonds, or pecans). For chew and sweetness, I fold in 1/3 cup chopped dried fruit such as cherries, raisins, or apricots. To make the flavor warmer, I add 1/2 to 1 teaspoon ground cinnamon or a pinch of allspice. For brightness, I grate the zest of one orange into the batter. For a holiday twist, I crumble 3/4 cup gingerbread cookies and mix in 1 tablespoon molasses.
I sometimes adjust base amounts to keep texture right. If I add fruit or cookies, I reduce the powdered sugar by 2–4 tablespoons. If I add nuts, I increase the dry mix by a similar amount. These small changes keep the mixture firm enough to roll.
How I change the process
I follow the same basic steps but shift timing and assembly for each variation. For nutty or fruit-filled versions, I fold the add-ins in after the chocolate and butter are fully combined so they stay evenly distributed. When using zest or spices, I mix them into the dry ingredients first so the flavor spreads through every bite.
If I use gingerbread crumbs or extra cookie crumbs, I combine them with the powdered sugar before adding to the chocolate. For orange or other citrus zests, I add them just before chilling so the aroma remains fresh. I always chill the mixture for at least one hour; longer chilling (2–4 hours) makes rolling easier for fattier or softer variations.
I sometimes coat the finished balls differently. I roll plain versions in extra powdered sugar or cocoa powder. For nutty versions, I press chopped nuts into the outside. For a glossy finish, I briefly dip chilled balls in melted chocolate and let them set on a lined sheet.
Nutrition changes I expect
Small ingredient swaps change calories and fat. Adding 1/2 cup chopped nuts raises calories and healthy fats by a noticeable amount. Dried fruit increases sugar and carbs but adds fiber. Adding 1 tablespoon molasses adds a few calories and some iron and potassium, though the change is minor per ball.
A rough guide per ball (based on a 1-inch size):
- Plain: ~80–90 kcal, 6 g fat, 7 g carbs.
- With nuts: ~95–110 kcal, 8–10 g fat, 7–8 g carbs.
- With dried fruit: ~85–100 kcal, 6–7 g fat, 9–11 g carbs.
These are estimates. If you need exact numbers, I weigh and recalculate using your final ingredient amounts.
Helpful tips and reminders
- I recommend using good-quality chocolate; it improves flavor more than any other change.
- Melt chocolate slowly over low heat or in short microwave bursts to avoid seizing.
- Wear gloves or chill the dough if it gets sticky while rolling.
- Taste the mixture before chilling: if it feels flat, add a pinch of salt or a little more vanilla to boost flavor.
- Store variations in an airtight container in the fridge for up to two weeks or freeze for longer storage.
Frequently Asked Questions
- Can I make these gluten-free?
I use gluten-free crushed cookies or cake when needed. That swaps in easily and keeps the same texture. - Which chocolate should I pick?
I favor dark chocolate for deeper flavor, but semi‑sweet works fine if you prefer milder sweetness. - Are these safe for kids?
Yes. I make them without alcohol, so they’re suitable for children and family events. - How do I make them sugar‑free?
I replace powdered sugar with erythritol or a stevia blend. The taste stays close, though the texture can change a bit. - Do I have to roll them in anything?
No. I often roll them in powdered sugar or cocoa for looks, but it’s optional.
Final Thoughts
I love how these alcohol-free rum balls deliver rich chocolate flavor without any liquor. They come together quickly, use common pantry items, and let me adjust sweetness, nuts, or spices to suit my guests. I often make them ahead; they hold up well and taste even better after a day in the fridge. For presentation, I roll them in cocoa, powdered sugar, or coconut to add texture and a neat finish. If I need a crowd-pleasing, kid-safe dessert that still feels festive, these no-rum truffles are my go-to.
FAQs
Q1: What makes a rum-free rum ball taste like the original?
I use strong flavor swaps—cocoa, molasses or brown sugar, and a tiny splash of vanilla or rum extract—to mimic the deep, sweet notes rum adds. Good-quality cocoa and a moist binder (like condensed milk or mashed dates) help the texture match classic rum balls.
Q2: Are rum balls without rum safe for kids and people avoiding alcohol?
Yes. If you leave out actual rum and use non-alcoholic flavorings, the treats contain no alcohol. I always check labels on extracts and other ingredients to be sure they’re alcohol-free if that matters to guests.
Q3: How long do alcohol-free rum balls keep, and how should I store them?
I store them in an airtight container in the fridge for up to 2 weeks. For longer storage, I freeze them for up to 3 months and thaw in the fridge overnight before serving.
Q4: Can I make rum balls without dairy or gluten?
Absolutely. I swap condensed milk for dairy-free milk or blended dates and use gluten-free crushed cookies or oats instead of regular cookies. Coconut or nut flours also work as binders for a dairy- and gluten-free version.
Q5: How do rum-free rum balls compare to the traditional version with rum?
They taste very similar when you balance sweetness and depth with the right substitutes. Traditional versions may have a subtle alcohol warmth and more complex flavor; rum-free ones rely on extracts and ingredients like molasses to reach a close match.
Q6: What are common binders and coatings I can use?
I commonly use sweetened condensed milk, honey, maple syrup, or blended dates as binders. For coatings, I choose cocoa powder, shredded coconut, chopped nuts, or sprinkles depending on the texture and look I want.
Q7: Any tips to keep them from crumbling?
I press the mixture firmly when forming balls and chill them for at least 30 minutes before handling. If the mix seems dry, I add a little more binder a teaspoon at a time until it holds together.
Conclusion
I recommend this rum-free rum ball approach for anyone who wants the classic flavor without alcohol. The recipe uses simple swaps—like coffee, vanilla, molasses, or extracts—to mimic rum’s depth while staying safe for all ages and dietary needs.
- I find these treats effective at delivering rich, chocolatey taste and festive texture.
- I confirm they are safe and family-friendly when made without alcohol.
- I prefer ingredients that are pantry-friendly and eco-conscious, such as using leftover cookies or nuts to reduce waste.
Choose a reliable recipe version that fits your preferences (vegan, dairy-free, nut-free) and test a small batch first to fine-tune sweetness and moisture. I encourage you to try one recipe today and keep the one you like best for future gatherings.