
Village Inn Candy Cane Pie Recipe — Classic Holiday Dessert with Easy Steps
Candy Cane Pie has been a holiday must for my family for years. I grew up getting a slice after tree decorating or shopping, and that cool peppermint filling with a chocolate cookie crust became a holiday tradition I still crave.
When the restaurant stopped selling it, I taught myself to make the pie at home. I now recreate the same creamy, minty flavor for Thanksgiving and Christmas, and I’ll share a simple, reliable recipe so you can make it too.
Key Takeaways
- I explain what the pie tastes like and how to recreate it at home.
- I list the key ingredients, tools, and steps for a consistent result.
- I offer tips for prepping ahead, serving, and storing the pie.
What the Village Inn Candy Cane Pie Tastes Like
I find the pie bright and minty, with a cool, creamy texture that feels light on the tongue. Small bits of crushed candy cane add a gentle crunch and a faint pink flecking that looks festive.
A dark chocolate cookie crust gives a mild richness that tames the peppermint without overpowering it. Each bite melts easily, similar to a soft peppermint ice cream but smoother and less dense.
The sweetness stays balanced and not cloying, so it finishes clean and refreshing — a good choice after a heavy holiday meal.
Village Inn Candy Cane Pie Ingredients
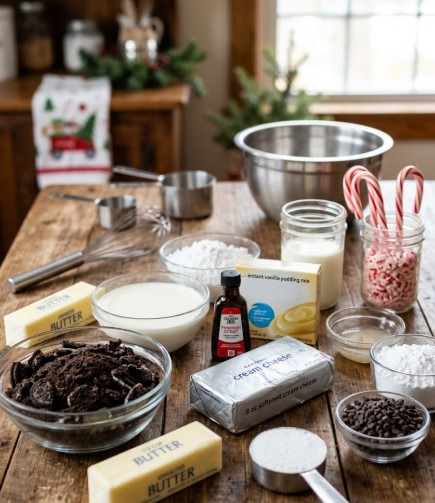
I list everything you need to make this peppermint chocolate pie, with simple swaps where helpful.
- Crust
- 36 chocolate sandwich cookies (crumbled) — any brand works; vanilla sandwich cookies give a lighter taste.
- 1/2 cup unsalted butter, melted — salted butter is okay if you omit extra salt.
- Filling
- 1 cup heavy cream (or whipping cream) — for richness and structure.
- 1 teaspoon peppermint extract — use less if you substitute stronger mint extract.
- 1/2 cup powdered sugar — dissolves smoothly into whipped cream.
- 3.4 oz instant vanilla pudding mix — white chocolate pudding is a fine alternative.
- 3/4 cup whole milk (2% works too) — combines with the pudding mix.
- 1 1/2 teaspoons unflavored gelatin — or agar powder for a vegetarian option.
- 1 tablespoon hot water — to bloom and dissolve the gelatin.
- 8 oz softened cream cheese — low‑fat works but yields a softer texture.
- 6 tablespoons softened unsalted butter — adds creaminess to the filling.
- 1/2 cup powdered sugar (additional) — sweetens and balances the cream cheese layer.
- 1/2 cup mini chocolate chips — dark or milk chips depending on desired richness.
- 1/4 cup crushed candy canes — or chopped peppermint candies for crunch.
- Topping
- 2 cups heavy cream — whipped into a light, fluffy topping.
- 1/4 cup powdered sugar — to sweeten the whipped cream.
- 4 candy canes — crushed or left whole for garnish.
Notes
- For texture, freeze the cookie crumbs briefly before pressing into the pan if they seem too soft.
- If you prefer less sweetness, reduce the powdered sugar by 1–2 tablespoons across the filling and topping.
- Keep ingredients at room temperature when directed (cream cheese, butter) so they blend smoothly.
Essential Kitchen Equipment
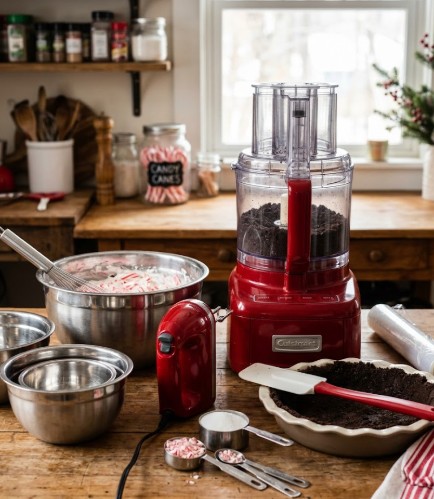
I use a food processor to crush cookies fast and evenly. I keep several mixing bowls on hand for different layers and tasks. An electric mixer saves time when whipping cream and blending the filling. A rubber spatula helps me fold ingredients and spread the filling cleanly. I measure with cups and spoons for accuracy and use a 9‑inch pie dish for baking. I also need a whisk, plastic wrap or a lid to cover the pie, and a freezer‑safe container for leftovers.
How I Make Village Inn–Style Candy Cane Pie
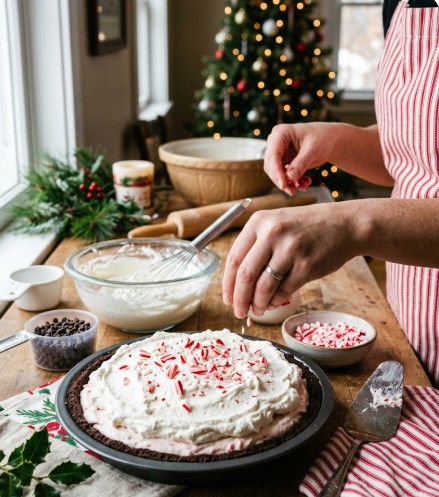
I start by crushing chocolate sandwich cookies into fine crumbs. I mix the crumbs with melted butter until the texture looks like wet sand, press the mix into a 9-inch pie pan, and chill it in the freezer so it firms while I work on the filling.
I whip 1 cup heavy cream with a bit of powdered sugar and peppermint extract until stiff peaks form. I stop as soon as the cream holds shape to avoid grainy or buttery texture, then set it aside.
I whisk instant vanilla pudding with whole milk until it thickens and becomes smooth. While that sets, I dissolve unflavored gelatin in hot water, stirring until it is completely clear and lump-free.
I beat softened cream cheese, softened butter, and powdered sugar until light and smooth. I fold the pudding and dissolved gelatin into the cream cheese mix and beat until uniform. To keep the filling airy, I gently fold in half of the whipped cream, then stir in mini chocolate chips and crushed candy cane pieces.
I pull the chilled crust from the freezer and spoon the filling into it, spreading evenly with a spatula. I cover the pie tightly and return it to the freezer for at least six hours, or overnight, so the layers set firm and slice cleanly.
Before serving, I whip 2 cups heavy cream with 1/4 cup powdered sugar to stiff peaks and spread this over the frozen pie. I finish by sprinkling broken candy cane pieces across the top for color and crunch.
Quick reference (ingredients and key steps):
- Crust: chocolate sandwich cookies + melted butter — press and chill.
- Filling: cream cheese + butter + powdered sugar + vanilla pudding + gelatin + half the whipped cream + chips + crushed candy cane.
- Freeze: 6 hours or overnight.
- Topping: whipped cream (2 cups) + powdered sugar, then crushed candy canes.
Tips I follow:
- Soften cream cheese and butter to room temperature for a smooth filling.
- Dissolve gelatin fully to avoid grainy spots.
- Fold whipped cream gently to keep the filling light.
- Freeze long enough so slices hold their shape when plated.
I serve slices straight from the freezer or after a short thaw at room temperature for 5–10 minutes, depending on preferred texture.
Tips for Perfect Candy Cane Pie
I keep my ingredients ready at room temperature so the filling mixes smooth and lump-free. Let cream cheese and butter sit about 30 minutes before you start.
I crush candy canes in a sealed bag with a rolling pin or mallet. This makes clean, even pieces and keeps shards contained.
I chill the mixing bowl and beaters for 10 minutes before whipping cream. Cold tools help the cream whip up faster and hold its shape longer.
I check the gelatin until it looks completely clear with no specks before folding it into the filling. Any undissolved bits will make the texture grainy.
I remove the pie from the freezer about 10 minutes before slicing. This softens it enough for clean slices while keeping the filling firm and creamy.
- Use a chilled pie server for neater pieces.
- Sprinkle crushed candy cane just before serving to keep crunch.
Make Ahead Tips
I like to finish this pie up to three days before serving and keep it tightly wrapped in the freezer. I always leave the whipped cream off until just before I serve it so the topping stays fresh and holds its texture.
If I need more time, I freeze only the crust up to a week ahead, then add the filling one or two days before the event. This spreads out the work and cuts stress.
- Keep pie well covered to prevent freezer burn.
- Thaw in the fridge for about 30–60 minutes before adding whipped cream.
Serving and Presentation Ideas

I plate slices on white or deep red dishes to make the colors pop. I add a small spoonful of whipped cream beside each piece for a clean, elegant touch.
I drizzle chocolate syrup in a zigzag over the slice and lay a mini candy cane on top for a festive look. I lightly dust cocoa powder around the plate rim before setting the slice to add contrast.
I serve the pie with hot chocolate or strong coffee to cut the sweetness. I cut thinner pieces, since the pie is rich, and arrange them near pine sprigs or small ornaments for holiday tables.
Storage and Shelf Life
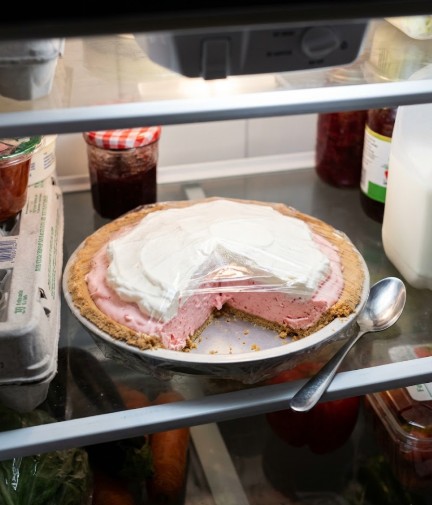
I keep the pie tightly covered in the fridge to hold the whipped topping and creamy filling. Eat it within 3–4 days for best texture and flavor.
For longer storage, I wrap the pie well in plastic or foil and freeze it. I use it within one month and thaw it in the fridge overnight before serving.
Crushed candy canes can soften in the cold, so I save a few fresh pieces to sprinkle on top just before serving for extra crunch.
Village Inn Candy Cane Pie Recipe FAQs
What goes into the crust and filling
- Crust
- 36 chocolate sandwich cookies, crushed
- 1/2 cup melted unsalted butter
- I press the crumb mixture into a 9-inch pie dish and chill or freeze it so it firms up before filling.
- Filling
- 1 cup heavy cream
- 1 tsp peppermint extract
- 1/2 cup powdered sugar (for whipped cream)
- 3.4 oz instant vanilla pudding mix
- 3/4 cup whole milk
- 1 1/2 tsp unflavored gelatin dissolved in 1 tbsp hot water
- 8 oz softened cream cheese
- 6 tbsp softened unsalted butter
- 1/2 cup powdered sugar (for cream cheese mixture)
- 1/2 cup mini chocolate chips
- 1/4 cup crushed candy canes
- Topping
- 2 cups heavy cream
- 1/4 cup powdered sugar
- 4 candy canes (whole or crushed) for decoration
- Notes
- A store-bought chocolate cookie crust saves time and works well if it’s intact.
- Keep cream and tools cold for better whipped cream volume.
How I make the pie step by step
- Make the crust
- Pulse the cookies in a food processor until fine.
- Mix crumbs with melted butter until it feels like wet sand.
- Press into a 9-inch pie plate and push slightly up the sides.
- Freeze the crust while I prepare the filling.
- Whip the first cream
- Chill my bowl and beaters.
- Whip 1 cup heavy cream with 1/2 cup powdered sugar and 1 tsp peppermint extract.
- Stop at stiff peaks and set aside.
- Prepare the pudding and gelatin
- Whisk the instant vanilla pudding with 3/4 cup milk until thick.
- Dissolve gelatin in 1 tbsp hot water, then let it cool a bit.
- Make the cream cheese base
- Beat 8 oz cream cheese, 6 tbsp butter, and 1/2 cup powdered sugar until smooth and light.
- Fold in the pudding and dissolved gelatin until combined.
- Combine and fill
- Gently fold half the whipped cream into the cream cheese mixture to lighten it.
- Stir in mini chocolate chips and crushed candy canes.
- Spoon the filling into the frozen crust and smooth the top.
- Cover and freeze at least 6 hours or overnight to set firmly.
- Finish before serving
- Whip 2 cups heavy cream with 1/4 cup powdered sugar to stiff peaks.
- Spread this whipped topping over the frozen pie.
- Decorate with crushed or whole candy canes.
Tips and troubleshooting
- Crushing candy canes: seal them in a bag and crush with a rolling pin to keep hands clean.
- Whipped cream collapse: avoid overbeating and keep everything cold. Stop when stiff peaks form.
- Whipped cream test: tilt the bowl slightly; if the cream holds, it’s ready. Overwhipping makes it grainy.
Nutrition snapshot (per slice, approximate)
- Calories: ~575
- Fat: ~43 g
- Sugar and other values will vary by brands and serving size.
I use these steps every time to get a light, minty filling with a firm chocolate crust and a festive peppermint finish.
FAQs
- What makes my version of the Village Inn candy cane pie work well?
I balance a crisp chocolate cookie crust with a light, peppermint-flavored filling and a thin chocolate layer to keep textures distinct. Chilling the pie until firm helps the filling set and makes slicing tidy. - Is this pie safe to store in the fridge and how long will it last?
I keep the pie refrigerated at or below 40°F (4°C). Properly wrapped, it stays good for about 3–4 days. Add fresh crushed candy canes just before serving to keep the crunch. - Can I use a store-bought crust instead of making one from scratch?
Yes. A ready-made chocolate cookie or Oreo crust saves time and works well. I adjust chilling time a little if the pre-made crust is softer than a homemade crumb base. - Are there simple swaps for people who need lower sugar or have diet limits?
I replace some sugar with a suitable granulated sugar substitute and use sugar-free chocolate if needed. Expect slightly different texture and sweetness; test a small batch first. - How do I keep crushed candy canes from getting soggy?
I fold most candy cane pieces into the top layer only lightly and reserve some for garnish. Placing those fresh pieces on the pie right before serving keeps the crunch. - How does this pie compare to other peppermint desserts?
I find this pie lighter than dense peppermint cheesecakes and richer than simple peppermint puddings. The layered textures—cookie crust, chocolate, and silky peppermint filling—give a mixed experience many people prefer. - What maintenance or prep tips help the pie hold up during service?
I chill the pie several hours or overnight, slice with a hot knife for clean pieces, and keep slices on chilled plates if serving for a while. If transporting, keep it in a cooler to avoid melting.
Closing Thoughts
I recommend the Village Inn–style candy cane pie for anyone who wants a festive, reliable dessert that balances peppermint and chocolate. I find the no-bake filling and chocolate crumb crust simple to make and forgiving for home bakers. The pie uses common ingredients and steps that keep it safe and easy to prepare when you follow basic food-handling rules.
I like this recipe because it stores well in the fridge, makes a clear seasonal statement, and lets you adapt sweetness or garnish to meet dietary needs. Choosing high-quality chocolate, fresh peppermint, and a sturdy crust gives the best long-term results and flavor. For a lighter option, I suggest substituting lower-sugar ingredients or using sugar-free alternatives, while keeping texture in mind.
If you want a dependable holiday dessert that looks festive and pleases most guests, try a Village Inn–style candy cane pie. I encourage you to pick trusted ingredients, follow safe prep steps, and serve it chilled for the best presentation and taste.
