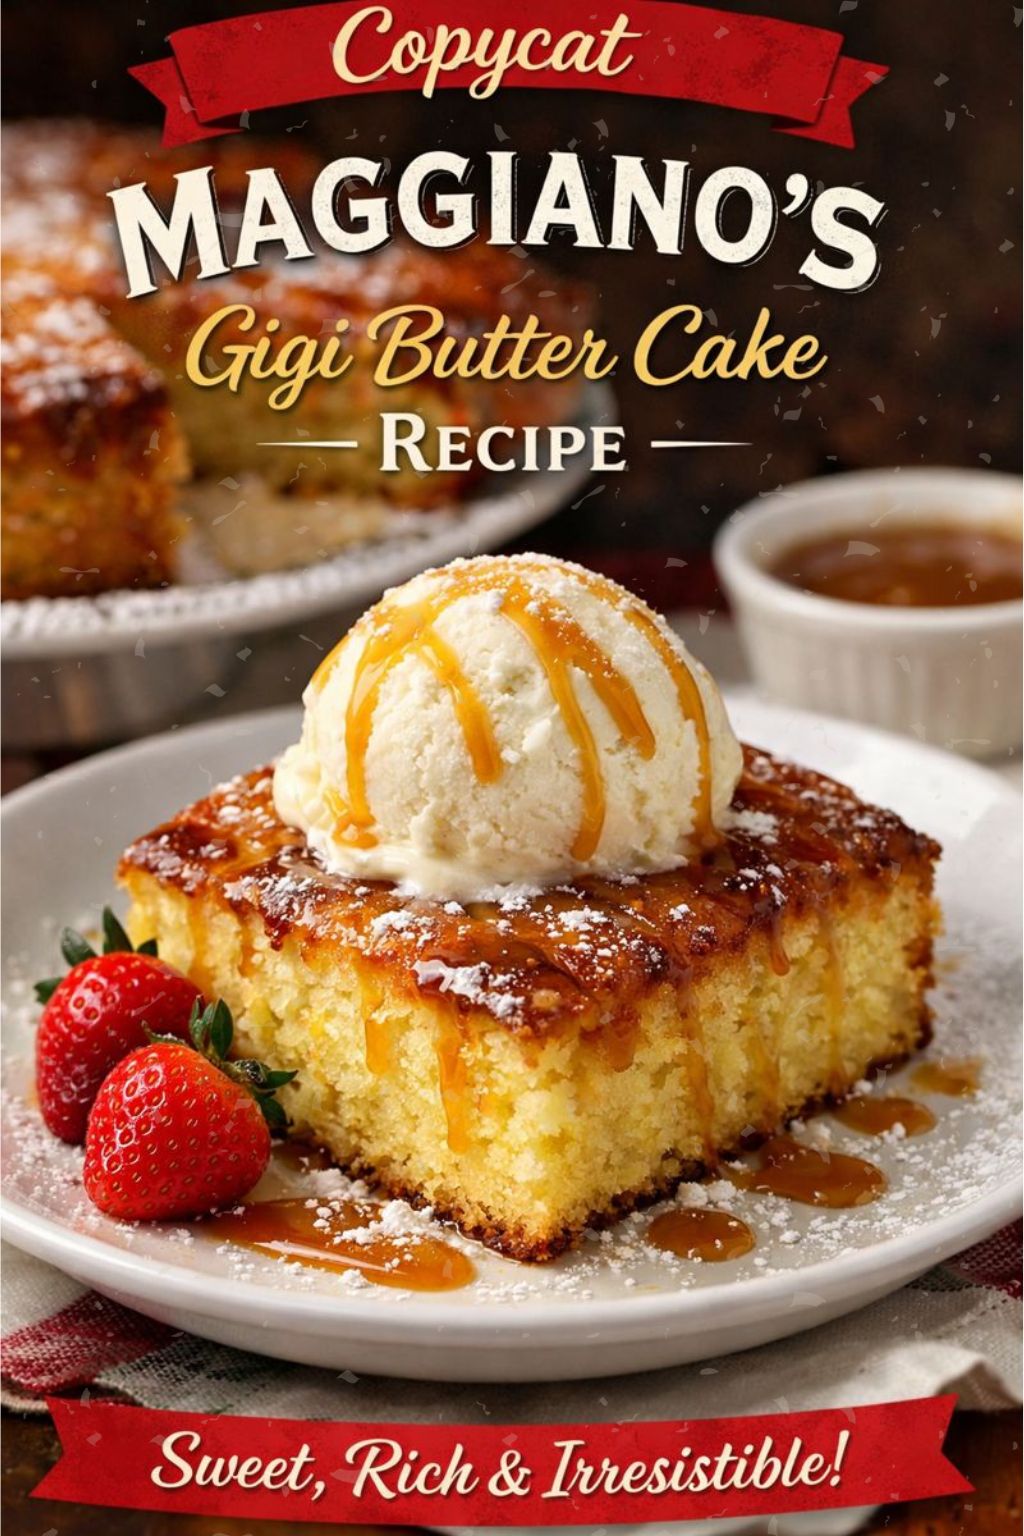
Maggiano’s Gigi Butter Cake Recipe
I love recipes that use a few simple ingredients to make something rich and memorable. Maggiano’s Gigi Butter Cake fits that bill: it’s a buttery, tender cake topped with a sweet glaze that melts into the crumb. The mix of light texture and creamy glaze makes each bite feel indulgent without a lot of fuss.
I’ll walk you through what the cake is, what goes into it, and easy steps to bake it at home. I’ll also share tips for swapping ingredients, storing leftovers, and common questions to help you get great results every time.
Key Takeaways
- The cake pairs a soft, buttery crumb with a sweet glaze for a simple yet indulgent dessert.
- You can make this recipe with basic pantry ingredients and straightforward steps.
- Small ingredient swaps and proper storage keep the cake fresh and flexible for different needs.
What Is Maggiano’s Gigi Butter Cake?
I describe a tender, Italian-style butter cake topped with a sweet glaze. The crumb is light and airy, while the exterior can caramelize slightly for a richer flavor.
Ingredients are simple: butter, sugar, eggs, flour, leavening, salt, and buttermilk. I find the combination yields a moist cake that feels homey but restaurant-quality.
- Texture: soft, fluffy interior
- Flavor: buttery, mildly sweet
- Use: serves well for celebrations or a casual dessert accompaniment to ice cream or fruit
Where I First Tasted Maggiano’s Gigi Butter Cake
I first tried Maggiano’s Gigi Butter Cake at a Tuscan-style Maggiano’s in Los Angeles. I went with my family for dinner, and we ordered the cake for dessert. The restaurant felt warm and traditional, which made the sweet finish feel right at home.
The cake surprised me with its light, fluffy crumb and rich buttery taste. A thin, creamy glaze on top added more sweetness and a smooth texture that balanced the cake’s tender interior. I kept reaching for another forkful.
The recipe proved simple when I learned it. Basic pantry items—butter, sugar, eggs, flour, baking powder, and a little baking soda—combine to make the batter. That small ingredient list made the cake approachable for me as a home baker.
After that night I asked the chef for the method and started baking it at home. I now serve it with whipped cream and fresh berries. The cream softens the sweetness, while berries add a bright contrast.
What I like most is how reliably the cake pleases guests. Even people who rarely bake tell me it tastes restaurant-quality. The ease of the recipe and the crowd-pleasing flavor keep it on my menu whenever I host.
Quick notes:
- Texture: light, tender, slightly crisp at the edges
- Flavor: rich butter with a sweet, smooth glaze
- Serving ideas: whipped cream, fresh berries
This dessert fits well into casual family meals or small gatherings. It stores and slices nicely, so I often make it ahead when I expect company.
Ingredients
I gather ingredients that make the cake tender and the glaze shiny. Below I list what I use and why, in case you want to adjust amounts or swap items.
- Unsalted butter – I use this for both the cake and the glaze so I can control salt. It gives rich flavor and a smooth crumb.
- Granulated sugar – I rely on this for sweetness and to help the cake rise and become light. Brown sugar can be used if you want a deeper flavor.
- Cake flour – I choose cake flour instead of all-purpose to keep the cake soft and airy.
- Baking powder – I add this to help the cake rise and stay fluffy.
- Buttermilk – I use buttermilk to add moisture and a mild tang that keeps the cake tender.
- Eggs – I include eggs to bind the batter and add richness.
- Salt – I add a pinch to boost overall flavor.
- Vanilla extract – I use vanilla in both batter and glaze for a clean, sweet note.
- Water – I use a small amount in the glaze to reach a pourable consistency.
I suggest measuring precisely and bringing dairy and eggs to room temperature for best results.
Cooking Directions
Phase One: Heat and Cream
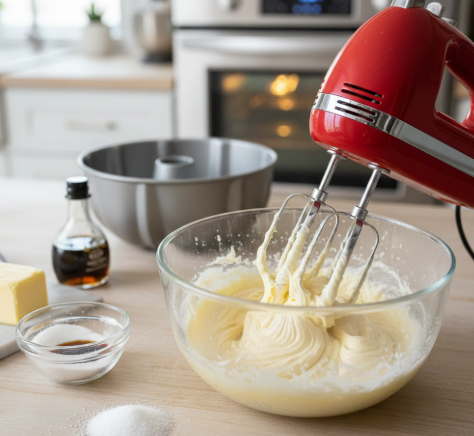
I preheat the oven to 350°F (177°C) and grease a bundt pan.
I use a hand mixer to beat butter, sugar, and vanilla until the mixture is pale and fluffy.
Phase Two: Combine Dry and Wet
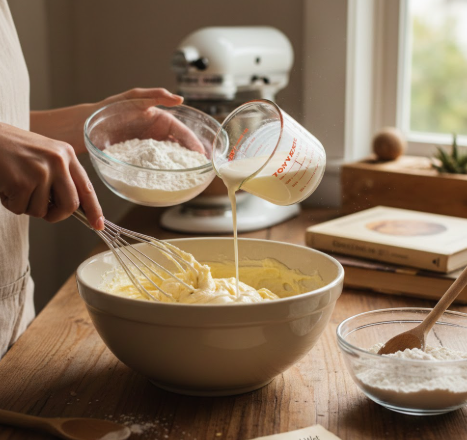
I whisk together cake flour, baking powder, baking soda, and salt in a bowl.
I add the dry mix to the creamed butter in three parts, alternating with buttermilk, starting and ending with the dry ingredients.
Phase Three: Add Eggs and Bake
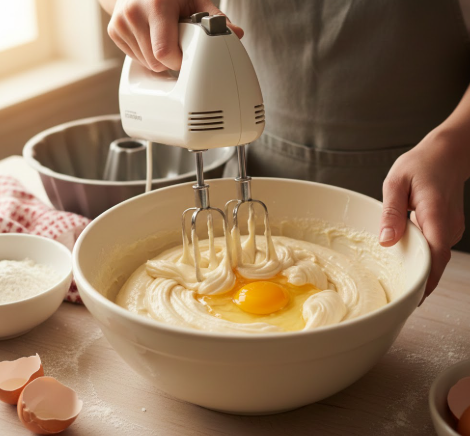
I beat in eggs one at a time, mixing just until each is incorporated.
I pour the batter into the prepared pan and bake 35–40 minutes, testing with a toothpick until it comes out clean.
Phase Four: Cool and Prepare Glaze
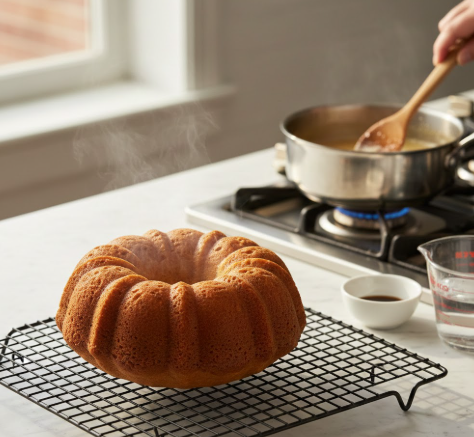
I let the cake rest in the pan for 10 minutes, then invert it onto a rack to cool.
For the glaze, I melt butter with sugar in a saucepan over medium heat and simmer gently for about 3 minutes, stirring constantly.
Phase Five: Finish and Serve

I remove the glaze from heat, stir in vanilla and a splash of water.
I drizzle the warm glaze over the cooled cake and let it set before serving.
Baking Tips I Use
- Choose unsalted butter. I control salt that way and adjust seasoning at the end.
- Quick buttermilk fix: I mix 1 cup milk with 1 tbsp lemon juice or vinegar, let it sit 10 minutes, then use it like store-bought buttermilk.
- Mix gently. I fold until just combined to keep the cake light and avoid a dense crumb.
- Cool before glazing. I wait until the cake is completely cooled so the glaze won’t melt or run off.
- Optional finishing touches: I add whipped cream, chopped nuts, or fresh berries when I want a richer presentation.
What Ingredients Can I Replace or Substitute While Making It?
Tools and pans I use (Equipment)
- Bundt pan: I stick with a bundt pan to get the classic shape, but a tube or ring pan of similar size works.
- Mixer options: I use a hand mixer for creaming butter and sugar; a stand mixer or whisk will do the job too.
- Other basic items: I keep measuring cups, rubber spatula, cooling rack, and small saucepan for the glaze on hand.
Tips:
- If I lack a bundt pan, I reduce baking time slightly for a regular loaf pan and test doneness earlier.
- When using a whisk instead of a mixer, I plan for more elbow time and mix gently to avoid overworking the batter.
Pantry swaps I make (Ingredients)
- Buttermilk: I make a quick substitute by mixing 1 cup milk with 1 tablespoon lemon juice or white vinegar and letting it sit 10 minutes. This gives similar acidity and texture.
- Flour choices: I use cake flour for a tender crumb. If I only have all-purpose flour, I use it but expect a slightly firmer texture. For lighter results with AP flour, I remove 2 tablespoons per cup and add 2 tablespoons cornstarch per cup.
- Fats: I swap melted butter for shortening if needed. Butter gives better flavor; shortening can keep the cake slightly more tender.
- Glaze sweetener: I replace granulated sugar in the glaze with honey or maple syrup for a different flavor and a smoother finish. If I use syrup, I reduce added water slightly to keep consistency.
- Salted vs unsalted butter: I prefer unsalted butter so I can control salt level. If I only have salted butter, I cut total added salt by about 1/4 teaspoon.
- Eggs and vanilla: I avoid substituting eggs when possible because they affect structure. For vanilla, I use pure extract; imitation works but changes flavor subtly.
Quick reference table:
| Original | Swap | Note |
|---|---|---|
| Buttermilk | Milk + lemon or vinegar | Let sit 10 min |
| Cake flour | All-purpose (+ cornstarch option) | Slightly denser |
| Shortening | Melted butter | More flavor with butter |
| Granulated sugar (glaze) | Honey or maple syrup | Reduce water slightly |
| Salted butter | Unsalted butter | Reduce added salt |
Method changes I use (Instructions)
- Mixing order: I still cream butter and sugar first, then alternate dry mix and buttermilk. If I replace butter with shortening, I beat a bit longer for smoothness.
- Adding eggs: I add eggs one at a time and blend lightly. If using an egg replacer, I mix according to package directions and bake a test cake to check texture.
- Baking time: When I use a different pan or swap flours, I check the cake 5–10 minutes early. I use a toothpick test and watch for even browning.
- Glaze technique: If I use honey or maple syrup in the glaze, I warm it gently and skip simmering too long. I pour warm glaze over the hot cake to help it soak in evenly.
Extra pointers I note (Notes)
- Temperature matters: I bring butter and eggs to room temperature for smoother batter. Cold ingredients can cause lumps.
- Don’t overmix: I stop mixing as soon as ingredients combine. Overmixing makes the cake dense.
- Cooling time: I let the cake rest in the pan 8–12 minutes before turning out. I cool completely before applying thick glazes or toppings.
- Flavor add-ons: I sometimes add a teaspoon of lemon zest or a splash of almond extract for a twist. I keep additions small to avoid changing texture.
- Serving ideas: I top with whipped cream, nuts, or fresh berries after the glaze sets.
How I Store Leftover Maggiano’s Gigi Butter Cake?
I keep slices in an airtight container at room temperature for up to 3 days.
For longer storage, I freeze pieces wrapped tightly and placed in a sealed bag for up to 3 months.
To eat, I thaw them in the fridge overnight before serving.
FAQs
Can I eat this cake while pregnant?
I recommend eating this cake only in small amounts during pregnancy. I also suggest checking with my healthcare provider if I have questions about sugar, eggs, or any specific pregnancy diet concerns.
Does this cake contain gluten?
No — this cake uses wheat flour, so I would not eat it if I need a gluten-free diet or have celiac disease. I’d choose a certified gluten-free recipe instead.
How should I serve the cake for best results?
I like serving it warm with a scoop of whipped cream and a handful of fresh berries. A light dusting of powdered sugar or a simple glaze also improves flavor and presentation.
Wrapping Up
I enjoyed sharing this butter cake recipe and I hope you try it soon. It’s an easy dessert that pays off with a rich, buttery center and a golden crust. Make it for guests or a simple family night—both work well.
If you like, save the recipe or pass it to friends. I find that small tips—using room-temperature butter, not overmixing, and testing with a toothpick—help the texture. You can store the cake at room temperature in an airtight container for a few days or wrap it for longer keeping.
Want similar recipes? I often post easy, copycat dishes and weeknight mains that pair nicely with this cake. Follow my posts or bookmark this recipe so you can make it again.
FAQs
- What makes my version of Maggiano’s Gigi Butter Cake taste like the restaurant?
I focus on high-quality butter, room-temperature eggs, and a gentle mixing method to keep the crumb tender. Baking in a bundt pan and brushing the cake with a simple butter-sugar syrup after baking helps mimic the moist, slightly caramelized edges found at the restaurant. - Is this cake safe for people with common food allergies?
The classic recipe uses wheat, dairy, and eggs, so it is not safe for those with gluten, dairy, or egg allergies. I recommend clear labeling and offering an alternative or using specialized substitutes (gluten-free flour, plant-based butter, and egg replacers) if you need to serve guests with allergies. - How long does the cake stay fresh and how should I store it?
The cake stays moist for 2–3 days at room temperature in an airtight container. I refrigerate it if I need to keep it longer, which can extend freshness to about 5–7 days. Bring slices back to room temperature before serving for best texture. - Can I prepare parts of the recipe ahead of time?
Yes. I will bake the cake a day ahead and keep it covered at room temperature. The syrup or glaze can be made and chilled separately, then warmed slightly before brushing on. Avoid glazing far in advance if you want the freshest shine. - How does this cake compare to other butter cakes or pound cakes?
I find Gigi-style butter cake has a lighter, more tender crumb than a dense pound cake, thanks to a softer mixing method and a syrup finish. It still keeps the rich butter flavor that distinguishes it from sponge or chiffon cakes. - What maintenance or care does the bundt pan need to ensure the cake unmolds cleanly?
I lightly grease and flour the bundt pan, and sometimes use nonstick spray with flour. Clean the pan gently after use and dry it completely to avoid rust. Proper greasing and correct bake time help prevent sticking. - Is the recipe effective for serving large groups or events?
Yes. I can scale the recipe up or bake multiple pans to serve a crowd. Because the cake stores well and is simple to slice, it works well for gatherings. For large events, I recommend baking ahead and finishing with syrup on the day of serving.
Final Thoughts
I recommend trying the Gigi Butter Cake recipe if you want a simple, reliable dessert that tastes like a restaurant treat. I find the cake’s tender crumb, buttery flavor, and slightly crisp edges make it both comforting and impressive without hard techniques.
- Effectiveness: The recipe delivers consistent, moist results when you follow basic baking steps and use quality butter and eggs.
- Safety and eco-friendliness: Baking at home lets you control ingredients and packaging waste. Choosing organic or local ingredients can reduce environmental impact.
- Suitability: This cake suits weeknight treats, family dinners, and small celebrations. It pairs well with vanilla ice cream, fresh berries, or a light sauce.
I suggest using trusted recipes and fresh ingredients for the best long-term results. Try it soon and enjoy a dependable, crowd-pleasing dessert.