
Texas de Brazil Cheese Bread Recipe
I fell in love with the cheese bread at Texas de Brazil and decided to recreate it at home. I wanted a simple, reliable version of pão de queijo that uses everyday ingredients so I could enjoy the same crispy outside and chewy, cheesy inside any time.
This recipe keeps things straightforward: tapioca flour and cheese form the base, and the dough comes together quickly. I’ll walk you through the steps and share tips so you get consistent, tasty results without fuss.
Key Takeaways
- I explain a simple, homemade approach to recreate the Texas de Brazil cheese bread.
- The recipe focuses on tapioca flour and cheese for the right texture.
- I share practical tips to make and store the bread successfully.
My Personal Journey with Texas de Brazil Cheese Bread

I went to Texas de Brazil and kept grabbing the cheese bread until my plate was nearly full. Those warm, cheesy puffs hooked me more than the steak did.
I asked what made them so good and learned they use tapioca flour and lots of cheese. I tried to recreate them at home. The first attempts were mixed — some batches came out too dry, others lacked enough cheese.
I adjusted the flour-to-cheese balance over several tries. I found small changes in measurements and baking time made a big difference. Now my version is chewy inside, crisp outside, and full of cheese.
- Favorite fix: a bit more cheese and a touch less flour.
- Result: reliable, tasty cheese bread that’s almost as good as the restaurant.
What I Use to Make Brazilian Cheese Bread
I use a few simple ingredients that work together to give the bread its soft, chewy interior and crisp outside.
- Milk (1 cup) – I pick whole milk for creaminess and moisture.
- Oil (1/2 cup) – I use olive or vegetable oil to add fat and keep the crumb tender.
- Salt (1 tsp) – I add salt to bring out the flavors.
- Tapioca flour (about 4 cups / 500 g) – This is the key. It creates the chewy, elastic texture and makes the bread naturally gluten-free.
- Eggs (3 large) – I use eggs to bind the dough and add richness.
- Cheese (2 1/2 cups, grated) – I mix in cheeses like Parmesan or Cheddar for saltiness and that melty, cheesy pull.
Ways I Change Up Cheesy Bread

I like to tweak the basic dough to fit the meal or mood. I often stir minced garlic into the mix for a savory kick. For heat, I fold in red pepper flakes or chopped jalapeño. I sometimes add dried oregano, basil, or rosemary for a herby note. I also experiment with cheese blends — mozzarella with Parmesan or sharp cheddar gives a bolder, more complex flavor.
Helpful Equipment I Use
- Saucepan for warming milk or oil.
- Mixing bowls (large and small) for combining ingredients.
- Baking sheet + parchment to prevent sticking.
- Wooden spoon for better mixing texture.
How I Make Texas de Brazil–Style Cheese Bites

I heat 1 cup whole milk and 1/2 cup neutral oil in a small saucepan with 1 teaspoon salt over medium heat until it just reaches a gentle boil. I remove the pan from the heat as soon as the liquid bubbles, which prevents overcooking the starch.
Next I pour 500 g (about 4 cups) tapioca flour into the hot milk-oil mix. I stir with a wooden spoon until the flour absorbs the liquid and a shaggy dough forms. The mixture will be very hot, so I let it sit for a few minutes to cool slightly before touching it.
When the dough is warm but not scalding, I add 3 large eggs one at a time, stirring each in until the batter becomes smooth and slightly glossy. Sometimes I beat the eggs first, but adding them directly works fine. The dough will be sticky and elastic.
I fold in 2 1/2 cups coarsely grated sharp cheese—Parmesan, Grana Padano, or a mix with mozzarella gives great flavor and stretch. I mix until the cheese is evenly distributed and the dough feels cohesive.
To shape the bites I oil my hands lightly or use a small cookie scoop. I roll the dough into roughly 1-inch balls and place them on a parchment-lined baking sheet. I space them about 1 inch apart so air circulates and they bake evenly.
Before baking, I preheat the oven to 400°F (200°C). I bake the cheese bites for about 20–25 minutes, watching for a golden, slightly crisp exterior. Oven times vary, so I check at 18 minutes and add time if needed.
After baking I let the bites cool on the sheet for a few minutes so they set up, then transfer to a wire rack. I serve them warm for the best gooey center.
Tips I use:
- If dough is too sticky, chill 10–15 minutes to firm it up.
- Freeze formed balls on a tray, then transfer to a bag; bake from frozen, adding a few minutes.
- Use a mix of sharp and melty cheeses for flavor and chewy texture.
Recipe Tips for Success
I learned a few reliable tricks that make these cheese breads turn out well every time.
- Stick to tapioca flour. It gives the chewy, airy texture you expect. Wheat or other flours will change the result a lot.
- Grate cheese yourself. Pre-shredded cheese can contain anti-caking agents that stop it from melting smoothly. Freshly grated cheese melts better and tastes fresher.
- Heat the milk mixture carefully. Warm it slowly and watch for scorching. Burnt milk will add a bitter note.
- Add eggs at the right temperature. Let the dough cool until it is warm, not hot. Hot dough will cook the eggs and make lumps; cold dough makes them hard to mix in.
- Keep hands slightly wet when rolling. The dough is sticky; a little water on your palms prevents sticking and keeps the balls smooth.
- Give each ball room to expand. Space the pieces on the sheet so they rise and brown without touching.
- Rotate pans mid-bake. Swap positions halfway through baking to get even color and doneness.
- Try a single test ball first. If you’re unsure about size or oven timing, bake one to check before doing the whole tray.
- Serve while warm. The texture and flavor are best right out of the oven, so plan to eat them soon after baking.
Tips summary (quick reference):
| Step | Key Point |
|---|---|
| Flour | Use tapioca only |
| Cheese | Freshly grated |
| Heat | Avoid scorching |
| Eggs | Add when dough is warm |
| Handling | Wet hands to roll |
| Baking | Space balls, rotate pans |
| Timing | Test one, serve warm |
What to Eat with Brazilian Cheese Bread?

I pair Brazilian cheese bread with bold, savory mains and light sides for balance. I serve it with grilled or barbecued meats — the chewiness cuts through rich, smoky flavors. I dunk it into hearty soups and stews like bean soup or chili; the crust holds up well to broths. For breakfast or brunch, I enjoy it with scrambled eggs and fresh fruit for a simple, filling plate. I also offer a crisp green salad with a tangy vinaigrette to brighten the meal. Simple dipping sauces like marinara or a creamy mushroom sauce work, too. Mix and match these options to suit the meal and keep flavors balanced.
How I Keep Brazilian Cheese Bread Fresh
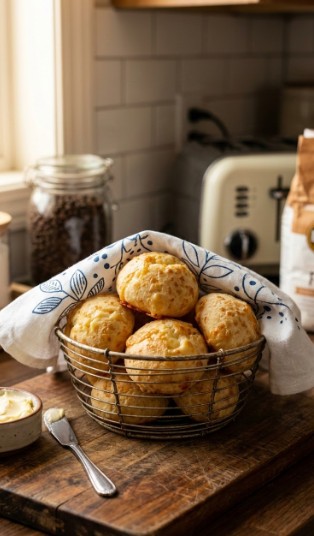
I store leftovers in an airtight container at room temperature for up to 2 days. For longer use, I put them in the fridge for up to 5 days.
- To reheat: I warm them in a 350°F oven for about 5 minutes or microwave for 15–20 seconds.
- To freeze: I freeze raw dough balls on a tray, then move them to a zip-top bag. I bake from frozen at 400°F, adding a few extra minutes.
Texas de Brazil Cheese Bread Recipe FAQs
Ingredients I Use
- 1 cup whole milk
- 1/2 cup oil (I use vegetable or light olive oil)
- 1 teaspoon salt
- 500 g (about 4 cups) tapioca flour
- 3 large eggs
- 2 1/2 cups grated cheese (I blend Parmesan with a sharper cheese like cheddar or a medium-aged white cheese)
Notes on the ingredients:
- I pick flavorful cheeses. Mild cheeses give a bland result; a mix of Parmesan and a stronger cheese recreates the Texas de Brazil taste well.
- I avoid extra virgin olive oil when baking at high heat. It can add a bitter note. I prefer vegetable or light olive oil.
- I check my tapioca flour for freshness. Old or rancid flour can cause off flavors.
How I Make Them
- Heat milk, oil, and salt: combine 1 cup milk, 1/2 cup oil, and 1 teaspoon salt in a saucepan. Heat over medium until it just boils, then remove from heat.
- Add tapioca flour: stir 500 g tapioca flour into the hot liquid until it forms a smooth dough. Let it cool a few minutes so it’s safe to handle.
- Mix in eggs: add 3 large eggs and stir until fully incorporated. I sometimes beat the eggs first, but you can add them directly.
- Stir in cheese: fold in 2 1/2 cups grated cheese until evenly distributed. The dough should be sticky but shaped.
- Shape the balls: wetting my hands with cold water helps. I roll the dough into balls about 1 inch for bite-sized breads or up to 2 inches for larger rolls. If dough is too sticky, I chill it 20–30 minutes or add a little more tapioca flour very sparingly.
- Bake: preheat the oven to 400°F (200°C). Place balls on a parchment-lined sheet about 1 inch apart. Bake until golden and slightly crisp, usually about 15–30 minutes depending on size.
- Cool slightly and serve warm.
Troubleshooting and tips:
- If they don’t puff: make sure the oven is fully preheated to 400°F. Too-wet dough or old eggs can also prevent proper rise.
- If they deflate after baking: a small settle is normal. If they collapse fully, they may be underbaked or the oven door was opened too soon.
- If centers seem gooey: they should be chewy, not raw. Add a few more minutes in the oven if the center is too soft.
- If dough is too sticky to roll: chill it or wet your hands. Add tapioca flour only a little at a time to avoid dry results.
- Size adjustments: 1-inch balls bake about 15–18 minutes; 2-inch balls can take up to 30 minutes. They’re done when golden and sound hollow when tapped.
FAQs
- What makes this Texas de Brazil–style cheese bread different from other cheese breads?
I use tapioca flour and a mix of cheeses to get the chewy interior and light crust that people expect from Pão de Queijo. That gluten-free base gives a unique texture compared with wheat-based cheese breads. - Is this recipe safe for people with gluten sensitivity or celiac disease?
Yes. I rely on tapioca flour, which contains no gluten. However, I always recommend checking labels on all ingredients and avoiding shared utensils or ovens that might have cross-contact with gluten. - How do I store and reheat leftovers so they stay fresh?
Cool the rolls completely, then store in an airtight container for up to 2 days at room temperature or up to 2 weeks in the freezer. To reheat, I thaw if frozen and warm at 350°F (175°C) for 8–10 minutes to restore the crust and chewiness. - Are there any safety or allergy concerns beyond gluten?
Cheese and dairy can trigger lactose intolerance or milk allergy. I advise using suitable cheeses or dairy-free alternatives if someone has those issues. Also watch for nut contamination if any specialty ingredients are processed in shared facilities. - How does this method compare to other ways of making Pão de Queijo?
My approach focuses on a simple, reliable dough made by mixing heated liquid with tapioca flour, which yields consistent texture. Some methods use a blender or different cheese blends; those can work but may alter texture or ease of preparation. - What maintenance or care does the dough require during prep?
The dough needs only brief handling. Mix until smooth and let it rest a few minutes so the flour hydrates. Overworking isn’t necessary; I shape or scoop and bake right away for best puff and chew. - Can I change the cheese types or add flavors without losing the classic texture?
Yes. I often swap cheeses for different flavors, but I keep the same moisture balance. Stronger cheeses give more flavor; adding herbs or spices works as long as you don’t add too much liquid, which can change the texture.
Conclusion
I recommend this Texas de Brazil–style cheese bread recipe for anyone who wants a quick, tasty, and gluten-free snack. I like its simple ingredients and the way tapioca flour creates a chewy, melty center with a crisp exterior.
- It works well for parties or weeknight baking because the dough comes together fast and you can freeze extras.
- The recipe is safe and easy to follow when you measure ingredients and bake at the right temperature.
- Using natural ingredients like cheese, eggs, and tapioca keeps it eco-friendly compared with processed snacks.
Choose a reliable recipe and high-quality ingredients for the best, consistent results. I encourage you to try it, freeze a batch, and enjoy fresh, warm cheese bread whenever you want.

