
Marie Callender Pie Crust Recipe
I know a reliable pie crust when I see one. My version of the Marie Callender–style crust focuses on a few basic ingredients and a simple method that yields flaky, buttery layers. It works well for sweet pies and savory tarts, and it doesn’t need fancy techniques or hard-to-find items.
I’ll share quick tips to help you get consistent results, from handling the dough to baking and storing leftovers. These small steps make a big difference in texture and ease, so you can spend less time worrying and more time enjoying the pie.

Key Takeaways
- The recipe uses few, common ingredients to create a flaky crust.
- Simple handling and baking tips improve texture and reliability.
- The crust fits both sweet pies and savory dishes.
What I Know About Marie Callender Pie Crust
Marie Callender pie crust is a simple, classic dough made for both sweet and savory pies. I use a mix of all-purpose flour, cold unsalted butter, and shortening to get a flaky texture. A little sugar and salt balance the flavor without masking the filling.
I keep the fat in small pieces so the dough bakes into flaky layers. Cold ingredients and minimal handling help prevent toughness. This crust works for single or double crust pies and can be baked blind or filled and baked.
Key points:
- Simple ingredient list
- Flaky, golden result
- Versatile for many pie types
Why I Love This Marie Callender–Style Pie Crust
I enjoy this pie crust because it blends simple, budget-friendly ingredients into a flaky, buttery base. The mix of all-purpose flour with butter and a touch of shortening gives a tender texture and a crisp edge. A little sugar and salt balance flavor without overpowering fillings.
I can whip the dough up quickly and follow a few easy steps to get consistent results. It freezes and holds shape well, so I can make it ahead for busy baking days.
The Ingredients I Use
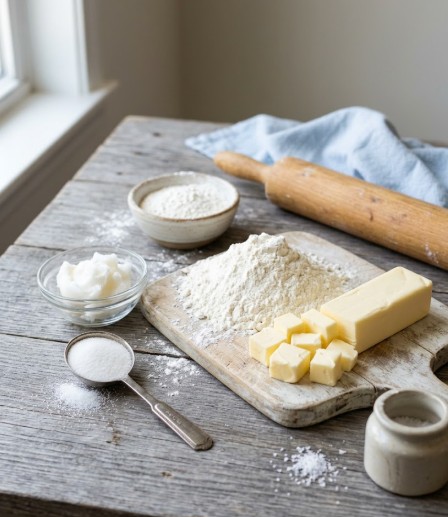
I keep this crust simple with five basic items that work together for flakiness and flavor.
- All-purpose flour — The base of the dough. I use it for structure and a tender, flaky crumb.
- Unsalted butter — I prefer unsalted so I control the salt level. It gives a rich, buttery taste and helps form layers.
- Shortening — I add a bit for extra crispness and to help the crust hold its shape.
- Sugar — A small amount adds a light sweetness that suits both fruit and cream fillings.
- Salt — I include a pinch to boost overall flavor and balance the dough.
I measure precisely and keep ingredients cold for the best results.
Directions
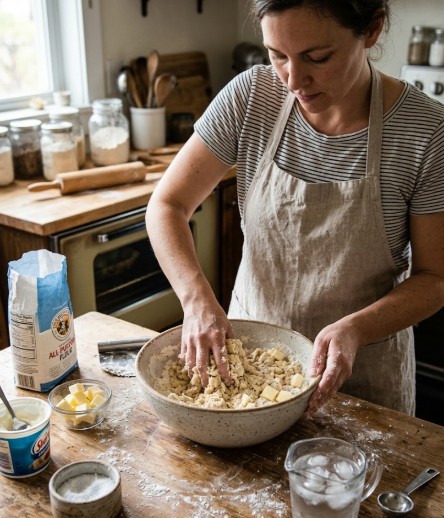
Step 1: Combine dry ingredients
I put all-purpose flour, salt, and a little sugar into a large bowl. I stir them until the mix looks even and there are no clumps.
Step 2: Chop butter into small pieces
I cut cold unsalted butter into small cubes and add them to the flour mix. I use a pastry cutter or two knives to work the butter in until the texture looks like coarse crumbs.
Step 3: Add the shortening
I add chilled shortening and continue to cut it in with the butter and flour. I stop when the mixture is evenly dotted with fat and still slightly coarse.
Step 4: Add iced water gradually
I sprinkle ice water over the dry mix, one tablespoon at a time. I press and fold the dough gently with my hands until it barely holds together; I avoid adding too much water.
Step 5: Light knead and chill
I turn the dough onto a lightly floured surface and knead it for about one minute. I shape it into a flat disk, wrap it tightly in plastic, and chill it in the fridge for at least 30 minutes.
Step 6: Let rest and roll out
I take the dough from the fridge and let it sit 8–10 minutes to soften slightly. I roll it out on a floured surface to fit a 9-inch pie plate, keeping the thickness even.
Step 7: Heat oven and ready the pie pan
I preheat my oven to 375°F (190°C). I transfer the rolled dough into a 9-inch pie dish, trim the excess, and crimp the edges. I prick the bottom and sides lightly with a fork.
Step 8: Cover with parchment and weigh down
I place a sheet of parchment over the crust and fill it with pie weights, dried beans, or rice. This prevents the crust from puffing and helps the edges bake evenly.
Step 9: Blind-bake the crust
I bake the crust in the preheated oven for about 20 minutes. I remove the weights and parchment, then check for a light golden color; if needed I return it briefly until the base and edges look set.
Step 10: Cool before filling
I let the baked crust cool on a rack until it reaches room temperature. Once cooled, I add my filling and proceed with any final baking the recipe calls for.
Notes
I keep ingredients very cold before I work the dough; chilled butter and water help create a flaky crust.
I handle the dough gently and stop kneading as soon as it holds together to avoid a tough texture.
For fillings that can make the bottom wet, I blind-bake the shell first.
- Custard pies: I fully blind-bake the crust before adding the filling.
- Fruit pies: I par-bake the crust for about 5 minutes to reduce sogginess.
- Savory pies: I par-bake the crust for roughly 10 minutes so the base stays firm.
I use pie weights or parchment when blind-baking to keep the crust flat and even.
Storage Tips
I wrap leftover crust tightly in plastic wrap, then seal it in an airtight container. I keep it in the fridge for up to five days or freeze it for as long as three months. I label containers with dates.
Serving Ideas
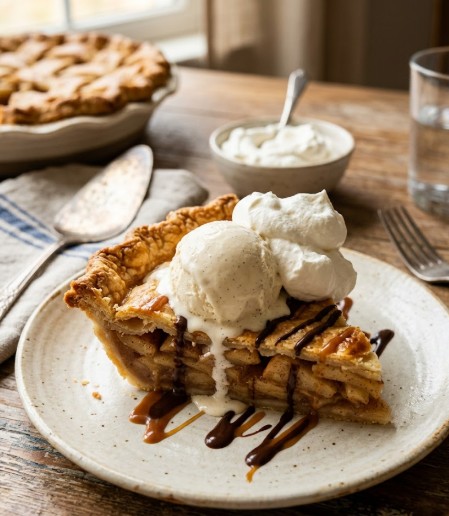
I pair the crust with sweet or savory fillings depending on the meal. For dessert, I add a scoop of ice cream or a dollop of whipped cream. I also brush melted chocolate over the crust for an extra treat. For dinner, I turn the crust into a quiche or savory tart. I sometimes use it as the base for a fruit crumble or cobbler.
Marie Callender Pie Crust Recipe
Tools I Use
- Rolling pin
- Pastry blender or two knives
- Pie weights or dried beans
- 9″ pie plate (regular or deep-dish)
- Parchment paper or foil
- Plastic wrap or wax paper
What Goes In
- 4 cups all-purpose flour
- 9 oz chilled vegetable shortening, cubed
- Unsalted butter, cold, cut into small cubes (about 8 tbsp / 1 stick)
- 1 1/2 teaspoons salt
- 1 tablespoon granulated sugar
- 1/2 cup ice water (add slowly)
I keep the fats and water very cold. That helps make a flaky crust.
Step-by-Step Method
- In a large bowl, whisk together the flour, salt, and sugar until even.
- Add the cold butter. Use a pastry blender (or two knives) to cut the butter into the flour until pieces are pea-sized.
- Stir in the chilled shortening and blend until the mixture looks like coarse crumbs with some small lumps of fat.
- Sprinkle ice water over the mixture, one tablespoon at a time. Mix gently with your hands until the dough starts to hold together. Stop when it just comes together.
- Turn the dough onto a lightly floured surface and knead very briefly — about 30–60 seconds. Form into a flat disk.
- Wrap the disk in plastic wrap and chill for at least 30 minutes. Let it sit 8–10 minutes at room temperature before rolling so it’s easier to handle.
- Preheat the oven to 375°F (190°C). Roll the dough to fit a 9″ pie plate and transfer it to the pan. Trim and crimp the edges. Prick the bottom and sides lightly with a fork.
- Line the crust with parchment and add pie weights or dried beans. Bake 20 minutes until the edges begin to color. Remove weights and parchment, then bake a few more minutes if you want a more golden bottom. Cool before filling.
Tips and Shortcuts
- Keep everything cold: chill fats and use ice water. Cold fat makes flakier layers.
- Don’t overwork the dough. Mix just until it holds together to avoid a tough crust.
- For custard or fully baked fillings, prebake the crust (blind bake) for the full 20 minutes.
- For fruit pies, blind bake about 5 minutes before adding filling to reduce sogginess.
- For savory pies or deeper fillings, blind bake about 10 minutes first.
- Use pie weights or dried beans to keep the crust from bubbling during blind baking.
Estimated Nutrition (per 6 servings)
- Calories: ~648 kcal per slice
I base this on the full recipe divided into six slices. Nutrition will change with different fats, butter amounts, or portion sizes.
Frequently Asked Questions
Q: How long will I keep a Marie Callender-style crust?
I store the crust in the fridge for up to five days. For longer storage I freeze it; frozen crust stays good for about three months. Thaw in the fridge before using.
Q: Can I prepare the crust in advance?
I often make the crust ahead. It keeps in the refrigerator for five days or in the freezer for three months. Wrap it well to prevent freezer burn.
Q: Is it okay to swap the flour?
I sometimes use whole wheat, almond, or oat flour instead of all-purpose. Expect small changes in texture and flavor, so adjust liquid and handling as needed.
Q: What can replace shortening?
I use coconut oil or olive oil as substitutes for shortening. Coconut oil gives a similar richness; olive oil will change the flavor and yield a different texture.
Q: What are sugar alternatives I can use?
I replace sugar with coconut sugar, maple syrup, or honey depending on taste. For liquid sweeteners, reduce other liquids slightly to keep dough consistency right.
Q: What can I use instead of regular salt?
I swap table salt for sea salt, Himalayan pink salt, or seasoned salts like garlic salt. Taste carefully—some salts are stronger, so use less.
Closing Thoughts
I find this pie crust recipe reliable and easy to use. It produces a flaky, buttery base that works well with both sweet pies and savory tarts.
I like that the ingredients are simple and steps are straightforward, so I can make a great crust without fuss. I often use it when I want a consistent result that still feels homemade.
Tips I follow:
- Keep ingredients cold for flakiness.
- Don’t overwork the dough.
- Chill before baking for best shape and texture.
FAQs
- What makes my Marie Callender–style pie crust flaky?
I use very cold fats (butter or shortening) and minimal water. Cold fat leaves little pockets of steam as the crust bakes. That steam creates layers and a flaky texture. - Is the crust safe to use for both sweet and savory pies?
Yes. The basic crust is neutral and works for fruit, custard, meat, or vegetable fillings. I adjust sugar slightly for sweet pies and add a pinch more salt for savory pies. - How can I prevent a soggy bottom?
I blind-bake the crust for wet fillings or use a barrier like a thin layer of egg wash, grated cheese, or a light sprinkle of flour or ground nuts on the bottom. Also, prebaking at the right temperature until the crust sets helps. - What storage method keeps the dough fresh?
I wrap dough tightly in plastic and chill up to 48 hours or freeze up to 3 months. Thaw in the fridge overnight before rolling. Baked crusts store in an airtight container for several days. - How do I repair a cracked or crumbly dough?
I press cracks together gently with a bit of cold water. If the dough is too dry, I add a teaspoon of cold water at a time until it holds. Work quickly to avoid warming the fat. - How does this crust compare to all-shortening or all-butter versions?
I find a mix of butter and shortening balances flavor and flakiness. All-butter gives best flavor but can be less stable. All-shortening is stable and very flaky but lacks butter taste. - What maintenance or tips keep results consistent?
I keep ingredients cold, measure flour by spooning and leveling, avoid overworking the dough, and chill before rolling. These steps make results repeatable and reliable.
Closing Thoughts
I’ve shown how a Marie Callender–style pie crust delivers a flaky, buttery base that works for both sweet and savory pies. It bakes evenly, holds fillings well, and keeps a homemade feel while saving time.
- Effectiveness: This crust gives reliable flake and browning when you keep ingredients cold and avoid overworking the dough.
- Safety and quality: Using fresh, simple ingredients means predictable results and no hidden additives.
- Eco and practicality: Making dough at home reduces packaging waste compared with some store-bought options, and the recipe uses common pantry items.
- Long-term choice: For consistent results, I recommend practicing the technique and using a trusted recipe or a quality pre-made crust when you need speed.
I encourage you to try the method that fits your schedule—homemade for control and flavor, or a good ready-made crust for convenience. Either way, pick a reliable approach and bake with confidence.