
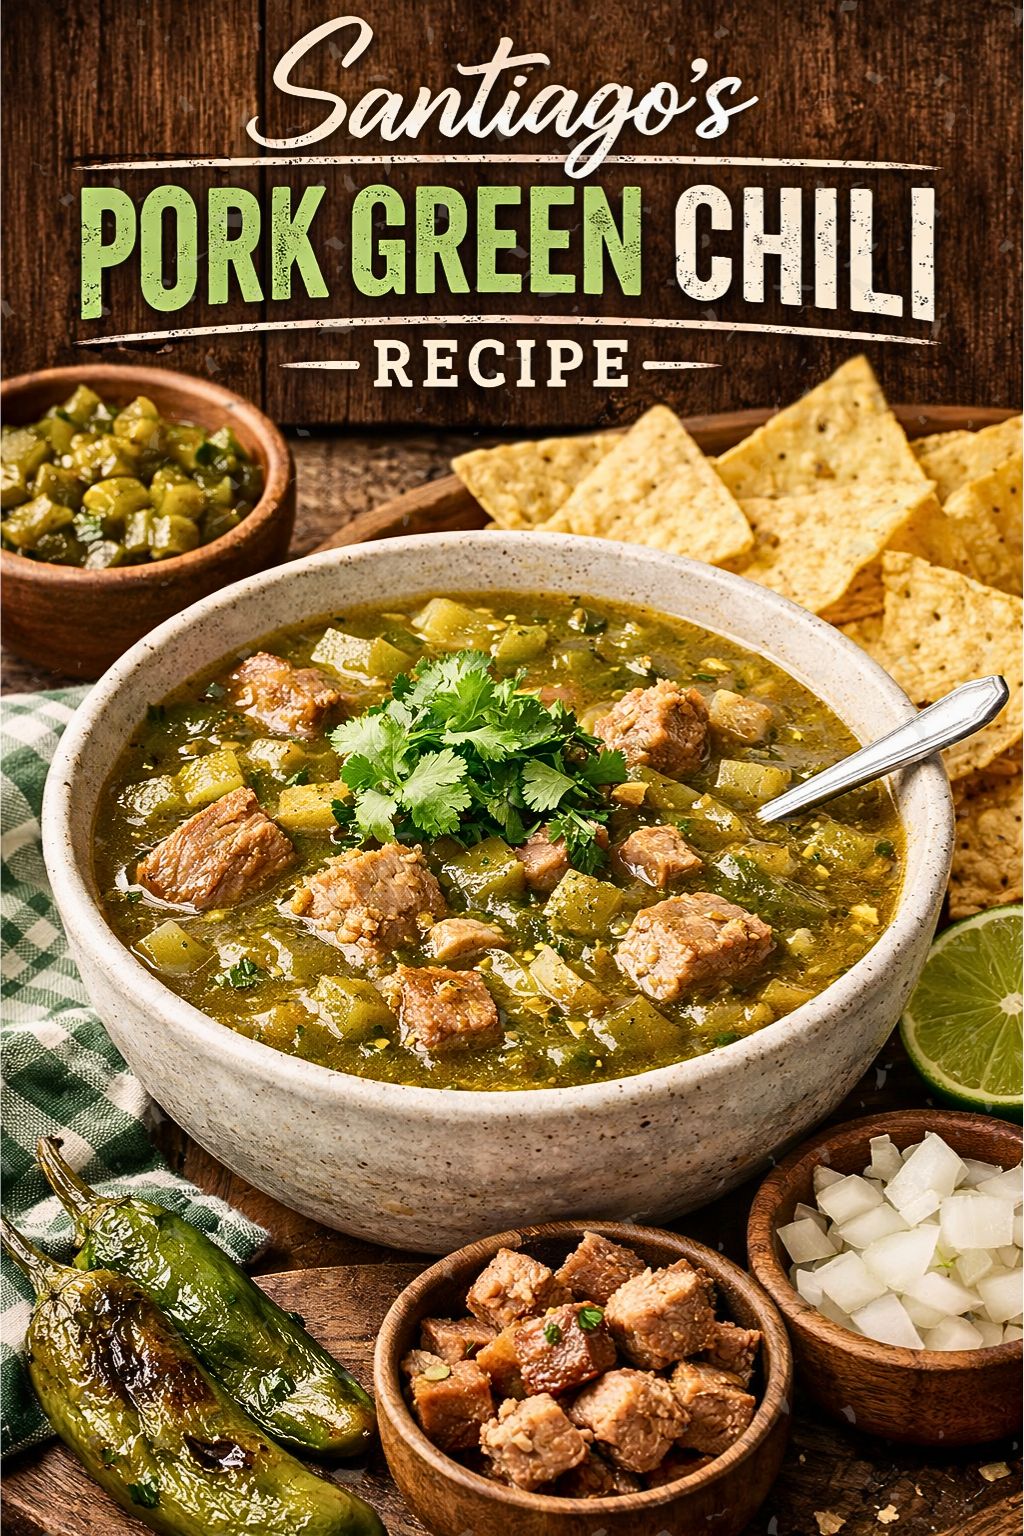
Santiagos Pork Green Chili Recipe
I grew up eating meals where bold, honest flavors mattered most, and Santiago’s Pork Green Chili is one of those dishes that always stood out. I’ll share a clear, simple path to make this hearty pork and roasted-green-chile stew at home, using straightforward steps and common ingredients so you can get consistent results.
I’ll also point out easy swaps, storage tips, and small tricks that keep the chili saucy and flavorful without adding fuss. Expect a practical, hands-on guide you can follow whether you’re new to cooking or want a reliable weeknight favorite.
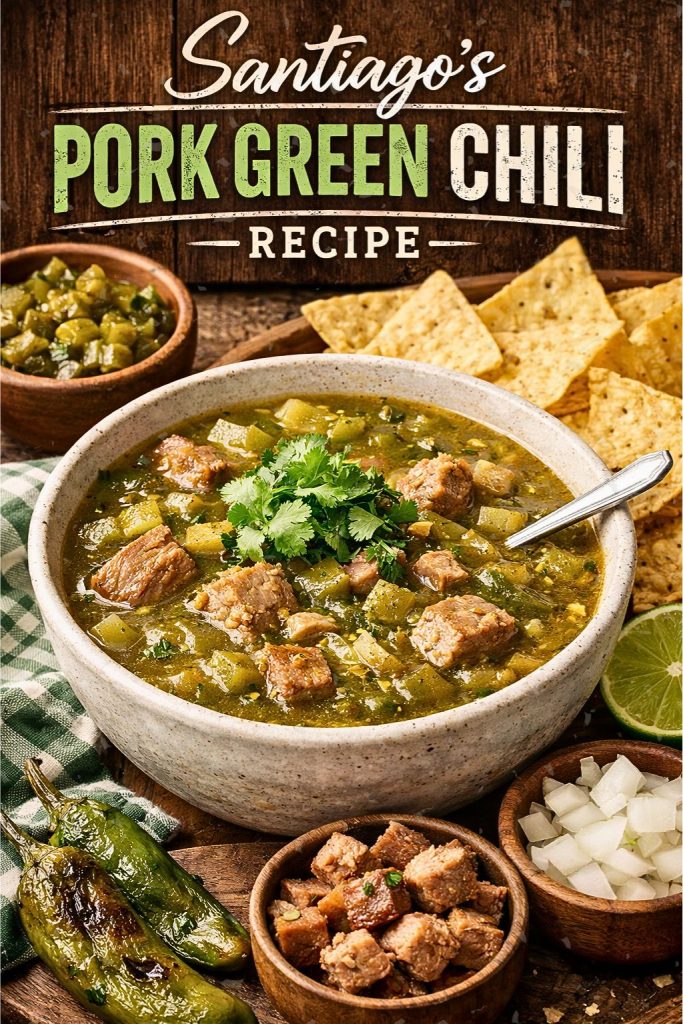
Key Takeaways
- The recipe turns tender pork and roasted green chiles into a hearty, home-cooked stew.
- Simple ingredients and clear steps make this dish easy to prepare and customize.
- Practical tips cover storage, swaps, and small tricks for consistent flavor.
What Santiago’s Pork Green Chili Means to Me
I call this dish a simple, bold comfort food. I use bite-sized pork pieces simmered with roasted green chiles and a blend of warm spices.
I serve it over rice or with warm tortillas so the sauce soaks into every bite.
I like how the pork becomes tender while the chilies add a mild heat and smoky flavor.
I find it homey and filling, the kind of meal that feels handcrafted and meant for sharing.
Why I Love Making Santiago’s Pork Green Chili
I love how this recipe brings bold, restaurant-style taste to my kitchen without fuss. It works for a quiet weeknight or when friends drop by, and I don’t worry about serving sizes or picky eaters.
I can change the heat, add toppings like shredded cheese, sliced avocado, or a dollop of sour cream, and still keep the base simple and affordable. The ingredients are easy to find, and the flavors deepen if I make it a day ahead.
- Bold flavor, low effort
- Easy to customize
- Wallet-friendly, crowd-ready
The Ingredients
I gather ingredients that build deep, layered flavor and hearty texture for this pork green chili. I use 2 pounds of pork—shoulder, butt, or loin all work—to give the chili meaty body and a tender bite when simmered.
Green chilies are the main flavor driver. I choose roasted fresh chilies when I can, or drained canned green chiles for convenience. I add canned jalapeños for extra heat but cut back or skip them if I want a milder dish.
Tomato paste plus diced tomatoes lend thickness and a rounded tomato note. I sometimes reduce the paste if I want less tomato-forward flavor. Onion and garlic are finely chopped and minced to form the savory base.
For the cooking liquid I use chicken broth plus a splash of water; vegetable broth works as an option. I sauté in lard for richness but swap in neutral oil if I prefer a lighter fat.
My spice mix is simple: ground cumin, dried oregano, black pepper, and a touch of sage. I adjust these to taste, increasing cumin for warmth or oregano for herbiness.
I keep a thickener on hand: all-purpose flour works well, and cornstarch serves as a gluten-free substitute if needed. Salt gets added carefully during cooking so the final seasoning balances with the broth and canned ingredients.
Quick reference (amounts vary by recipe):
- Pork: 2 lb, diced
- Green chilies: roasted or canned
- Jalapeños: canned, optional
- Tomato paste + diced tomatoes
- Onion, garlic: finely chopped
- Chicken broth + water (or vegetable broth)
- Fat: lard or oil
- Spices: cumin, oregano, black pepper, sage
- Thickener: flour or cornstarch
Step by Step Instructions
Step 1 — Prep the Pork
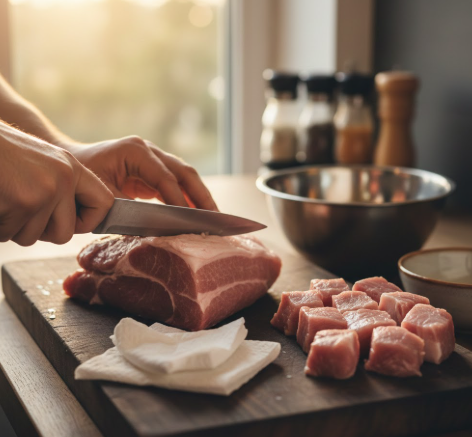
I trim excess fat from the pork and cut it into bite-sized pieces.
I pat the pieces dry and set them aside so they’re ready when the pan is hot.
Step 2 — Sauté Onions and Garlic
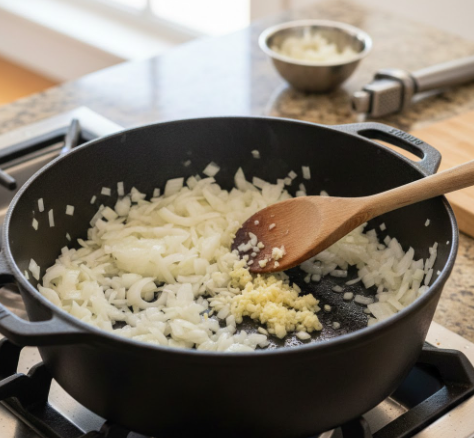
I heat 1 tablespoon of lard in a large pot over medium heat.
I cook the diced onions until they turn translucent, about 5 minutes, then add minced garlic and cook 1 more minute.
Step 3 — Brown the Meat
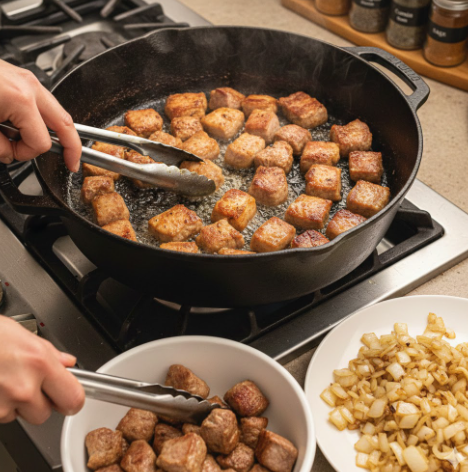
I remove the onions and garlic and set them aside.
I add another tablespoon of lard, brown half the pork over medium-high heat until all sides are seared (about 5 minutes), remove it, then brown the remaining pork.
Step 4 — Add Chilies and Seasonings

I return the pot to medium heat and add chopped green chilies, tomato paste, diced tomatoes, and sliced jalapeños.
I pour in chicken broth and a bit of water, then season with black pepper, oregano, cumin, and sage. I stir to combine.
Step 5 — Combine and Simmer

I bring the mixture to a boil, lower the heat, and stir the browned pork back into the pot.
I cover the pot partially and let it simmer gently for about one hour so the flavors meld and the pork becomes tender.
Step 6 — Make a Roux

In a separate saucepan, I melt 1 cup of lard over medium heat.
I whisk in flour gradually, stirring constantly until it forms a smooth, thick paste.
Step 7 — Thicken the Stew

I add the roux slowly to the simmering chili while stirring to avoid lumps.
I let the chili continue to simmer for another 30 minutes until it reaches a rich, thicker consistency.
Step 8 — Plate and Serve
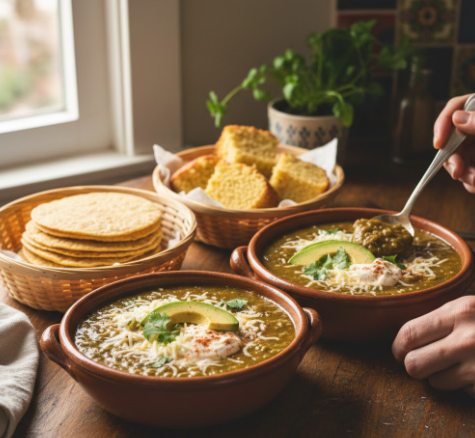
I ladle the chili into bowls and offer toppings like shredded cheese, sour cream, or sliced avocado.
I serve it with warm tortillas or cornbread and enjoy.
Notes
- I like to stir in 1 tablespoon of ground cinnamon for a warm, complex layer of flavor.
- I often buy pre-cut pork cubes to cut prep time and skip trimming.
- I make this chili a day ahead when I can; chilling and reheating deepens the taste.
How I keep Santiago’s pork green chili fresh
I let the chili cool to room temperature, then seal it in airtight containers. I refrigerate for up to 3 days or freeze portions for up to 3 months. I label frozen packs with date.
Variations
I swap pork for black or pinto beans to make a vegetarian chili that still feels filling.
I sometimes add diced potatoes for more texture and bulk.
To thicken the chili, I increase the roux or simmer it longer until it reaches the consistency I want.
Santiago’s Pork Green Chili Recipe
Tools I Use
- Large heavy pot or Dutch oven
- Wooden spoon or heatproof spatula
- Slotted spoon or tongs
- Measuring cups and spoons
- Small saucepan for roux
- Cutting board and sharp knife
What Goes In
- 2 lb pork, trimmed and cut into bite-size pieces
- 3 cups roasted green chiles, chopped
- 12 oz tomato paste
- 2 × 12 oz cans jalapeños (drained to taste)
- 2 × 14 oz cans diced tomatoes
- 6 cans chicken broth (use can size you prefer)
- 2 cups finely chopped onion
- 1 cup lard + 1 tbsp for browning and roux
- 8 cloves garlic, minced
- 4 cups water
- 2 tsp black pepper
- 2 tsp dried oregano
- 1/2 tsp ground cumin
- 2 cups all-purpose flour (for roux)
- 1/2 tsp dried sage
- Optional toppings: shredded cheese, sour cream, sliced avocado, warm tortillas
Step-by-Step Method
- Trim excess fat from the pork and cut into bite-size pieces. Pat dry with paper towels.
- Heat 1 tablespoon lard in the large pot over medium heat. Add onions and cook 4–6 minutes until soft, then stir in garlic for 1 minute. Scoop the onion and garlic out and set aside.
- Raise heat to medium-high and add another tablespoon lard. Brown pork in batches so pieces sear evenly, about 4–5 minutes per batch. Remove browned pork with a slotted spoon and set aside.
- Return onions and garlic to the pot. Add roasted green chiles, tomato paste, diced tomatoes, canned jalapeños, chicken broth, water, black pepper, oregano, cumin, and sage. Stir until well mixed.
- Bring mixture to a boil, then lower heat to a gentle simmer. Add the browned pork back into the pot. Partially cover and simmer for about 1 hour, stirring occasionally.
- While the chili simmers, make the roux: melt 1 cup lard in the small saucepan over medium heat until bubbly. Gradually whisk in flour until you have a smooth paste. Cook 2–3 minutes, stirring, but do not let it burn.
- Slowly whisk small amounts of hot chili broth into the roux to temper it, then pour the roux into the main pot while stirring constantly. Simmer another 20–30 minutes until the stew thickens to your liking.
- Taste and adjust salt, heat, or spices. Serve hot with cheese, sour cream, avocado, and warm tortillas on the side.
Helpful Tips and Variations
- I brown pork in batches to keep a good crust on the meat.
- Use roasted Hatch or poblano chiles for a smoky, authentic flavor.
- For a leaner dish, substitute pork shoulder with pork loin, but simmer until tender.
- Make it ahead; flavors deepen after a day in the fridge.
- If you prefer a thinner chili, skip some of the roux or add extra broth.
Estimated Nutrition
- Yield: about 8 servings
- Calories: ~180 kcal per serving (estimate)
- Serving suggestions: bowl with tortillas or over rice
If you want, I can provide a shopping list or a scaled version for fewer people.
FAQs
- Can I cook this chili in a slow cooker?
I often start the recipe on the stove (browning meat and softening aromatics), then move everything to a slow cooker. Cook on low for 6–8 hours or high for 3–4 hours. Stir in a flour or cornstarch slurry about an hour before serving to thicken. - Can I swap beef for pork?
I sometimes use beef instead of pork. Choose a tender cut and watch the cooking time; beef may need a slightly different simmer to reach the same tenderness. - Is this chili safe for special diets?
The standard recipe uses wheat flour and dairy toppings, so it isn’t automatically gluten‑free or dairy‑free. I recommend substituting gluten‑free flour or cornstarch for thickening and using plant‑based toppings to accommodate those needs. - Any quick tips?
Roast the green chiles for more depth, and taste as you go so seasoning stays balanced.
Wrapping Up
I hope you give this pork green chili a try and make it your own. Play with toppings like cilantro, queso fresco, or a squeeze of lime. Swap pork cuts, add roasted tomatillos, or change the heat level to suit your taste.
Share the recipe with friends and family who love bold, simple meals. If you want quicker weeknight versions, try a pressure cooker or use pre-roasted chiles. For leftovers, the flavors improve after a day in the fridge.
I also create and test other easy recipes you might enjoy. If you liked this dish, check my latest posts for more ideas that save time and money while keeping meals satisfying.
FAQs
- What makes my Santiago-style pork green chili different from other recipes?
I focus on roasted green chiles and slow-simmered pork to build deep flavor. I balance heat with mild spices, onions, and garlic so the chili tastes smoky and savory without overpowering the pork. - Is this green chili safe for people with mild spice sensitivity?
Yes. I control the heat by removing seeds from the chiles and using milder varieties like Hatch or anaheim. I also recommend tasting and adjusting chiles or using fewer jalapeños to suit sensitive eaters. - How well does this recipe reheat and store?
It stores very well. I cool it, refrigerate in an airtight container for up to 4 days, or freeze for 2–3 months. Reheat gently on the stove or in the microwave until hot throughout. - Can I use different cuts of pork or a different protein?
Absolutely. I prefer pork shoulder for tenderness, but pork butt works too. For leaner meat, pork loin will do if you avoid overcooking. You can also substitute shredded chicken for a lighter option. - What maintenance or prep steps keep the chili tasting its best?
I roast and peel the chiles ahead of time and trim excess fat from the pork. While simmering, I skim foam and check seasoning near the end. These steps keep the broth clear and the flavors balanced. - How does this green chili compare to red chili or other chilis?
My green chili emphasizes tangy, vegetal, and slightly smoky notes from fresh or roasted green chiles. Red chilis use dried red peppers and tend to be sweeter, deeper, and often hotter. Texture and spice profiles differ, so choice depends on the flavor you want. - Will this recipe cover common dietary needs like gluten-free or low-carb?
Yes. I make it naturally gluten-free and low-carb when you skip thickeners or serve it without flour tortillas. Always check labels on canned chiles or broth to confirm they contain no hidden gluten.
Conclusion
I find Santiago’s pork green chili to be a reliable and satisfying choice for family meals and gatherings. The recipe blends tender pork with roasted green chiles and simple spices, giving bold flavor without complex techniques.
I trust this dish for its balance of heat and comfort. It cooks easily in a slow cooker or on the stovetop, which makes it practical and low-waste. Using roasted fresh chiles or quality canned green chiles keeps the flavor strong while reducing prep time.
I recommend choosing fresh pork shoulder for tenderness and using roasted Hatch or Anaheim chiles when possible for the best taste. Season carefully and taste as you go to control spice and salt.
I believe this green chili is safe and home-friendly when you handle pork and chiles properly—cook pork to the right temperature and store leftovers promptly. For a long-term go-to recipe, stick with trusted ingredients and simple methods.
Try making a batch and freeze portions for quick meals later. I’m confident you’ll find it a versatile, eco-friendly, and dependable dish worth keeping in your rotation.

