
Santiagos Denver Green Chili Recipe
I love pairing Santiago’s Denver Green Chili with simple sides like fluffy white rice, warm flour tortillas, or a slice of cornbread. The dish fits many meals and adds bold, comforting flavor without a lot of fuss.
This recipe is more than a bowl of chili to me; it’s a family favorite that brings people together. I’ll walk you through what makes it special, how it tastes, and how to make it at home so you can enjoy it too.
Key Takeaways
- Santiago’s Denver Green Chili pairs well with rice, tortillas, or cornbread.
- The recipe delivers bold, comforting flavors that work for gatherings or weeknight meals.
- I will explain ingredients, steps, and storage tips to help you make it successfully.
What I Know About Santiago’s Denver Green Chili
I describe Santiago’s Denver Green Chili as a Denver-born pork stew made with roasted green chiles, spices, and tender diced pork. I find it savory, mildly spicy, and filling.
- Key parts: roasted green chiles, seasoned pork, aromatic spices
- Texture: chunky, saucy, and hearty
- Uses: served over rice, in burritos, or with tortillas
You might enjoy these soup ideas I love!
- Copycat Rafferty’s Potato Soup — creamy, hearty, and easy to make.
- Pumpkin Tomato Soup — savory-sweet with warm spices.
- Hungarian Caraway Soup — light, tangy, and fragrant.
Why This Version Stands Out
I use roasted green chiles and rendered lard to build deep, layered flavor you don’t get in typical chilis.
The chiles add smoky freshness while the lard gives a rounded, savory body.
- Balances heat and richness for broad appeal.
- Simple ingredients create a distinct Denver-style profile.
How Would I Describe the Flavor?
I taste a thick, rich chili with smoky heat and tender pork in every spoonful. The jalapeños add sharp spice, while cumin and smoked paprika give warm, earthy depth. Garlic and other spices layer in savory notes that make the bowl feel cozy and satisfying. The heat lingers but stays balanced with the meat’s richness.
Ingredients I Use to Make This Green Chili
- Meats & Proteins
- 1 lb pork, cut into 1/4–1/2 inch cubes (loin or shoulder)
- 1–1½ tbsp rendered lard (plus 1 tbsp extra)
- Peppers & Veg
- 1½ cups green chiles (mild or hot)
- 1 cup canned jalapeños
- 1 cup finely minced onion
- 4 cloves garlic, minced
- Tomato & Liquids
- 1 can (14 oz) diced tomatoes
- 6 oz tomato paste
- 3 cans chicken stock
- 2 cups water
- Thickener
- 1 cup all-purpose flour
- Seasonings
- 1 tsp black pepper
- 1 tsp dried oregano
- 1 tsp chili powder
- 1½ tbsp dry mustard powder
- ¼ tsp ground cumin
- ¼ tsp dried sage
- 1 tbsp smoked paprika
- 2 tbsp chicken bouillon granules
I list these so I can grab everything before I start cooking.
Step-by-Step Instructions
Step 1: Gather and Prep Ingredients
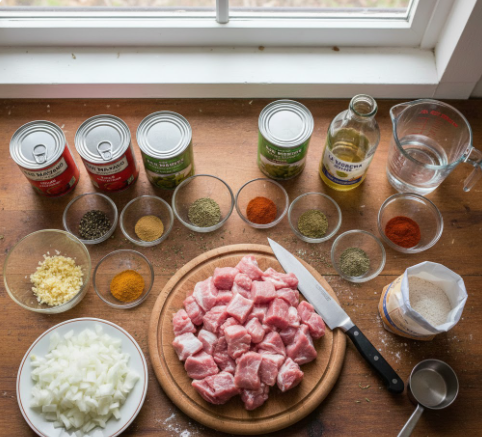
I lay out every ingredient and measure them before I start. I chop the pork into bite-size pieces, mince the garlic, dice the onion, and have the canned tomatoes, chiles, and jalapeños ready. Measuring spices and liquids ahead keeps the process smooth.
Step 2: Sear the Pork
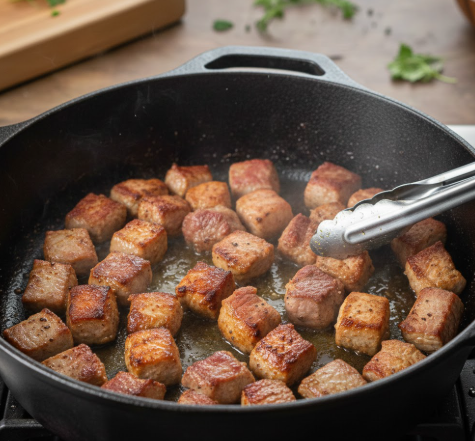
I heat 1 tablespoon of rendered lard in a large pot over medium-high heat. I add the pork in a single layer and brown it on all sides until a crust forms. Browning builds flavor and helps keep the meat juicy.
Step 3: Cook the Onions and Garlic
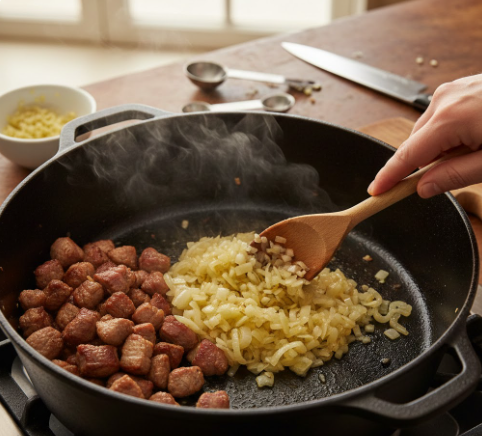
With the pork browned, I push it to the side and add the minced onion and garlic. I cook until the onion turns translucent and soft, about 3–5 minutes, stirring so the garlic doesn’t burn.
Step 4: Mix in Dry Spices and Flour

I sprinkle in flour, black pepper, dry mustard, sage, smoked paprika, cumin, and chili powder. I stir until the pork pieces are coated and the spices smell fragrant, about 1–2 minutes.
Step 5: Add Tomatoes and Green Chiles
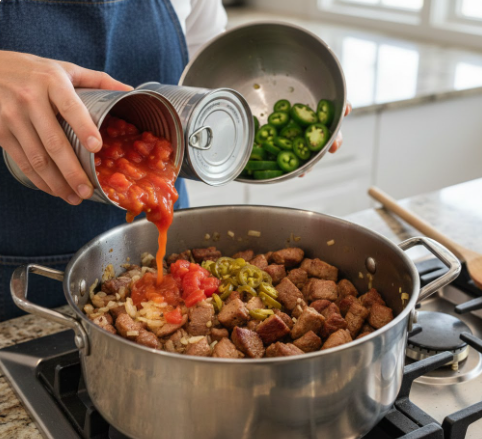
I pour in diced tomatoes, green chiles, and jalapeños, then stir to combine. This spreads the flavors and gives the base its characteristic texture.
Step 6: Pour in Stocks and Tomato Paste
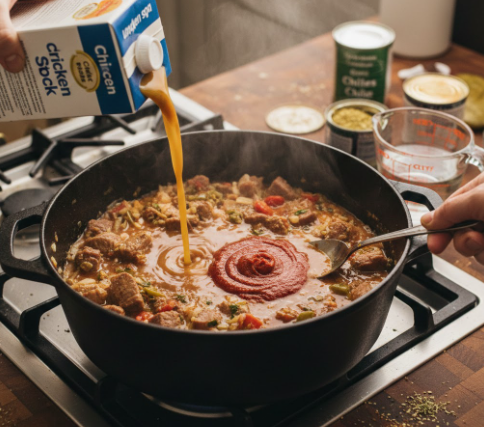
I add chicken stock, water, and tomato paste to the pot. I stir thoroughly until the tomato paste dissolves and the mixture looks uniform.
Step 7: Low Simmer
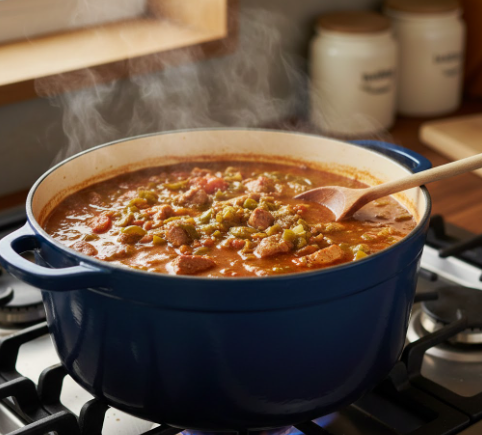
I bring the pot to a boil, then lower the heat and simmer uncovered for 1–2 hours. I stir occasionally to prevent sticking and check the pork for tenderness.
Step 8: Final Seasoning and Finish
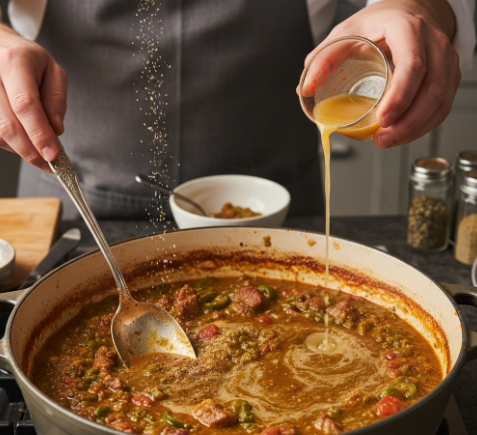
Near the end, I taste and tweak salt, pepper, or spices as needed. I stir in the remaining 1/2 cup rendered lard for extra richness before serving.
Tips & Tricks On Making Santiago’s Denver Green Chili
I roast fresh green chiles when I can; the smoke boosts flavor. I cook the chili low and slow so spices and pork blend well. I often make it a day ahead — it tastes richer after resting. If I want a thicker sauce, I stir a cornstarch slurry in near the end. I test heat by mixing milder and hotter chiles until the spice level matches what I enjoy.
How I Keep Leftovers Fresh
I store the chili in airtight containers in my fridge for up to five days.
For longer storage, I cool it fully, then freeze in labeled containers or bags for up to three months.
I thaw in the fridge overnight before reheating.
Substitutes You Can Use in Santiago’s Denver Green Chili
I keep a few easy swaps on hand when I’m missing ingredients.
- Pork: I use chicken or turkey for a lighter, still-tasty option.
- Green chiles: Poblanos or even green bell peppers work if Hatch chiles aren’t available.
- Rendered lard: I often replace it with olive oil or a neutral vegetable oil.
- Chicken stock: I switch to vegetable stock to make a vegetarian version.
- Tomato paste: Crushed tomatoes give similar body and flavor when paste is not on hand.
Santiago’s Denver Green Chili Recipe
Ingredients I Use
- 1½ cups green chiles (mild or hot), roasted or canned
- 1 cup all-purpose flour
- 1 tsp freshly ground black pepper
- 1 can (14 oz) diced tomatoes
- 4 cloves garlic, minced
- 1½ cups canned jalapeños, chopped
- 3 cans chicken stock (about 24 oz total)
- ¼ tsp dried sage
- 1 tbsp smoked paprika
- 1 tbsp rendered lard for browning + ½ cup reserved for richness
- ¼ tsp ground cumin
- 1 tsp chili powder
- 1 lb pork, cut into ¼–½ inch cubes (loin or shoulder)
- 6 oz tomato paste
- 2 cups water
- 2 tbsp chicken bouillon granules
- 1 cup onion, finely minced
- 1 tsp dried oregano
- 1½ tbsp dry mustard powder
Step-by-step Method
- Prep everything first so cooking flows smoothly.
- Heat 1 tbsp rendered lard in a large pot over medium-high. Brown the pork in batches so pieces get a good sear.
- Add the minced onion and garlic to the pot. Sauté until the onion is soft and translucent.
- Sprinkle in the flour, black pepper, dry mustard, sage, smoked paprika, cumin, and chili powder. Stir so the flour and spices coat the pork and aromatics.
- Stir in the diced tomatoes, green chiles, and jalapeños. Mix well to combine.
- Pour in the chicken stock, the 2 cups water, and add the tomato paste. Stir until the tomato paste dissolves into the liquid. Add the chicken bouillon if you want extra depth.
- Bring to a boil, then lower heat and simmer uncovered. I let it simmer 1–2 hours, stirring now and then to prevent sticking.
- Near the end, taste and adjust seasoning. Add the remaining ½ cup rendered lard for extra richness if desired. If you want thicker chili, whisk a small cornstarch slurry (1 tbsp cornstarch + 1 tbsp cold water) and stir in slowly until you reach the consistency you like.
Practical Tips and Reminders
- Roast fresh green chiles when possible. I roast, peel, and chop them for a smoky, bright flavor.
- Cook low and slow. Longer simmering melds flavors and tenderizes the pork.
- Make this a day ahead. I find the chili tastes better after resting overnight.
- Control heat by swapping mild or hot chiles and adjusting jalapeño amounts.
- To thicken, use a cornstarch slurry instead of adding more flour late in cooking.
- Store leftovers in airtight containers in the fridge for up to 4 days or freeze up to 3 months.
Estimated Nutrition per Serving
| Nutrient | Approximate Value |
|---|---|
| Calories | 50 kcal (note: depends on portion size and ingredients) |
| Protein | Moderate (from pork and stock) |
| Fat | Variable (depends on lard used) |
| Carbohydrates | Low to moderate (from tomatoes, flour) |
| Sodium | Can be high (use low-sodium stock or reduce bouillon) |
I recommend adjusting salt and fat to match your dietary needs.
Frequently Asked Questions
1. Can I cook this in a slow cooker?
Yes. I brown the pork and sauté onions and garlic first, then move everything to the slow cooker. I cook on low for 6–8 hours for tender meat and deeper flavor.
2. Will this come out spicy?
That depends on your chiles. I control heat by choosing milder or hotter green chiles and adjusting the jalapeño amount. Remove seeds to reduce heat.
3. Can I use fresh jalapeños instead of jarred?
You can. I often use fresh jalapeños for brighter, fresher heat. Roast or seed them if I want milder flavor.
4. What should I serve with it?
I like white rice, warm tortillas, or a spoonful of sour cream. Other good options: shredded cheese, chopped cilantro, or lime wedges.
5. Is there a meat-free version?
Yes. I swap pork for firm tofu or extra beans and use vegetable stock. The dish stays hearty and flavorful.
Closing Thoughts
I recommend trying this green chili at home and sharing it with friends or family. It brings warm, layered flavors and a comforting texture that fits many meals. I find it especially good for casual gatherings and simple weeknight dinners. Give it a try and adjust the spice to match your taste.
You’ll love these new recipe picks!
- I recommend a spicy Cava-style falafel I tried.
- I make Carrabba’s minestrone my way for depth.
- I also simplify Buffalo Wild Wings’ Southwest ranch for home.
FAQs
Q1: What makes Santiago’s Denver green chili stand out?
I think the key is a balance of roasted green chilies, tender pork, and a light spice mix. Roasting brings smoky depth, while slow-simmered pork gives the chili a rich texture without being too heavy.
Q2: Is this recipe spicy, and can I adjust the heat?
Yes, it can be spicy, but you control the heat. Use milder green chilies or remove seeds for less heat. Adding jalapeños or hotter chiles raises the spice level. I always taste and adjust as it simmers.
Q3: How can I make this safely for family members with dietary needs?
I swap ingredients to meet needs: use lean pork or turkey for lower fat, and replace pork with jackfruit or firm tofu for a vegetarian version. For low-sodium diets, I cut back on added salt and use low-sodium broth.
Q4: How long does the chili stay good, and how do I store it?
I refrigerate the chili in an airtight container for up to 4 days. For longer storage, I freeze portions for 2–3 months. Thaw overnight in the fridge and reheat gently on the stove.
Q5: What basic maintenance tips keep the flavor consistent each time?
I recommend roasting chilies and toasting spices before adding them. Cook low and slow to let flavors meld. Taste during cooking and adjust salt, acid (lime or vinegar), and spice at the end.
Q6: How does this Denver-style green chili compare to other regional chilis?
Denver-style focuses on chopped green chiles and tender pork in a saucy base, different from New Mexico green chile which often uses roasted Hatch chiles, or Texas chili which leans toward beef and thick meat-heavy profiles. I find Denver chili lighter and more versatile for burritos and bowls.
Q7: Can I use canned or frozen chilies instead of fresh roasted ones?
Yes. Canned or frozen green chilies work in a pinch and save time. I prefer fresh-roasted for best flavor, but draining canned chilies and briefly sautéing them improves their taste and texture.
Conclusion
I recommend Santiago’s Denver green chili for anyone who wants a hearty, well-balanced pork green chili that stands up to tradition. I find its blend of roasted green chiles, tender pork, and savory spices both effective and satisfying for everyday meals and special gatherings.
This recipe performs well for stovetop or slow-cooker methods, and I trust it to be safe when you follow basic food-handling steps like cooking pork to the right temperature and storing leftovers promptly. Using roasted fresh chiles or responsibly canned green chiles keeps the dish more eco-friendly than heavily processed alternatives.
If you value long-term reliability, choose quality ingredients—fresh green chiles, good pork, and simple spices—and stick with steady cooking techniques. Those choices produce consistent flavor and reduce waste over time.
I encourage you to try a batch, tweak the heat to your taste, and make it part of your regular recipe rotation. You’ll get a dependable, flavorful green chili that’s easy to make again and again.