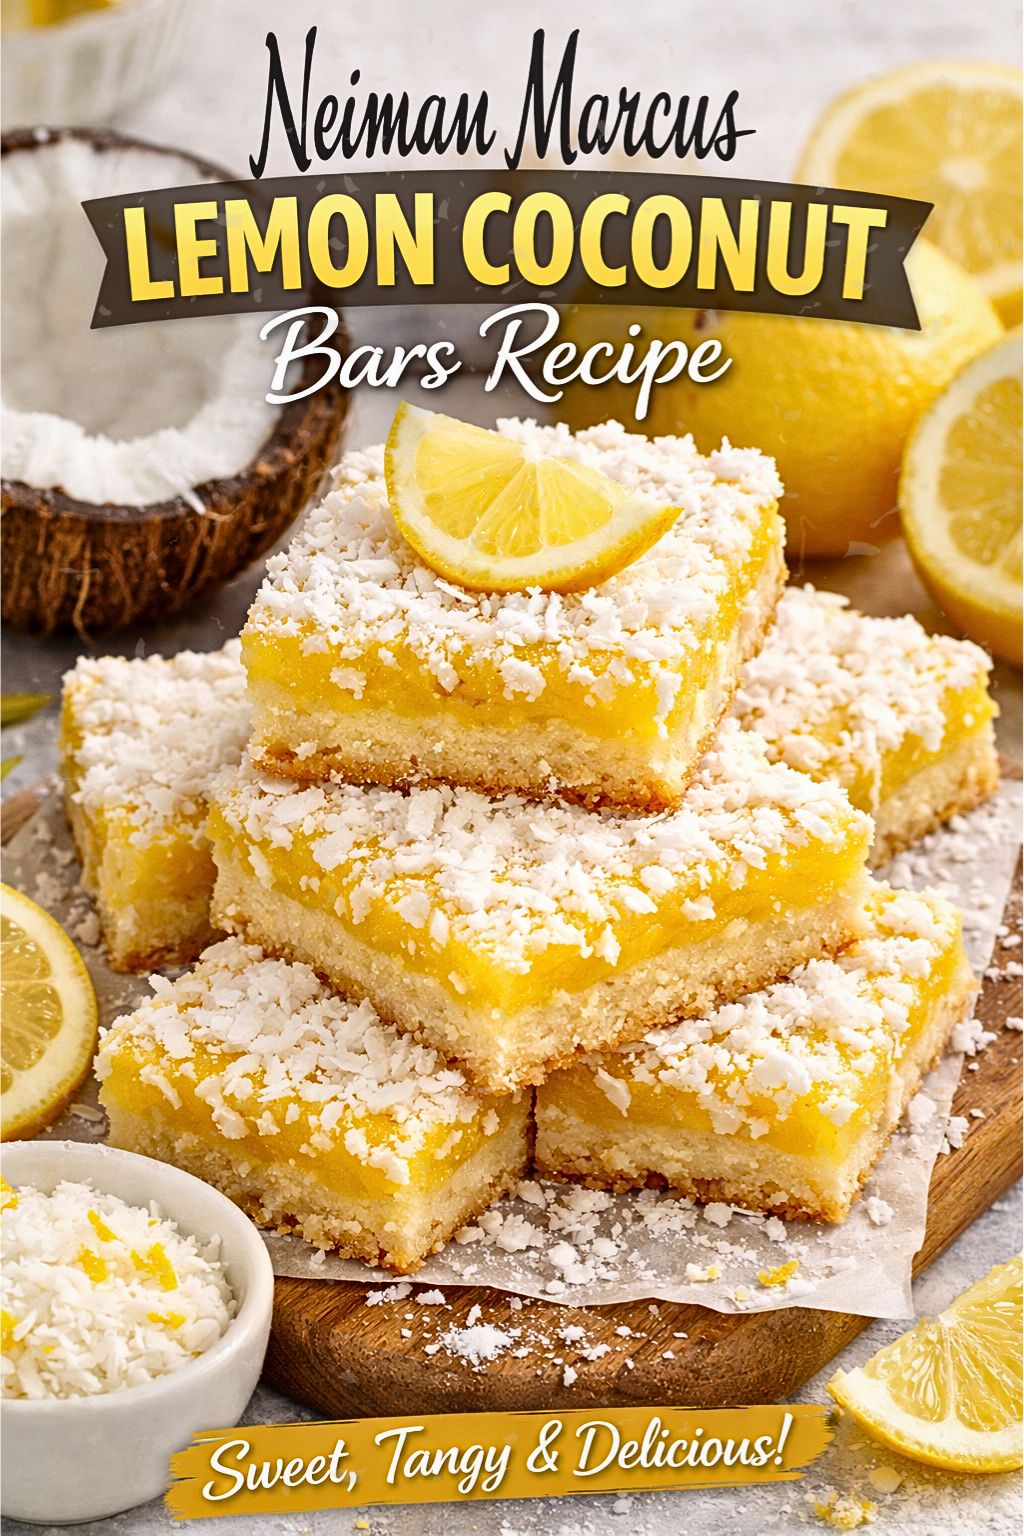
Neiman Marcus Lemon Coconut Bars Recipe
I love cooking because it brings people together, and I often turn to simple, bright dishes that match that feeling. Lately I’ve been pairing a tangy lemon coconut bar with light meals, and the contrast of zesty sweetness and fresh savory sides never fails to please.
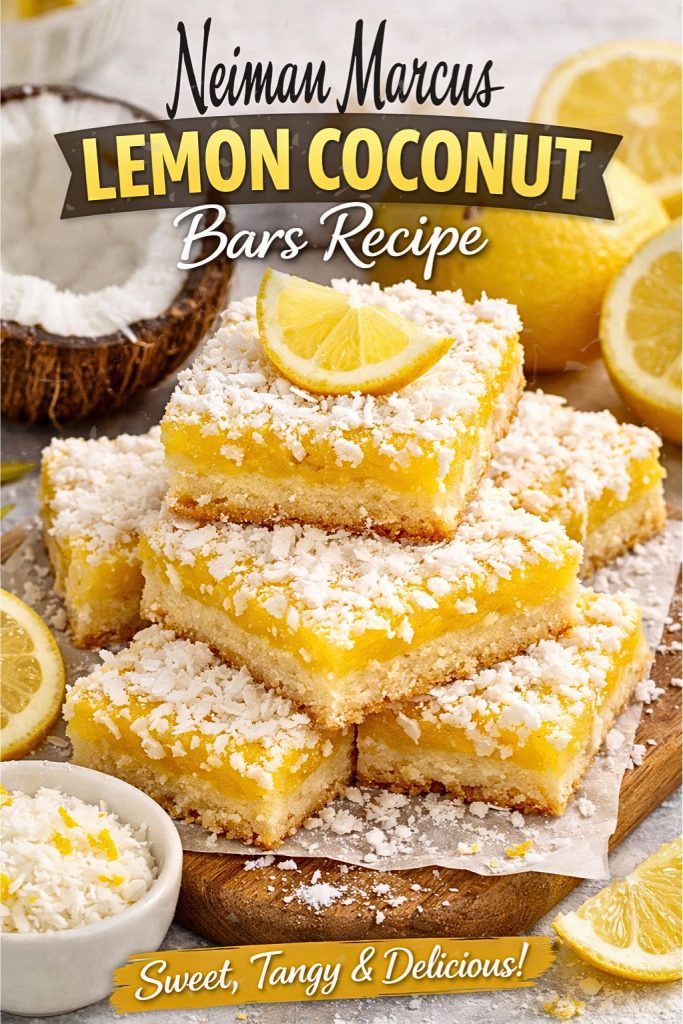
I’m sharing my take on Neiman Marcus Lemon Coconut Bars—rich butter crust, tangy lemon layer, and shredded coconut on top. They’re easy to make, travel well, and work for picnics, potlucks, or a small family dessert after dinner.
Key Takeaways
- The recipe combines a buttery base, tart lemon filling, and sweet coconut topping.
- These bars are easy to prepare and suit casual gatherings or potlucks.
- They pair well with fresh, savory dishes and keep for sharing or transporting.
What I Know About Neiman Marcus Lemon Coconut Bars
I call these bars a simple, sweet citrus-coconut dessert that blends tart lemon and creamy coconut.
They use a cake-mix base mixed with butter and egg, then a creamy topping with cream cheese, eggs, powdered sugar, and shredded coconut.
- Texture: soft, slightly gooey center with a tender crust.
- Flavor: bright lemon notes balanced by sweet coconut.
- Serve: cut into squares and share at gatherings or hold in an airtight container.
The Ingredients
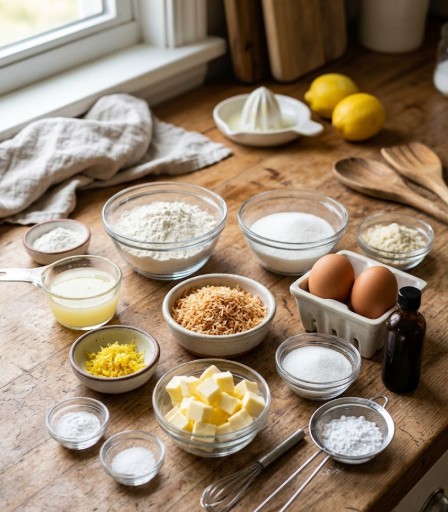
I gather simple, pantry-friendly items to make these lemon coconut bars. I use 1 cup all-purpose flour plus an extra teaspoon for dusting, 1 tablespoon almond flour, and 3/4 cup toasted sweetened shredded coconut. For leavening and seasoning I add 1/2 teaspoon baking powder and 1/2 teaspoon fine sea salt, plus a pinch more salt if needed.
For the citrus layer I mix 1/4 cup fresh lemon juice, 1 tablespoon grated lemon zest, 3/4 cup caster sugar, and 2 large eggs. For the crust and topping I include 6 tablespoons cold butter (diced), 1/4 cup granulated sugar, 1/4 cup powdered sugar for dusting, and 1/2 teaspoon vanilla.
How to Make Neiman Marcus Lemon Coconut Bars?
Step 1: Warm the Oven
I set the oven to 350°F (175°C) so it reaches the right temperature before baking. A fully warmed oven gives even heat and steady results.
Step 2: Line the Pan
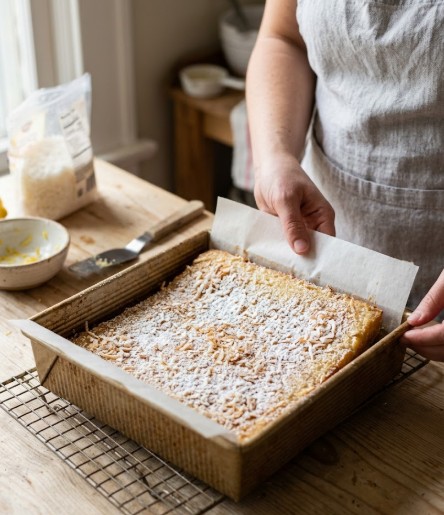
I use an 8-inch square pan and press parchment paper into it, leaving extra on two sides. That overhang makes it simple to lift the bars out after they cool.
Step 3: Mix and Bake the Base
I cut cold butter into small pieces, then mix it with 1/4 cup granulated sugar and a pinch of salt until the texture looks like coarse crumbs. I stir in 1 cup flour and a bit of baking powder until a soft dough forms, press it into the pan, and bake 13–15 minutes until the crust is light golden.
Step 4: Whip the Lemon Coconut Filling
While the crust bakes, I beat the eggs with caster sugar for 3–5 minutes until fluffy. I add fresh lemon juice, lemon zest, vanilla, and almond flour, then fold in toasted shredded coconut gently to keep some texture.
Step 5: Layer the Filling Over the Crust
When the crust comes out hot from the oven, I pour the lemon-coconut mix over it and spread it evenly. This helps each bar have a consistent amount of filling and coconut.
Step 6: Finish Baking
I return the pan to the oven and bake 20–25 minutes, watching for the filling to set but stay slightly jiggly in the center. If the top starts to brown too much, I tent it with foil to prevent overbrowning.
Step 7: Cool, Remove, and Dust
I let the bars cool fully in the pan so the filling firms up. Then I lift them out using the parchment overhang and sprinkle powdered sugar on top. I cut into bars once they are completely cooled for clean slices.
Tips:
- Toasting the coconut first boosts the flavor.
- Use fresh lemon juice for the best bright taste.
- Chill briefly if you want neater slices.
Notes
I like to squeeze fresh lemons — their juice lifts the whole bar more than bottled juice.
I toast shredded coconut briefly in a dry pan until light brown; it adds aroma and a slight crunch.
I always let the pan cool fully before cutting to get neat squares.
If I want stronger lemon punch, I stir in extra lemon zest to the filling.
After cooling, I chill the bars for at least an hour to firm the texture and make them easier to serve.
Storage Tips
I keep the bars in an airtight container at room temperature for up to 2 days to preserve texture.
For longer freshness, I refrigerate them; they stay good for about a week and taste crisp and cool.
If I need to save them longer, I wrap each piece tightly and freeze for up to a month. Thaw in the fridge before serving.
Nutrition Information
I list estimated nutrition per bar (1 of 24):
- Calories: ~230–300 kcal
- Fat: ~12–16 g (saturated fat 6–9 g)
- Carbohydrates: ~28–36 g (sugars 18–25 g)
- Protein: ~2–4 g
- Fiber: <1 g
- Sodium: ~120–220 mg
Notes: values vary by exact ingredients and portion size. Adjust servings or ingredients to change totals.
Serving Ideas I Like
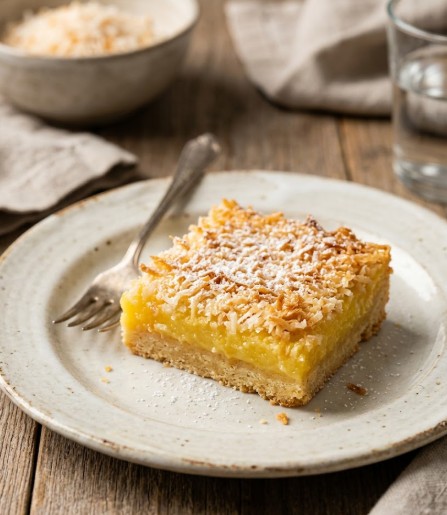
I often serve these lemon coconut bars with a scoop of vanilla ice cream. The cold cream melts slightly and softens the bright lemon flavor, making each bite smoother.
I also place a handful of fresh berries on the plate. Strawberries or blueberries add color and a sweet pop that pairs well with the coconut.
A small spoonful of whipped cream lifts the texture and tames the tartness. I keep it light so the bars stay the star.
For a warm drink, I pick chamomile or green tea. Their mild flavors match the bars without overpowering them.
Sometimes I drizzle a little melted dark chocolate over the top. The slight bitterness of the chocolate gives a pleasant contrast to the citrus and coconut.
- Serve chilled or at room temperature.
- Garnish with lemon zest or extra coconut for a neat finish.
What Other Substitutes Can I Use in Neiman Marcus Lemon Coconut Bars Recipe?
Ingredients I can swap
- Butter: I can use melted coconut oil for a stronger coconut taste or stick to butter for a richer, traditional flavor.
- Sugar: I may trade caster or granulated sugar for brown sugar to add a mild caramel note.
- Citrus: I can replace lemon zest and juice with orange or lime to change the citrus profile.
- Flour: I can use a 1:1 gluten-free flour blend instead of all-purpose flour for gluten-free needs.
- Eggs: I can replace each egg with 1 tablespoon flaxseed meal plus 3 tablespoons water (let sit 5 minutes) or 1/4 cup applesauce for an egg-free option.
- Almond flour: If I need nut-free, I can omit almond flour or replace it with extra all-purpose or a seed flour like sunflower seed flour.
- Coconut: I can switch sweetened shredded coconut for unsweetened if I want less sweetness, or use toasted coconut for more flavor and texture.
Tools and gear I might use
- Baking pan: An 8-inch square pan works best; I can use a similar-sized metal or glass pan, adjusting bake time by a few minutes if needed.
- Lining: I always line the pan with parchment and leave an overhang for easy removal.
- Mixing tools: I use a bowl and whisk or an electric mixer for the filling, and a pastry cutter or fork for blending butter into the crust.
- Oven: A reliable oven set to 350°F (175°C) gives even results; an oven thermometer helps if my oven runs hot or cold.
How I change the steps
- Crust: If I use coconut oil, I melt it first and chill the crust briefly before baking so it firms up and bakes evenly.
- Filling: When I use flax “eggs” or applesauce, I whisk longer to help the filling bind and set. I may also add a tablespoon of cornstarch to help firm the filling if I omit eggs.
- Zest swap: If I use orange or lime, I reduce juice slightly if the flavor becomes too sweet or tart.
- Baking time: A gluten-free flour blend or a glass pan can change bake time. I check the bars at the low end of the suggested time and watch for a slightly jiggly center.
- Cooling and chilling: I always cool completely in the pan. If I used egg replacements, I often chill the bars for at least an hour to help them set before slicing.
Nutrition changes to expect
- Using coconut oil raises saturated fat compared with butter; toasted coconut and sweetened coconut increase calories and sugar.
- Brown sugar adds a touch more minerals but keeps calories similar to white sugar; applesauce cuts fat and slightly reduces calories compared with eggs and butter.
- Gluten-free flour may alter fiber and micronutrient content depending on the blend.
- Egg replacements change protein: flaxseed adds some plant-based fat and fiber, while applesauce lowers protein overall.
Extra tips I learned
- I always taste the filling (a little spoonful) before baking if I change citrus or sugar, so I can adjust sweetness or zest.
- If I want a firmer set without eggs, I add 1–2 teaspoons cornstarch or 1 tablespoon tapioca starch to the filling.
- When using nut-free substitutes for almond flour, I check texture and add a tablespoon more flour if the filling seems too loose.
- I toast coconut lightly on a sheet pan for 5–8 minutes at 350°F, stirring once, to boost flavor without burning.
Frequently Asked Questions
- Can I prep these bars ahead of time?
I often make them a day or two early. Once cooled, I seal them in an airtight container and refrigerate. - How do I know when they’re baked?
I look for firm edges and a slightly wobbly center. The filling firms as it cools, so a little jiggle is fine. - Is toasting the coconut necessary?
I always toast it. It adds a toasted, nutty note and gives better texture than using it raw. - Can I freeze leftovers?
Yes. I wrap pieces tightly in plastic wrap and foil. They keep their flavor for about a month in the freezer. - What if I don’t have fresh lemons?
I prefer fresh lemons, but bottled lemon juice works in a pinch. Fresh gives brighter flavor.
Final Thoughts
I loved how these lemon coconut bars came together and I think you will too. With simple steps and small tweaks, I made a treat that’s bright, creamy, and easy to share.
- Try swapping citrus or adding toasted coconut for new flavor.
- Chill before slicing for neater bars.
I hope this recipe becomes one of my go-to desserts and that it finds a spot at your next gathering.
FAQs
Q1: What makes this lemon coconut bar recipe work so well?
I use a boxed lemon cake mix for the base because it gives a light, citrusy structure with minimal effort. The cream cheese topping adds richness and holds the bars together. Shredded sweetened coconut gives texture and extra flavor without changing the basic method.
Q2: Are these bars safe for people with common food allergies?
They contain dairy (butter and cream cheese), eggs, wheat (cake mix), and coconut. I recommend swapping ingredients if you need to avoid any of those. For example, use dairy-free cream cheese, an egg replacer, and a gluten-free cake mix. Always check labels to avoid cross-contamination.
Q3: How long will the bars stay fresh and how should I store them?
I store the bars in an airtight container in the fridge for up to 5–7 days. You can freeze them for up to 2 months; wrap individual pieces in plastic and place them in a freezer-safe bag. Thaw in the fridge before serving.
Q4: How can I keep the topping from cracking or getting too runny?
I beat the cream cheese until smooth and add the eggs one at a time to keep the topping stable. Bake at a moderate temperature and avoid overbaking — the center should still jiggle slightly when you take it out. Let the bars cool completely in the pan before cutting.
Q5: Can I make the recipe without a boxed mix?
Yes. I can make a simple lemon-flavored crust using flour, sugar, butter, lemon zest, and a bit of baking powder. The topping can be made the same way with cream cheese, eggs, powdered sugar, and lemon juice. The texture will be a bit different, but the flavor stays similar.
Q6: How do these bars compare to other citrus or coconut bars?
Compared with plain lemon bars, these are richer and creamier because of the cream cheese and coconut. Compared with coconut cream bars, they have a brighter, tangier lemon note. I find they balance tartness and sweetness well without being overly heavy.
Q7: What maintenance or prep tips make baking easier?
I line the pan with foil or parchment for easy removal and cleaner cuts. I measure ingredients precisely, soften the cream cheese first, and let the baked bars cool fully before slicing. These small steps save time and give better results.
Final Thoughts
I recommend trying the lemon coconut bars when you want a bright, easy dessert that travels well and pleases a crowd. I like recipes that use a moist lemon cake mix or a simple buttery crust topped with a creamy lemon-coconut filling because they give a consistent, tasty result with minimal fuss.
- I find these bars effective for potlucks and family gatherings because they hold their shape and slice neatly.
- I consider them safe and simple: common pantry ingredients and standard baking steps keep the process low-risk.
- I view them as eco-friendly when I reduce waste by using reusable baking pans and buying ingredients in bulk.
- I think these bars suit both casual snacks and special occasions, and they store well in the fridge for several days.
I encourage you to pick a trusted recipe, follow clear baking times and cooling steps, and adjust sugar or coconut to your taste. Try them once and you’ll likely keep the recipe in your rotation.