Dream Whip Recipes With Jello: Easy No-Bake Desserts and Flavor Combinations
I grew up eating light, airy desserts made from Dream Whip and flavored gelatin, and I still find them simple and satisfying. These treats mix a fluffy whipped topping with bright Jello flavors to make easy, no-bake desserts that work for weeknight snacks, potlucks, or special occasions.
I like how flexible the pairing is — you can layer it, fold it into mousses, or build quick parfaits with fruit and cookie crumbs. The results always feel nostalgic yet fresh, and they take little time and common kitchen tools to prepare.
Key Takeaways
- The recipe uses a whipped topping and flavored gelatin for a light texture.
- Simple tools and basic steps make this dessert quick to assemble.
- You can change flavors and add layers or fruit for variety.
Ingredients
Jello layer ingredients
- 1 (3 oz) package flavored gelatin — pick a flavor you like (strawberry, lime, etc.).
- 1 cup boiling water — pour over the gelatin to dissolve it completely.
- 1 cup cold water — adds the right texture once the gelatin cools.
Dream Whip layer ingredients
- 1 envelope Dream Whip whipped topping mix — found in the baking aisle.
- 1/2 cup cold milk — I use whole milk for creaminess, but other milks work.
- 1/2 teaspoon vanilla extract — boosts the whipped layer’s flavor.
Add-on options
- Fresh fruit: berries, sliced bananas, or pineapple for texture and color.
- Crushed graham crackers: use for a crunchy layer or as a base.
- Shaved chocolate or sprinkles: for a simple, decorative finish.
Ingredient quick view
| Item | Amount | Note |
|---|---|---|
| Flavored gelatin | 1 (3 oz) | Choose a matching flavor |
| Boiling water | 1 cup | Must be fully boiling |
| Cold water | 1 cup | Measure accurately |
| Dream Whip mix | 1 envelope | Powdered whipped topping |
| Cold milk | 1/2 cup | Whole milk gives best texture |
| Vanilla extract | 1/2 tsp | Optional but recommended |
| Fresh fruit | Optional | Pick fruits that pair with the gelatin |
| Graham crackers | Optional | Adds crunch |
| Chocolate/sprinkles | Optional | For garnish |
I keep measurements simple so the layers set right and the dessert stays light and creamy.
Tools and Equipment
Must-have Utensils
I keep a few basic items on hand that make this dessert quick and tidy. A large bowl works for dissolving Jello and a medium bowl holds the Dream Whip while I whip it. I use a hand or electric mixer to get the topping light and airy. Measuring cups and spoons help me pour the right amounts of water, milk, or flavoring. A whisk or flexible spatula lets me fold the whipped topping into the Jello without deflating it. If I add fresh fruit, a sharp knife and cutting board are essential.
Nice-to-have Extras
Some extra tools make assembly and presentation easier, though they aren’t required. I often use a piping bag with tips when I want neat dollops or decorative swirls. An offset spatula helps me smooth layers in a pan or mold. Serving spoons, small ladles, or an ice cream scoop speed up portioning into bowls or glasses. Clear individual glasses or ramekins make the dessert look more polished, and silicone molds can add fun shapes.
How I Prepare My Tools
I always start by washing and fully drying every tool; any moisture can change how the whipped topping behaves. I pick a clear glass dish when I want the colorful layers to show. If I’m using a decorative mold, I lightly oil it so the finished dessert unmolds cleanly. For hot water, I use a kettle so I can dissolve the Jello powder quickly and evenly. I also set bowls and spoons on a clean towel to avoid slips while folding or piping.
Tips at a glance:
- Clean and dry everything before use.
- Use a kettle for boiling water to dissolve Jello quickly.
- Lightly grease molds for easy release.
- Choose clear dishes to show layers.
- Keep an extra spatula on hand for scraping bowls.
These tools and simple prep steps save time and help me get consistent texture and a tidy final look.
Directions
Preparing the Whipped Topping
I chill a large mixing bowl and beaters briefly in the freezer to help the topping whip better. I pour 1 cup of cold milk into the bowl, sprinkle in one envelope of Dream Whip mix, and start on low speed for about 30 seconds to blend. Then I raise the speed to high and whip for roughly 4 minutes, until the mixture holds stiff peaks and feels light. I fold in 1 teaspoon of vanilla and place the whipped topping in the fridge while I make the gelatin.
Preparing the Gelatin Layer
I bring 1 cup of water to a boil and stir in one 3-ounce packet of flavored Jello until it dissolves completely. I add 1 cup of cold water, stir, and let the mixture cool to room temperature but not firm up. Cooling the gelatin prevents it from melting the whipped topping later. If I want fruit mixed in, I prepare it now so it stays ready and drains any excess juice.
Folding Whipped Topping and Gelatin
I pour the cooled Jello into the chilled whipped topping in small amounts, folding gently with a rubber spatula. I use slow, sweeping motions so the air in the whipped topping stays intact and the texture stays fluffy. I continue folding until the color and liquid are fully blended and the mixture looks smooth and even. At this point I may fold in fruit pieces or crushed cookies, using care to keep the mixture light.
Cooling and Final Setting
I spoon or pour the combined mixture into a refrigerator-safe dish or individual cups, smoothing the top as needed. For layered desserts, I add a base of crushed graham crackers or a pre-set gelatin layer before adding the whipped mixture. I cover the dish tightly with plastic wrap and chill for 2–3 hours, or until the dessert is firm to the touch. Before serving, I garnish with simple toppings like fruit slices, shaved chocolate, or sprinkles.
Variations And Flavor Ideas
1. Timeless Fruit Combos
I like matching Jello flavors with fresh fruit to keep flavors simple and familiar. Try strawberry Jello with sliced strawberries, orange Jello with mandarin segments, or raspberry Jello with fresh raspberries or blackberries. For a bright contrast, pair lemon Jello with blueberries or pineapple chunks. Lightly tossing fruit in a teaspoon of sugar before layering helps the fruit taste sweeter and hold its texture.
2. Stacked Dream Whip Parfaits
I build parfaits by alternating clear layers of set Jello and fluffy Dream Whip in tall glasses. Between layers I add texture with crushed graham crackers, cookie crumbs, or granola. Small touches like shaved chocolate, toasted coconut, or a sprinkle of chopped nuts on top make each glass look finished and give a mix of textures.
3. Island-Inspired Versions
I switch to coconut milk when I want a creamier, tropical flavor. Pineapple Jello works great with diced mango and a sprinkle of toasted coconut flakes. You can also fold in a little shredded coconut into the Dream Whip or add macadamia nuts for a crunchy contrast.
4. Zesty Citrus Mixes
I combine lemon and lime Jello for a bright, tangy base. To boost citrus notes, I fold candied lemon or lime zest into the whipped layer. For extra zing, a thin ribbon of curd or a few candied citrus slices across the top gives a sharp, clean finish.
5. For Chocolate Fans
I swap the gelatin for a creamy chocolate pudding layer when I want a richer treat. I layer the chocolate pudding with Dream Whip and top it with dark chocolate shavings or mini chocolate chips. A dusting of cocoa powder or a drizzle of chocolate sauce makes it feel more indulgent without much extra work.
6. Fun, Kid-Focused Ideas
I create playful desserts children love by using bright colors and familiar candies. Use blue raspberry Jello with gummy fish for an “ocean” cup, or make thin rainbow layers of different Jello flavors and finish with sprinkles. Cookie pieces, gummy bears, or small chocolate candies act as edible decorations kids recognize.
7. Cheesecake-Style Blends
I mix softened cream cheese into prepared Dream Whip to create a smooth, cheesecake-like layer. Cherry or strawberry Jello pairs well with this base. A spoonful of cherry pie filling or a few whole berries on top makes it look like a classic no-bake cheesecake.
8. Holiday and Seasonal Takes
I pick colors and add simple props to match holidays. For Christmas I alternate red and green layers; for Halloween I use orange Jello with crushed chocolate cookies for a “dirt” look. For Valentine’s Day I add heart-shaped fruit or pink-tinted whipped layers to keep the dessert festive and themed.
Make-Ahead Instructions
Step 1: Ready the Components and Mixes
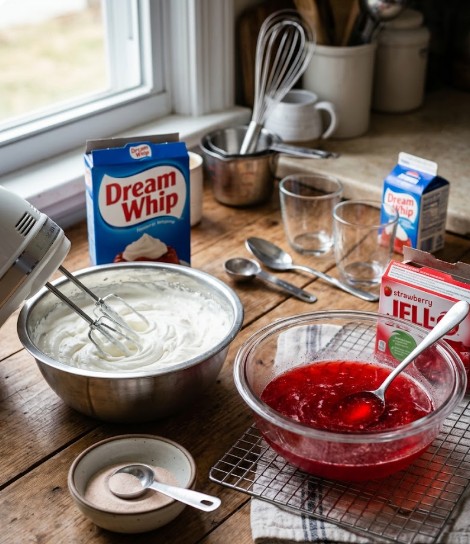
I prepare each component separately. I mix the Dream Whip powder as the recipe directs and dissolve the gelatin in hot water, then chill both until they start to set. For layered cups or parfaits, I cool every layer on its own so each stays firm and neat when I stack them.
Step 2: Put Together and Refrigerate
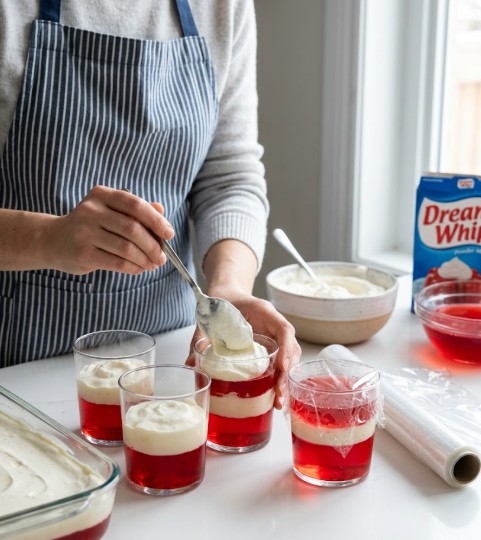
I assemble the dessert only after all parts are chilled. I spoon or pour layers carefully and smooth the tops for clean lines. I cover the dish tightly with plastic wrap or a lid to stop a skin from forming and to keep the dessert moist.
Step 3: How Long to Keep It
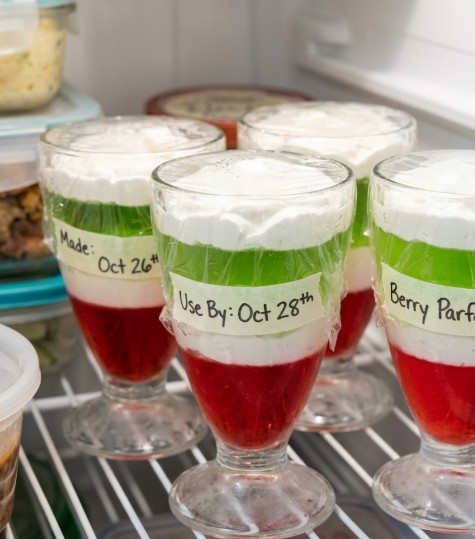
I follow safe storage times to keep texture and flavor:
- Refrigerator: up to 48 hours for best quality.
- Freezer: up to 1 week, though freezing may change the texture slightly.
I label containers with the date so I know when I made them.
Step 4: Add Toppings Right Before Serving
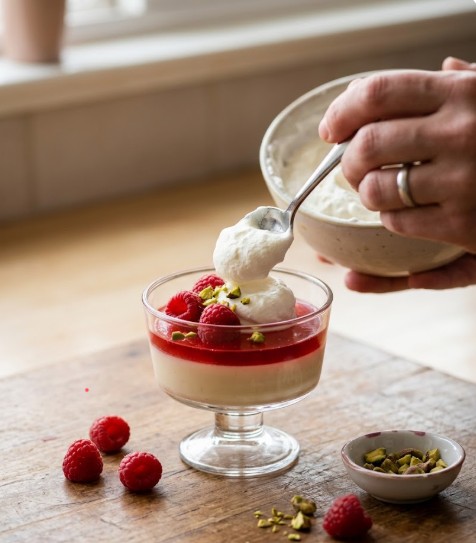
I save fresh garnishes for the last minute. I add fruit, cookie crumbs, toasted nuts, or extra whipped topping just before serving so they stay bright and crisp. This keeps the dessert looking and tasting fresh.
Tips For Success
1. Get the Whip Right
I always start with very cold milk when I whip Dream Whip.
I beat it until it holds firm peaks, then stop; over-beating thins the texture.
I tuck the whipped mixture into the fridge while I work on the Jello so it stays stable.
2. Fully Dissolve the Gelatin
I pour boiling water onto the Jello powder and stir for at least two minutes so no grains remain.
I then mix in cold water to cool it, but I do not let it gel before combining with the whipped part.
If I add fruit, I fold it in while the Jello is still liquid so it disperses evenly.
3. Build Clean Layers
When I layer desserts, I chill each layer briefly—about 15–20 minutes—before adding the next.
I spread each layer gently with a spatula to keep lines neat and prevent colors from running.
Working in shallow dishes makes even layers easier to control.
4. Add Extras at the Best Moment
I chop fruit into small pieces and pat them dry to cut moisture.
I fold mix-ins in slowly and gently so the whipped airiness stays.
For crunchy items, I add them last or reserve some for topping to keep textures crisp.
5. Chill Until Firm
I refrigerate the finished dessert for at least 2–3 hours so it sets properly.
I cover it with plastic wrap to protect flavors and stop the dessert from drying out.
If I need it firmer, I give it extra time rather than rushing service.
6. Use Practical Tools
I use separate bowls for whipping and dissolving to avoid accidental setting.
An electric mixer speeds up reaching stiff peaks, and a flexible spatula helps fold without deflating.
I measure liquids and powders precisely to keep textures consistent.
7. Finish with Thoughtful Toppings
I add garnishes only right before serving to keep them fresh and attractive.
I pick toppings that match the texture—soft fruit for flavor and small crunchy bits for contrast.
When serving guests, I sometimes offer a small selection of toppings so they can customize.
8. Try Small Changes and Track Results
I test one change at a time—new fruit, different Jello flavor, or a swap in texture—so I can tell what works.
I note what I liked and what I would change next time.
That way I improve recipes while keeping reliable steps the same.
Closing Thoughts
I find Dream Whip paired with Jello a reliable way to make quick, crowd-pleasing desserts. I like how simple steps and a few pantry items can yield bright flavors and fun textures.
I often swap colors, add fruit, or layer mixtures to keep things fresh. With basic tools and small tweaks, I can turn a humble mix into something pretty and tasty.
I encourage trying one new variation each time I make these desserts. It keeps the process creative and makes each gathering a little more memorable.
Frequently Asked Questions
What exactly is a Dream Whip plus Jello treat?
I make a light, airy dessert by mixing prepared Dream Whip (powdered whipped topping) with flavored gelatin. The result is a fluffy, jiggly dessert that works for potlucks, holidays, or simple weeknight sweets. It’s simple to change the flavor and texture with different Jello flavors or add-ins.
Is it okay to prepare this dessert ahead of time?
Yes. I can mix everything and chill it in the fridge for 2–3 hours until it firms up. I recommend adding fresh garnishes like fruit or cookie crumbs right before serving for the best look and texture.
Which ingredients do I need to make this dessert?
I use:
- Dream Whip powder and cold milk
- One box of flavored gelatin (Jello)
- Boiling water and cold water
- Optional: vanilla extract, fresh fruit, crushed cookies, or chocolate shavings
What tools do I need to make it?
I use basic kitchen tools:
- Mixing bowls
- Electric or hand mixer
- Measuring cups and spoons
- A refrigerator-safe dish or individual glasses for setting
How do I make sure the gelatin fully dissolves?
I pour the gelatin into boiling water and stir until it disappears. Then I add the cold water and let the mixture cool until it’s no longer hot. Only then do I combine it with the whipped topping to avoid melting the fluff.
Can I change the flavors and mix-ins?
Yes. I swap Jello flavors freely and add fruits, cookie crumbs, or chocolate. Combining complementary flavors (like strawberry Jello with fresh strawberries) gives the best results. I keep proportions similar so the texture stays creamy.
How long should I chill it before serving?
I chill the dessert for 2–3 hours or until it’s set and holds shape. If I use large molds, I sometimes chill it longer, up to overnight, for firmer results.
Is it safe to add fresh fruit to the mix?
Yes. I fold in fruits like berries, pineapple, or mandarin oranges gently so they don’t break up. Some fruits (like fresh pineapple) can prevent gelatin from setting unless cooked or canned; I check that before adding.
What’s the best way to build a parfait-style version?
I layer the mixtures in clear glasses: start with a spoon of Dream Whip–Jello, add fruit or crushed cookies, then repeat. I finish with a garnish and chill the assembled parfaits until set.
How do I keep Dream Whip light and airy?
I make Dream Whip with cold milk and beat it until firm peaks form. I let it cool in the fridge before folding in the gelatin, and I stir gently to keep as much air as possible.
FAQs
- What makes Dream Whip and Jello work well together?
I find they blend textures and flavors: Jello gives bright taste and structure, while Dream Whip adds lightness and creaminess. Together they set into a fluffy, chilled dessert that holds fruit or layers well. - Are Dream Whip–Jello desserts safe to eat for most people?
Yes, they are generally safe if you follow package directions and check ingredients for allergies. People with gelatin or dairy sensitivities should choose alternatives like vegan gelatin or dairy-free whipped toppings. - How long do these desserts stay fresh in the fridge?
I recommend storing them covered for 2–4 days. After that texture and flavor can decline, and fruit may weep or break down. - Can I use fresh fruit, and does it affect setting?
You can use fresh fruit, but some fruits (like pineapple, kiwi, and papaya) contain enzymes that stop gelatin from setting unless cooked first. Canned or cooked fruit works reliably. - How do I fix a runny or overly firm Dream Whip–Jello dessert?
If runny, chilling longer or adding a bit more prepared gelatin (cooled) can help. If too firm, fold in a little extra Dream Whip or softened whipped topping to lighten texture. - How does this method compare to using Cool Whip or real whipped cream?
I find Dream Whip yields more stable, airy results and sets well into molded desserts. Cool Whip is ready-to-use and convenient, while real whipped cream gives richer flavor but may lose structure faster. - What simple tips improve the final result?
Chill the Jello until slightly thick before folding in Dream Whip for a fluffier texture. Use cold Dream Whip and drain any excess syrup from canned fruit to avoid watering down the dessert.
Conclusion
I recommend Dream Whip and Jell-O as a simple, reliable base for no-bake desserts that deliver consistent texture and flavor. They work well together for layered treats, fluffy salads, and light pies. I find the pairing particularly effective when you want quick, crowd-pleasing desserts with minimal fuss.
- Effectiveness: Dream Whip adds stable, airy structure while Jell-O supplies bright flavor and color. Together they set reliably when you follow package directions.
- Safety and ease: Both products are shelf-stable and safe when prepared as directed. They need only basic chilling, so they suit busy cooks and potluck hosts.
- Eco and practicality: Using shelf-stable mixes reduces food waste from fresh cream or complex fillings. I suggest portioning to avoid leftovers that may lose quality.
- Long-term choice: Pick recognizable, trusted brands and check expiration dates. Consistent ingredients make repeatable results more likely.
I encourage you to try a simple flavor combo, practice one reliable recipe, and then adapt it. Once you master the basics, you can expand to creative layers, fruit additions, and presentation styles to suit any occasion.