
How to Make Coffee on a Stove: Simple Steps for Rich, Consistent Brew
I love the smell of fresh coffee, and I make it on the stove whenever I don’t have a machine or I’m away from home. Stovetop brewing is simple and reliable: a pot, hot water, and good grounds let me make a strong, flavorful cup whether I’m camping, in a dorm, or fixing a broken coffeemaker.
I’ll show the basic gear I use, the easy steps I follow, and a few small tips that improve taste. These methods let me brew coffee anywhere, control strength and flavor, and enjoy a satisfying cup without fancy equipment.
Key Takeways
- Stovetop coffee uses minimal gear to brew a good cup.
- Simple steps give control over strength and flavor.
- Stove brewing works well at home, on trips, or in emergencies.
Understanding the Basics of Stovetop Coffee Making
Picking the right tools
I choose a simple stovetop brewer like a Moka pot for most stovetop coffee. It works well on a range of stoves and gives a strong, clean cup.
I also keep a grinder, a kettle, and a measuring spoon nearby. For other methods I might use a French press or pour-over gear.
Key parts of a Moka-style pot:
- Bottom chamber for water
- Middle basket for grounds
- Top chamber for brewed coffee
- A central tube, gasket, and safety valve
I learn how to assemble and disassemble the pot before I use it.
Getting amounts and grind correct
I measure coffee and water carefully. A good starting point is about 1 tablespoon of coffee per 6 ounces of water, then I adjust to taste.
I use a burr grinder when I can because it gives a steady, even grind.
For stovetop brewing I aim for a medium-coarse grind so water flows through but extraction stays balanced. If the coffee tastes weak, I make the grind finer or add a bit more coffee. If it tastes bitter, I make the grind coarser or reduce the dose.
Quick guide:
- Ratio: ~1 tbsp per 6 fl oz (adjust to taste)
- Grind: medium-coarse for most stovetop pots
- Grinder: burr preferred
Heating and making the brew
I fill the bottom chamber with water and set the heat to medium-low. I add the grounds to the basket and secure the top chamber.
I bring the water to a gentle boil and watch the pot closely. Once the coffee starts flowing into the top chamber, I keep the heat low to avoid boiling the brew.
Timing and temperature pointers:
- Start with medium-low heat to prevent scalding
- Aim for a steady, gentle flow of coffee into the top chamber
- Total brew time usually falls between 4–6 minutes depending on strength and pot size
I avoid high heat that causes rapid boiling and bitter flavors.
Troubleshooting common issues
If the coffee tastes weak or thin, I check these points:
- Was the grind too coarse? Try a finer grind.
- Did I use too little coffee? Increase the dose slightly.
If the coffee tastes harsh or bitter:
- Try a coarser grind.
- Lower the heat to avoid boiling the brew.
If coffee stops flowing or the taste is odd:
- Clean the stem, gasket, and valve. Clogs reduce flow and can change flavor.
- Make sure parts fit tightly and the seal is clean.
I keep a small cleaning routine so the pot performs consistently.
Practical steps and everyday tips
I clean the pot after each use and deep-clean the gasket and valve weekly. This keeps flavor clean and parts working.
I store beans whole and grind just before brewing to keep the aroma and taste fresh.
Simple habits that help:
- Use fresh, roasted beans and grind just before brewing.
- Preheat the water in the kettle to shorten stovetop time.
- Start with the suggested ratio, then tweak by small amounts until it matches your taste.
- Keep a thermometer or learn stove settings to keep heat steady.
I experiment in small steps: change one variable at a time (grind, dose, or heat). This helps me learn what each change does to the final cup.
Step-by-Step Guide to Making Coffee on a Stove
What you need to brew
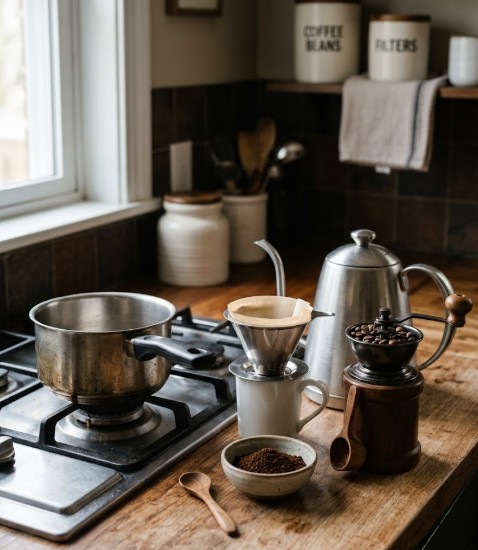
I use a few basic items to make stove-top coffee:
- A medium pot (holds at least 2–3 cups).
- A heat-safe filter or a small metal basket.
- Fresh coffee beans or ground coffee.
- A grinder if I start with whole beans.
- A spoon or coffee scoop and a kettle or water source.
I keep everything near the stove so the process stays smooth and quick.
How much coffee and water to use
I follow a simple ratio to start: 1 tablespoon of ground coffee for every 6 ounces (about 180 ml) of water.
- For a stronger cup, I add a little more coffee.
- For a milder cup, I use less coffee or a bit more water.
I measure by spoon or scale to keep the strength steady. Small adjustments change flavor noticeably, so I tweak one variable at a time.
Ways I brew on the stove

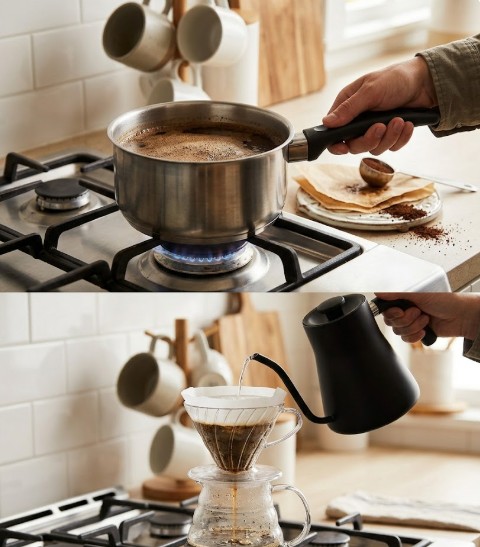
I use two main methods: immersion and pour-over.
Immersion method
- I add grounds directly to the pot.
- I pour in hot water to fully wet the grounds.
- I bring it to a gentle boil, then lower the heat and let it simmer 5–7 minutes.
- I strain the liquid through a heat-safe filter or metal basket into a cup.
This method gives a full-bodied, strong cup. I watch the heat so it doesn’t scorch and become bitter.
Pour-over method
- I place a filter in the basket or the pot.
- I put the grounds in the filter.
- I pour a small amount of hot water to bloom the grounds for 20–30 seconds.
- I continue pouring the rest slowly in circles until I’ve used the measured water.
- I wait for the drips to finish (about 5–7 minutes), then remove the filter and serve.
This method makes a cleaner, more delicate cup. I pour evenly and slowly to control extraction.
Practical tips for a better cup
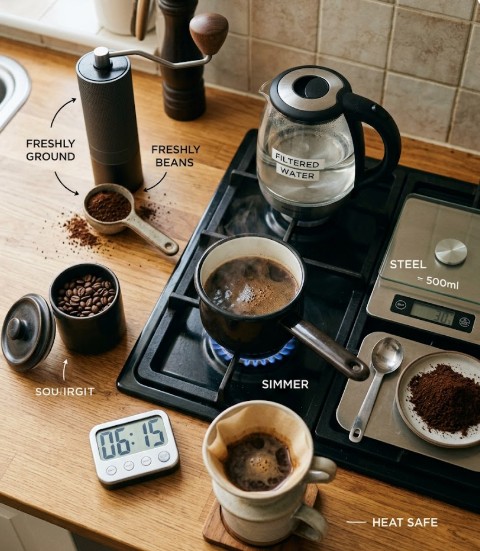
- I grind beans just before brewing for fresher flavor.
- I use filtered water to avoid off-tastes from minerals or chlorine.
- I avoid boiling the coffee hard; I prefer a gentle simmer or hot water below a rolling boil.
- I keep beans in an airtight container away from light and heat.
- I experiment with the 1 Tbsp : 6 oz starting point until I find my preferred strength.
Quick checklist I follow each time:
- Measure coffee and water.
- Heat water to near boiling, then adjust heat as needed.
- Time steep or drip for 5–7 minutes.
- Strain carefully and serve.
I stick to these steps and small tweaks until the cup matches my taste.
Step-by-Step Guide to Brewing Coffee on a Stove
What I Gather Before I Start

I check my gear and beans first. I pick whole beans when I can and grind them just before brewing. I set out a pot or my stovetop coffee maker, a spoon, and a timer. I also have a filter or cheesecloth ready if I plan to strain grounds.
How I Measure Coffee and Water
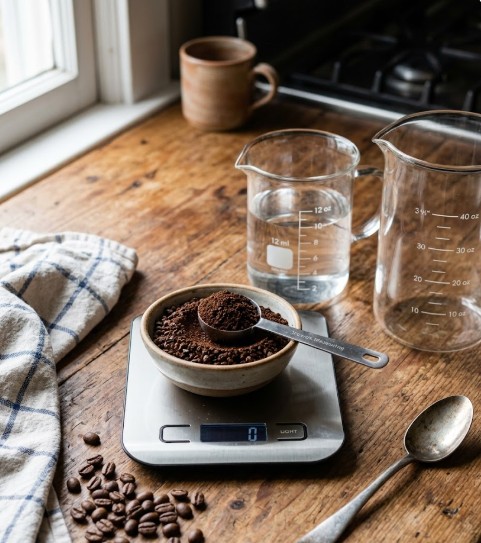
I aim for a clear ratio to keep results consistent. I use about 1 tablespoon of ground coffee per 6 ounces of water as a starting point. For larger batches, I scale up: 8 tablespoons for 48 ounces of water. For French press, I use a coarser grind and slightly more coffee because of the full-immersion method.
Quick reference table:
- 6 oz water — 1 tbsp coffee
- 24 oz water — 4 tbsp coffee
- 48 oz water — 8 tbsp coffee
I adjust the ratio a little each time until it matches my taste.
How I Brew on the Stove

I use one of two main methods depending on my gear.
Stovetop pot method:
- Heat the water until it almost boils, then remove from heat.
- Add the measured coffee to the hot water and stir so all grounds get wet.
- Let it steep for 3–5 minutes, using 3 for a milder cup and 5 for stronger.
- Strain the liquid through a filter or cheesecloth into a clean container.
- Serve immediately.
French press method:
- Bring water to a near-boil and pour it over the coarse coffee grounds in the press.
- Stir gently to fully saturate the grounds.
- Steep for 3–5 minutes, then press the plunger down slowly and evenly.
- Pour the brewed coffee into cups right away to avoid over-extraction.
I watch the timing and water temperature. Too-hot water or too-long steeping makes coffee bitter. Too-cool water or too-short steeping makes it weak.
My Tips and Simple Variations
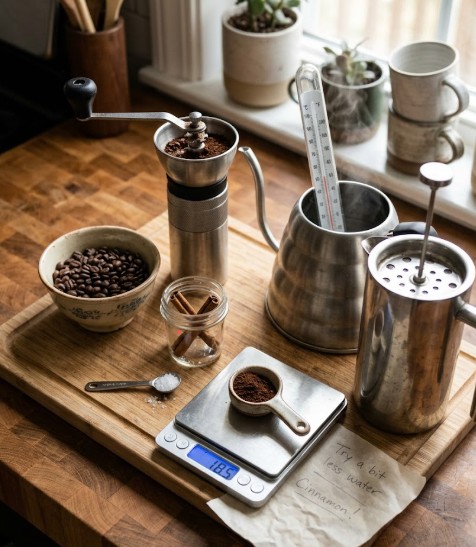
I keep these habits to improve flavor:
- Use fresh beans and grind them just before brewing.
- Try small ratio tweaks: add or subtract a teaspoon per cup until it suits you.
- Control temperature: aim for water just off the boil (about 200°F / 93°C) for best extraction.
- Add a pinch of salt or a small stick of cinnamon to the grounds for a different taste.
- For richer coffee, slightly finer grind; for cleaner cup, go coarser.
- If I lack a strainer, I let grounds settle a few minutes before pouring slowly.
I recommend tasting and changing one variable at a time—grind size, amount of coffee, or steep time—so I know what made the difference.
Stovetop Coffee Brewing: The Basics
Gear You’ll Need
I use a stovetop coffee maker (Moka pot) as the main tool. It has three parts: a bottom water chamber, a middle basket for grounds, and a top collecting chamber.
I also keep a kettle or saucepan for hot water, a small spoon or scoop for measuring, and a heat source (gas or electric). A fine mesh filter or clean cheesecloth helps if I want extra clarity. A thermometer is optional but useful.
How I Brew It
- I pour cold water into the bottom chamber up to the safety valve or about an inch below the rim.
- I measure coffee. My starting point is 1 tablespoon of medium-fine ground coffee per 6 ounces of water, then I tweak to taste.
- I fill the basket evenly with grounds but do not tamp them down. I level the surface with the back of the spoon.
- I assemble the pot and screw the top on tightly.
- I heat the pot on medium-low. When steam pushes coffee into the top chamber, I lower the heat to avoid sputtering.
- I watch for a steady flow of coffee and remove the pot from heat when a gurgling sound starts or the top fills.
- I let it rest one minute, then pour. If I want clearer coffee, I strain it through a filter or cloth into a cup.
Helpful Hints and Ways to Change It
- Grind size: I use a medium-fine grind. Too fine clogs the filter; too coarse makes weak coffee.
- Water temp: I aim for water just below boiling (195–205°F / 90–96°C) for best flavor.
- Strength: I adjust coffee amount to change strength. Use a bit less for milder coffee and more for a stronger brew.
- Bean choice: I prefer Arabica for cleaner taste; darker roasts give bolder, richer notes.
- Preheating: Warming the water first shortens brew time and can cut bitter flavors.
- Flavors: I sometimes add a pinch of cinnamon or a drop of vanilla after brewing for a mild twist.
Problems I Fix and How
- Bitter coffee: I reduce heat, shorten brew time, or use slightly cooler water. I may also use fewer grounds.
- Weak coffee: I add more coffee or use a finer grind. Increasing brew time slightly can help.
- Blocked pot: I disassemble and rinse the funnel and filter plate. Soaking in hot water loosens stuck grounds.
- Sputtering or burnt taste: I lower the heat so the brew flows smoothly, and I remove the pot as soon as the top chamber fills.
Wrap-Up
I find stovetop brewing gives a bold, full cup with simple tools. Small changes in grind, heat, and ratio let me tune the flavor fast. Experimenting helps me find the right balance for my taste.
Key Takeaways
I focus on three simple areas to make great stovetop coffee: beans, temperature, and timing.
- Beans: I always pick fresh, high-quality beans and grind them just before brewing. I store beans in an airtight container away from light and heat.
- Water: I heat water to about 195°F–205°F (90°C–96°C). That range pulls the right flavors without over-extracting.
- Ratio: I use roughly 1:15 to 1:17 coffee to water. For a stronger cup, I edge toward 1:15; for a milder cup, I use 1:17.
I watch the brew time closely and fine-tune it to my taste. A 5–7 minute brew is a good starting point, but I shorten or lengthen that based on strength and bitterness. I also stir the grounds once or twice during brewing to help even extraction.
Tools I find useful:
- A small kitchen thermometer to hit the right water temperature.
- A scale to measure coffee and water precisely.
- A sturdy pot or stovetop brewer suited to my chosen method.
I experiment with roast level and grind size to change flavor. Darker roasts need less time and coarser grinds than lighter roasts. If my cup tastes weak, I increase coffee or grind finer; if it tastes bitter, I reduce time or go coarser.
Quick checklist:
- Fresh beans? Yes.
- Water at 195°F–205°F? Check.
- Coffee around 1:15–1:17? Set.
- Brew time 5–7 minutes, adjusted as needed? Done.
I repeat these steps and tweak one variable at a time until the cup matches what I want.
Frequently Asked Questions
I get a lot of the same questions about making coffee on the stove. Below I answer the most common ones clearly and simply.
What exactly is stovetop coffee?
- Stovetop coffee is brewed in a Moka-style pot that has three parts: a bottom water chamber, a filter basket for grounds, and a top chamber where brewed coffee collects. Heat pushes water up through the grounds so you end up with a strong, concentrated cup.
How does the pot actually make coffee?
- When the water in the lower chamber heats, steam pressure forms. That pressure forces hot water through the coffee in the filter basket. The brewed coffee rises and gathers in the top chamber, ready to pour.
Why choose stovetop brewing instead of other methods?
- I like stovetop brewing because it’s inexpensive, simple, and gives a bold, aromatic cup. You can control strength by changing grind size, dose, and heat. It also works without electricity if you use a camp stove.
How should I start if I’ve never used a Moka pot?
- Fill the bottom chamber with cold water up to the safety valve. Add finely ground coffee to the basket without packing it down. Screw the top on tight and place the pot on medium heat. When you hear bubbling or gurgling, remove it from heat and pour.
My coffee tastes bitter — what can I change?
- Bitterness usually means over-extraction. Try one or more of these: use slightly less coffee, use a coarser grind, lower the heat, or stop the brew a bit earlier. Fresh beans and a clean pot also reduce off-flavors.
Is the result like espresso?
- The coffee is stronger and more concentrated than drip coffee and closer to espresso in intensity. It is not true espresso because it doesn’t use the same pressure as an espresso machine, but it makes a rich, bold brew that works well with milk.
How do I pick the right grind?
- Aim for a fine to medium-fine grind. If the grind is too fine, the brew can be bitter and take longer. If it’s too coarse, the coffee may taste weak. Small adjustments help you find the best balance.
How much coffee should I use?
- Follow the pot manufacturer’s guideline or a simple ratio: about one level scoop per cup-size chamber. If the coffee is too strong, reduce the dose; if too weak, add a little more ground coffee.
How do I clean and care for my pot?
- Rinse each part with hot water after use and dry thoroughly. Avoid soap or abrasive cleaners because they can affect flavor. Replace worn gaskets and check the safety valve occasionally.
What does a Moka pot cost?
- You can buy a basic, good-quality Moka pot for roughly $20–$40. Larger or brand-name models cost more, but even those remain reasonably priced compared to many electric machines.
Final Thoughts
I found stove-top coffee to be a practical, low-cost way to enjoy good coffee at home. It takes only a few tools and a bit of practice to control strength, heat, and brewing time so the cup matches my taste.
I like that this method scales easily. I can make a single mug for myself or a larger pot for guests without extra machines. That flexibility helps me avoid waste and keeps coffee fresh when I brew just what I need.
I also value the control it gives me over each variable. I choose beans, grind size, water temperature, and steep time to shape flavor. Small tweaks—darker roast, finer grind, a longer steep—change aroma and bitterness in ways I can taste and learn from.
Practical tips I use:
- Measure coffee and water for consistent results.
- Keep heat moderate to avoid burning the coffee.
- Let grounds settle a minute before pouring to reduce sediment.
Benefits I notice:
- Lower cost compared with frequent café visits.
- Less equipment to clean and maintain.
- A calm, hands-on ritual that fits my morning routine.
I encourage trying short experiments: change one thing at a time and note the result. Share a pot with friends and compare preferences. Mistakes are useful; they teach what to adjust next.
If you want a reliable everyday method with few barriers, stove-top brewing delivers. It rewards attention and curiosity, and over time it becomes a simple, enjoyable ritual that fits my life.
FAQs
Q1: Can I make a good cup of coffee on the stove?
I can get a very good cup on the stove. Using fresh beans, the right grind, and controlled heat gives clear flavor. Methods like boiling in a saucepan, a Moka pot, or a pour-over with a kettle each produce different strengths and notes.
Q2: Is stove-top brewing safe?
Yes, stove-top brewing is safe when I watch the pot and use proper tools. I keep handles away from heat, use low to medium heat to avoid boil-overs, and remove the pot from flame when coffee starts to rise. Hot liquid and steam can burn, so I handle with care.
Q3: How do I avoid gritty coffee when I brew on the stove?
I prevent grit by using the right grind and settling time. For saucepan boiling, I use a medium to coarse grind and let grounds settle a minute before pouring. For Moka or percolator styles, I use a fine to medium grind and a filter or the device’s built-in trap to keep grounds out.
Q4: Which stove method gives the strongest coffee?
I find the Moka pot or a concentrated saucepan brew gives the strongest, richest cup. They extract more oils and solids than a quick drip. If I want espresso-like intensity, I use a Moka pot with finely ground beans.
Q5: How much coffee and water should I use?
A reliable starting ratio I use is 1 to 15–17 by weight (1 g coffee to 15–17 g water). For simple measures, use about 1 to 2 tablespoons of coffee per 6 ounces (180 ml) of water and adjust to taste.
Q6: How do I clean my stove-top coffee gear?
I rinse pots and filters right after use to prevent stains and buildup. For Moka pots, I disassemble and wash with warm water only—no soap—to protect the metal and flavor. I descale if I see mineral deposits from hard water.
Q7: How does stove-top brewing compare to electric coffee makers?
Stove-top brewing gives me more control and can produce bolder flavor. Electric makers offer convenience and consistency. If I want hands-on flavor tuning, I use the stove. If I need speed and ease, I use an electric machine.
Conclusion
I recommend stove-top coffee for its simple, reliable results and low waste. It uses basic tools like a saucepan, moka pot, or French press and avoids single-use pods and complex machines. That makes it safer for the planet and kinder to your budget.
Key benefits I find most useful:
- Easy to control strength and flavor by adjusting water, grind, and time.
- Minimal equipment reduces repair and replacement needs.
- Low energy use compared with many electric brewers.
Safety tips I follow:
- Watch the pot while heating to prevent boil-overs.
- Use the right grind for your method to avoid blockages or sputtering.
- Handle hot metal and steam with care to prevent burns.
If you want a straightforward, eco-friendly way to get great coffee, pick a sturdy stovetop method and stick with it. A well-chosen moka pot or simple saucepan routine will serve you well for years. Try it today and keep refining your technique until it matches your taste.