
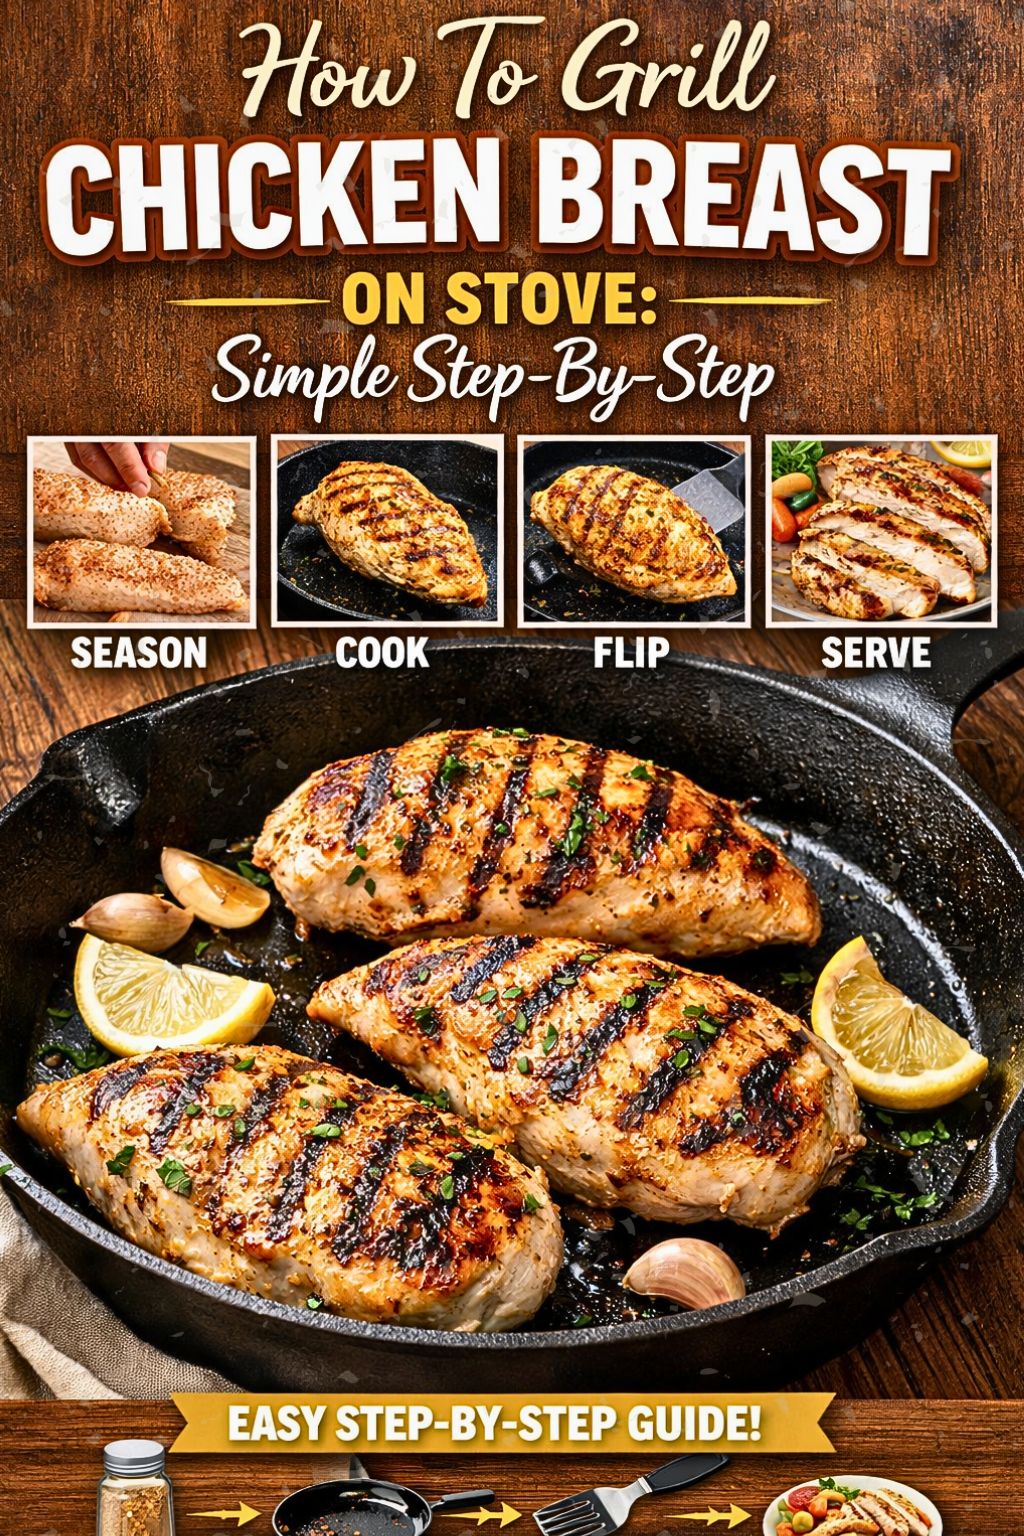
How To Grill Chicken Breast On Stove: Step‑By‑Step
I love cooking because simple ingredients can become great meals. In this guide, I will show you how to grill chicken breast on the stove so you get juicy, flavorful results without a backyard grill. I focus on easy steps that work for weeknights and special dinners alike.
I will walk you through what you need, the basic technique, and small tips that make a big difference. You’ll learn how to prepare, cook, and store stovetop grilled chicken, plus simple ideas for sides and variations to keep meals interesting.
Key Takeaways
- Learn a clear stovetop method that yields juicy, well-cooked chicken.
- Find easy prep steps, timing tips, and simple ingredient choices.
- Get storage advice and quick serving ideas to use the chicken in many meals.
The Lowdown on Grilling Chicken Breast on the Stove
I use a hot pan to mimic outdoor grilling, getting a browned crust and juicy inside without a backyard grill. A cast-iron or heavy grill pan gives the best sear. I pat the breasts dry, season or marinate them, then cook over medium-high heat until a golden crust forms and the center reaches 165°F (75°C).
Quick tips:
- Let the pan get very hot before adding chicken.
- Don’t crowd the pan — cook in batches.
- Rest the meat 5 minutes after cooking to keep it moist.
This method saves time and works in any weather.
Why You’ll Love This Way
I grill chicken on the stove because it’s fast and hardly ever fails. It saves time on weeknights and still gives a juicy result. I can easily change the seasonings to match any meal, so leftovers stay interesting. Bold flavors, quick cooking, and simple cleanup make this method a go-to when I want a tasty protein without extra fuss.
The Ingredients You’ll Need
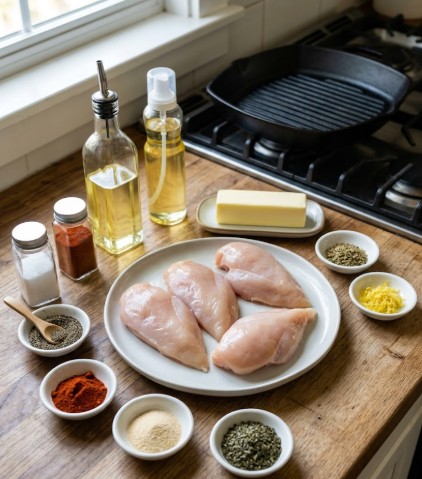
I gather simple pantry items and fresh chicken to keep this easy. You’ll want about 4 boneless, skinless chicken breasts (roughly 1 lb total). Season with salt and freshly ground black pepper to taste.
For cooking fat and searing, I use 3 tablespoons vegetable or canola oil plus a light spray of cooking oil to prevent sticking. I add 2 tablespoons unsalted butter near the end for extra moisture and flavor.
For dry seasoning, I mix:
- ½ teaspoon garlic powder
- ½ teaspoon onion powder
- ½ teaspoon smoked or sweet paprika
- ½ teaspoon dried basil
Optional boosts: ½ teaspoon dried oregano and ½ teaspoon lemon zest for a brighter finish.
Step by step instructions
I start by drying the chicken breasts with paper towels. A dry surface browns better, so I pat until no moisture remains. Then I sprinkle both sides with salt and black pepper, pressing the seasoning lightly into the meat.
If I have time, I toss the breasts in a quick marinade of olive oil, lemon juice, and herbs for at least 30 minutes. This boosts flavor and keeps the meat tender, but I skip it when I need dinner fast.
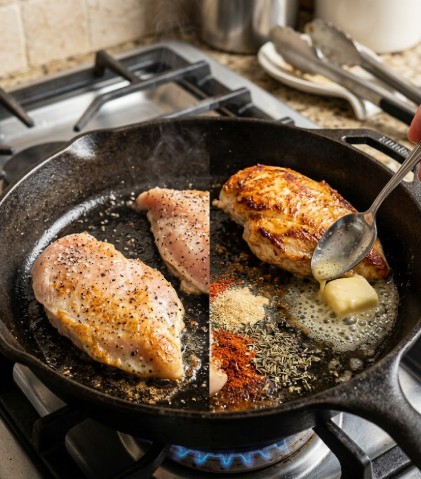
I preheat a large skillet over medium-high heat until it gets hot, then add a thin layer of vegetable or canola oil. I wait until the oil shimmers — that tells me the pan is ready.
I place the chicken into the pan one piece at a time, leaving space between each breast. The sizzle should be steady; if the pan is crowded the chicken steams instead of sears. I let each breast cook without moving it so a golden crust can form.
After about 6–7 minutes, when the underside is deep golden, I flip the breasts. Right away I add a knob of butter to the pan. As it melts, I tilt the pan slightly and spoon the butter over the chicken to baste it. Then I sprinkle garlic powder, onion powder, paprika, and any fresh or dried herbs I like.
I continue cooking the other side for another 5–7 minutes. I use an instant-read thermometer and pull the chicken when the thickest part reads 165°F (75°C). If you don’t have a thermometer, cut a small slit to check that the juices run clear and the meat is no longer pink.
Once done, I remove the chicken to a plate and cover it loosely with foil. I let it rest for about five minutes so the juices settle back into the meat. This step makes slices juicier and prevents them from drying out.
Serving tip: slice the breasts against the grain and spoon any pan juices or remaining butter over the top. A quick sprinkle of fresh herbs or lemon zest brightens the final dish.
Tips & Tricks
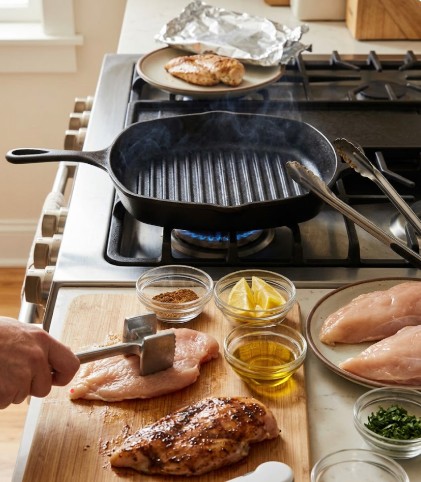
I pound chicken to an even thickness so it cooks the same across the breast. Letting it sit at room temperature for 20–30 minutes helps me avoid undercooked centers. I always preheat the pan until it’s very hot to sear, not simmer, which gives better texture. After cooking, I let the meat rest a few minutes so juices redistribute. I like to test different marinades—from tangy to smoky—to find new favorite flavors.
Can I Store Grilled Chicken?
I store grilled chicken in airtight containers in the fridge for 3–4 days.
Let it cool slightly before sealing to keep texture and safety.
What Can I Serve with Grilled Chicken?
I pair grilled chicken with simple, tasty sides that balance flavor and texture. Try grilled zucchini, bell peppers, or asparagus for smoky veggies. Serve on a bed of rice pilaf or alongside a hearty pasta. A mixed green salad with nuts or cheese adds freshness. Crispy potato wedges give a satisfying crunch. Mix and match for variety.
Variations to Try
I like to switch up the basic recipe with simple twists. Try a lemon-and-herb mix—zest, thyme, and rosemary—for a bright, fresh taste. For richer flavor, brush on BBQ sauce near the end for a sticky, smoky glaze. Swap in Cajun seasoning to give the chicken some heat and bold spices. For lighter, briny notes, toss the chicken with olive oil, dried oregano, and capers. If I want sweet-tang, I marinate briefly in a honey-and-mustard blend before cooking.
Grill Chicken Breast On Stove
What I Use
- 4 boneless, skinless chicken breasts (about 1 lb total)
- Salt and freshly ground black pepper, to taste
- 3 tbsp neutral oil (vegetable or canola), divided
- Cooking spray (optional)
- 2 tbsp unsalted butter, divided
- 1/2 tsp garlic powder
- 1/2 tsp onion powder
- 1/2 tsp smoked or sweet paprika
- 1/2 tsp dried basil
- 1/2 tsp dried oregano (optional)
- Zest of 1/2 lemon (optional)
I list ingredients here so you can gather everything before heating the pan.
How I Cook It
- Pat each breast dry with paper towels and season both sides with salt and pepper.
- (Optional) Toss chicken in a simple quick marinade of oil, lemon juice, and herbs for 30 minutes if you have time.
- Preheat a large skillet or grill pan over medium-high heat. Add 1–2 tbsp oil and wait until it shimmers.
- Place chicken in the hot pan without crowding. You should hear a steady sizzle.
- Cook on the first side for 6–7 minutes without moving the pieces, until a golden crust forms.
- Flip the breasts, add the remaining oil and 1 tbsp butter. Sprinkle garlic powder, onion powder, paprika, basil, and oregano over the top. Spoon melted butter over the chicken as it finishes.
- Continue cooking 5–7 minutes more, or until the internal temperature reaches 165°F (75°C). Use an instant-read thermometer for accuracy.
- Remove chicken to a plate and let it rest for about 5 minutes before slicing. This keeps the meat juicy.
Use even thickness for uniform cooking. If breasts are uneven, pound them gently to a consistent thickness first.
Tips and Small Tricks
- Pound breasts to the same thickness so they cook evenly.
- Let chicken sit at room temperature 20–30 minutes before cooking if possible.
- Keep the pan hot enough to sear; a good crust improves texture.
- Rest cooked chicken for 5 minutes to let juices settle.
- Try different marinades or spice blends for variety (BBQ, Asian, or lemon-herb work well).
Bold: use a thermometer. Italic: baste with butter. These small steps change the result.
Estimated Nutrition
| Measure | Amount per serving |
|---|---|
| Calories | 165 kcal |
| Protein | 31 g |
| Fat | 4 g |
Values are estimates per serving (four servings total). Adjust if you change portion sizes or add sauces.
Frequently Asked Questions
Can I cook chicken straight from the freezer?
I prefer to thaw chicken in the fridge overnight. Cooking frozen breasts straight in the pan risks uneven cooking and a cold center. If I must cook from frozen, I lower the heat and allow much more time, but thawing first gives the best result.
How do I tell the chicken is fully cooked?
I always use an instant-read thermometer. The thickest part should reach 165°F (75°C). I also look for clear juices and no pink in the center, but the thermometer is the most reliable.
Is oil required to grill chicken on the stove?
I don’t always use oil, but a bit helps with browning and prevents sticking. For fewer calories, I use a light nonstick spray or a quick brush of oil on the chicken instead of pouring oil into the pan.
How can I stop chicken from drying out?
I pound breasts to even thickness, sear over medium-high heat, and let the meat rest for a few minutes before slicing. These steps keep the juices inside.
What’s the simplest way to add flavor?
I marinate for at least 30 minutes or rub with spices and herbs before grilling. Even a short marinade boosts flavor.
Closing Thoughts
I find stovetop grilling one of the easiest ways to get flavorful, juicy chicken without needing an outdoor grill. With a hot pan, a short cook time, and a bit of seasoning or a quick marinade, the chicken browns nicely and stays tender inside.
Cook each breast until it reaches 165°F (74°C) and then rest it for a few minutes so the juices redistribute. That small pause makes a big difference in texture and keeps slices from drying out.
Tips I use: pat the meat dry before seasoning, let the pan get hot, and avoid overcrowding. If you want extra flavor, finish with a squeeze of lemon or a sprinkle of fresh herbs.
Try this method for weeknight dinners or for feeding friends. It’s fast, reliable, and produces tasty results with minimal equipment and prep.
FAQs
Q: How do I get juicy chicken breast on the stove?
I brine or marinate the breasts for at least 20 minutes to add moisture. I pat them dry, season, and cook over medium-high heat in a hot pan to seal juices. I finish until the internal temperature reads 165°F (74°C).
Q: Is cooking chicken on a stovetop safe from food-safety view?
Yes. I use a meat thermometer to confirm the thickest part reaches 165°F (74°C). I avoid cross-contamination by using separate plates and utensils for raw and cooked chicken.
Q: What pan works best for stovetop “grilling”?
I prefer a cast-iron or heavy grill pan because it holds heat and makes good sear marks. A nonstick skillet works too if you want less sticking, but it gives less char.
Q: How long should I cook each side?
Timing varies by thickness. For average 1-inch breasts, I sear 4–6 minutes per side over medium-high heat, then rest 5 minutes. Thicker pieces need a few more minutes or finishing in a low oven.
Q: How can I add smoky flavor without an outdoor grill?
I use a hot grill pan to get char and add a small smoked paprika or liquid smoke in the marinade for more smoke taste. Finishing the chicken briefly under a broiler can also deepen the char.
Q: How do I keep the chicken from drying out?
I flatten breasts to even thickness, brine or marinate, avoid overcooking, and let them rest. Resting for 5 minutes redistributes juices and keeps meat tender.
Q: How does stovetop grilling compare to outdoor grilling?
I find stovetop grilling gives good sear and flavor but less real smoke and open-flame char. It’s faster, works in bad weather, and needs less space and setup than outdoor grilling.
Final Thoughts
I find stove-top grilling of chicken breast to be a fast, reliable way to get juicy, well-seared results without an outdoor grill. When I use a hot grill pan or cast-iron skillet, trim and even out the breast thickness, and monitor temperature with a thermometer, the chicken cooks evenly and stays moist.
- Effectiveness: A hot pan and proper prep deliver a nice crust and tender interior.
- Safety: I always cook to 165°F (74°C) internal temperature to ensure the chicken is safe to eat.
- Eco-friendliness: Cooking indoors on a stovetop uses less energy than heating a large outdoor grill, especially for small meals.
- Suitability: This method works well for quick weeknight dinners, meal prep, and when weather or space limits outdoor grilling.
I recommend choosing sturdy cookware (cast iron or a heavy grill pan) and a reliable instant-read thermometer for consistent results over time. Try the method with a simple marinade or seasoning, and you’ll see how dependable stove-top grilling can be for everyday meals.

