How to Can Vegetables With a Pressure Cooker: Step‑By‑Step Guide for Safe, Shelf‑Stable Preserving
I have learned that pressure canning vegetables makes it simple to keep fresh produce on hand all year. Using a pressure cooker lets me preserve low-acid foods safely and efficiently, so I can save garden harvests, cut food waste, and avoid some store-bought options.
I will walk you through what I use, the safety steps I follow, and the basic techniques that give reliable results. This guide focuses on choosing the right gear, prepping vegetables, and following tested methods so you can get consistent, shelf-stable jars.
Key Takeaways
- Learn how pressure canning extends the life of fresh vegetables.
- Follow clear safety steps and use proper equipment for safe canning.
- Proper preparation and tested methods help achieve reliable results.
Preparing for Pressure Canning: Safety Precautions and Equipment
Knowing the Hazards of Pressure Canning
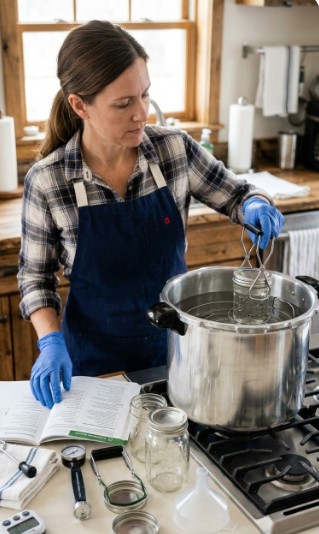
I recognize that pressure canning uses high heat and steam.
If I misuse the cooker, pressure can build up and cause burns, scalds, or even a dangerous release of hot contents.
Improper processing or storage can let harmful bacteria, like Clostridium botulinum, survive and make food unsafe.
Steps I Take to Stay Safe
I always follow the canner maker’s instructions exactly.
I work in a well-ventilated space and keep children and pets away.
I monitor pressure with a reliable gauge and never leave the canner unattended while it builds or holds pressure.
I use the correct pressure and processing time for the food and my elevation.
I open the canner only after pressure drops to the safe level and I follow the manufacturer’s release steps.
I clean the canner, jars, and work area before and after each use to avoid contamination.
Tools and Supplies I Use
I keep the following items on hand:
- Pressure canner (with clear markings and a working gauge)
- Tested canning jars and new lids made for canning
- Jar lifter, canning funnel, and a magnetic lid lifter
- Heat-resistant gloves or mitts and a long-handled spoon
- Clean towels and a timer
Table: Basic gear and purpose
| Item | Why I use it |
|---|---|
| Pressure canner | Creates and maintains required temperature and pressure |
| Pressure gauge | Shows and verifies correct pressure level |
| Canning jars & lids | Seal safely under pressure and heat |
| Jar lifter & funnel | Reduce spills and burns when handling hot jars |
| Gloves & towels | Protect me from hot steam and surfaces |
Picking the Best Pressure Canner for Me
I choose a canner that fits the jars I plan to use and my stove type.
I prefer models with a metal-valve gauge I can test or a dial gauge I can calibrate.
I check that replacement parts and lids are easy to find.
If I’m at high elevation, I make sure the canner lets me reach the higher pressure needed or that I can adjust processing as required.
Preparing Vegetables for Pressure Canning
Cleaning and Rinsing Produce
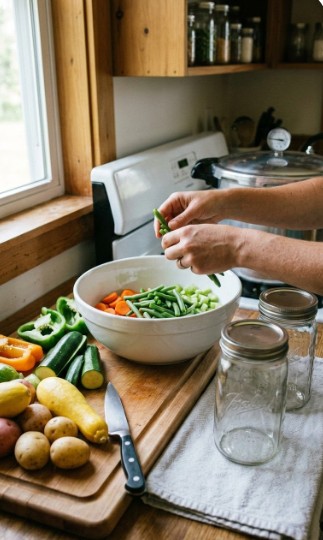
I start by removing dirt and debris with cold running water. I gently rub or scrub root vegetables with a soft brush to get rid of stubborn soil.
I wash other vegetables under the tap, handling delicate leaves carefully so they don’t bruise. I do a final rinse to remove any soap or cleaner and let items drain or dry briefly on a clean towel.
Trimming and Cutting for Jars
I trim off stems, damaged spots, and any inedible parts before cutting. I slice or chop vegetables into uniform pieces so they cook evenly in the canner.
For leafy greens I chop coarsely; for roots I cut into slices or cubes that match processing times; for tomatoes I quarter, crush, or peel depending on the recipe. I keep pieces consistent in size to avoid overcooking or underprocessing.
Filling Jars and Headspace Tips
I pack jars so they hold the right amount without crushing the produce. I leave the recommended headspace—usually about 1 inch—to allow for expansion during processing.
I add hot water, broth, or brine as the recipe calls for, pouring gently to remove large air pockets. I wipe jar rims with a clean, damp cloth, center the lid, and screw on the band fingertip-tight before placing jars in the pressure canner.
- For leafy vegetables: I pack more tightly to reduce settling.
- For root crops: I pack loosely to avoid crushing.
- For tomatoes: I pack gently and add liquid to cover.
I always follow tested recipes and headspace guidelines for each vegetable to keep the jars safe and properly processed.
Choosing the Right Vegetables for Pressure Canning
Low-acid picks that need a pressure canner
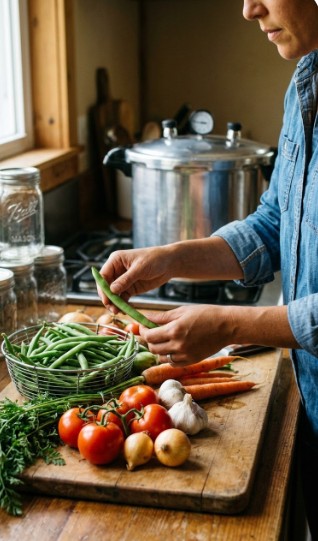
I pick vegetables with low acidity for pressure canning because they need higher temperatures to stay safe. These have a pH above 4.6 and include beans (green, lima, snap), corn, peas, potatoes, winter squash, pumpkin, broccoli, carrots, and green beans.
I never use a boiling water bath for these items. A pressure canner reaches the heat needed to destroy dangerous bacteria such as Clostridium botulinum. Follow tested recipes and processing times for each vegetable to make sure jars are safe.
Higher-acid options fit for a water bath
I reserve boiling water bath canning for foods that are naturally acidic or have added acid. These have a pH of 4.6 or lower and commonly include tomatoes (often with added acid), pickled cucumbers and peppers, salsas, and relishes.
Because acid inhibits harmful bacteria, a water bath can safely preserve these items when you use trusted recipes. When in doubt about acidity, I use a pressure canner or follow a tested method that adds acid to reach a safe pH.
Preparing Vegetables for Pressure Canning
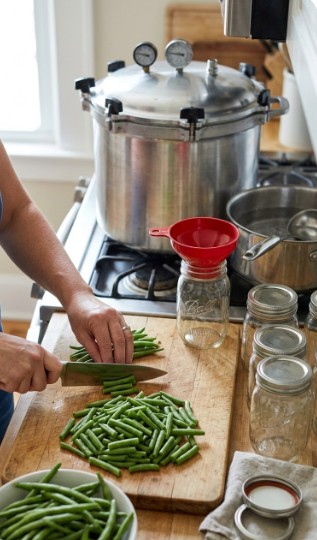
Washing and Picking Through
I wash every vegetable under cool running water and use a brush for any stubborn dirt. I discard bruised, soft, or moldy pieces and only keep firm, fresh produce. Sorting by size and ripeness helps me pick jars that will process evenly.
Stripping Skins and Cutting to Size
I remove peels when needed — especially from roots like potatoes and carrots — because skins can stay tough after canning. I cut vegetables into even chunks, usually about 1–2 inches, so heat reaches all pieces at the same rate. Uniform sizes give consistent texture in the jars.
Quick Blanching to Lock Color and Firmness
I blanch vegetables briefly in boiling water, then cool them fast in ice water. This step stops enzymes that cause color loss and softening. Blanching keeps texture firmer and helps the vegetables look and taste better after canning.
Packing Jars with Room to Grow
I pack jars without overfilling and leave the proper headspace — generally 1–2 inches depending on the recipe. That gap allows food to expand during processing and helps form a safe vacuum seal. I tap jars gently or use a nonmetallic spatula to remove air bubbles before sealing.
Adding Liquid for Even Heat
I pour a hot canning liquid over the packed vegetables so they’re covered. I use water, broth, or a light juice based on the vegetable and my taste goal. The liquid ensures even heat transfer and prevents pieces from drying out during pressure processing.
Pressure Canning Process: A Step-by-Step Guide
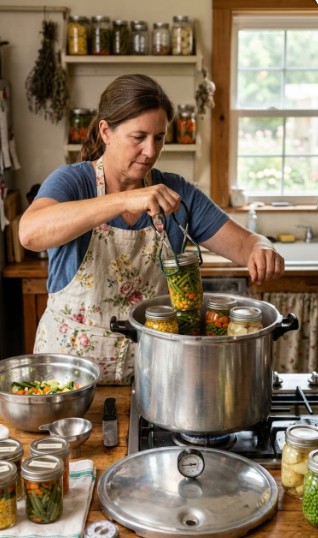
Gather Tools and Supplies
I collect all gear before I start to keep the process smooth and safe. I use a pressure canner made for home canning (not a regular pressure cooker), canning jars, new lids, and screw bands.
I also have a jar lifter, a wide funnel, a clean towel, and heat-resistant gloves or pot holders ready.
I check jars for chips and lids for defects so every piece is safe to use.
Ready the Canner and Jars
I follow the canner maker’s directions to set up the unit. I put the metal rack in the canner and add the right amount of water.
I pack my prepared vegetables into jars with the proper headspace, wipe rims, place lids and rings finger-tight, and arrange jars on the rack so they do not touch.
I set the canner lid in place and secure it before I heat the unit.
Bring Up Pressure and Hold It
I heat the canner until steam begins to flow and then bring it up to the pressure the recipe calls for.
When the gauge or weight shows the target pressure, I lower the heat enough to hold that pressure steady.
I watch the gauge and adjust heat so pressure stays constant for the entire processing time.
Process for the Required Time
I start timing once the canner reaches and maintains the proper pressure.
I use tested times from reliable canning guides based on my vegetable type, jar size, and altitude.
I do not lift the lid or disturb the canner during processing; I let the jars do their work until the timer runs out.
Take Out Jars and Let Them Set
When time is up, I turn off the heat and let pressure drop naturally to the safe level before opening.
I remove jars with the lifter and place them upright on a clean towel, leaving space between them to cool.
I let jars sit undisturbed for 12–24 hours, listen for lids to pop, and then press each lid center to confirm a firm seal.
Preparing Vegetables for Pressure Canning
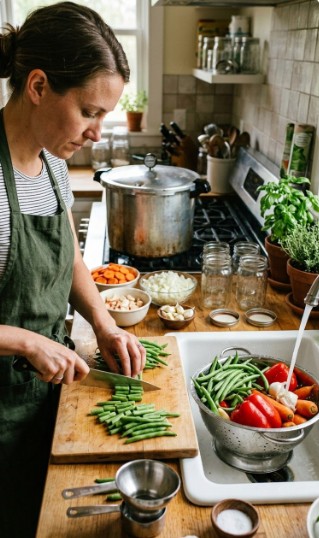
Cleaning and Checking Produce
I wash every vegetable under cold running water to remove dirt and grit. For firm items like carrots and potatoes, I use a vegetable brush to scrub the surface.
I inspect each piece and cut away bruised, soft, or moldy spots. Removing damaged parts lowers the chance of spoilage and helps keep the final jars safe.
Removing Skins and Cutting to Size
I peel vegetables with thick or tough skins—potatoes, beets, and some root crops—to improve texture in the jar. For tender vegetables such as green beans or asparagus, I often leave the skin on.
I cut pieces to a consistent size so they heat evenly in the jars. Aim for about 1-inch chunks or sticks for most vegetables; uniform pieces help ensure proper processing.
Quick Blanching (Not Needed for Tomatoes)
I blanch most vegetables briefly in boiling water, then cool them fast in ice water. This step stops enzyme action that can change color and flavor during storage.
To blanch, I bring a large pot of water to a rolling boil, add the prepared vegetables for the time recommended for that type, then plunge them into an ice bath. After cooling, I drain well and pat dry to remove excess water before packing jars.
Adding Acid to Low-Acid Vegetables
I treat low-acid vegetables—like green beans, corn, and peas—with an acidifying agent when a recipe calls for it. Acidification helps limit the growth of harmful bacteria.
I follow tested recipes for exact amounts. A common guideline is 1 tablespoon of bottled lemon juice or 1/2 teaspoon citric acid per pint. I add the acid directly to each jar before filling with vegetables and liquid.
Understanding Pressure Canning Times and Safety
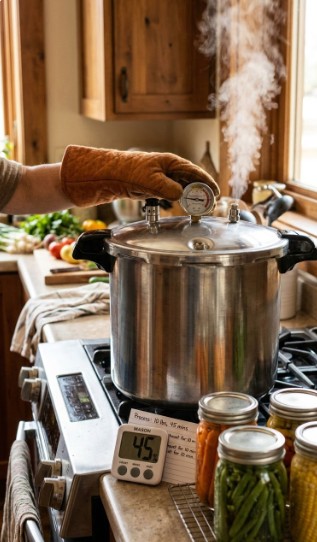
Processing Durations for Pressure Canning
I treat processing time as the most important detail when canning low-acid vegetables. Many things change the minutes a jar needs under pressure:
- Type of vegetable: Dense or starchy vegetables usually need longer than tender ones.
- Jar size: Quarts hold more and often require more time than pints.
- Altitude: Higher elevations lower boiling points, so I add time or follow altitude-adjusted charts.
I always use a trusted, current canning chart or official guide to set exact times. When I change a recipe, jar size, or can at a different elevation, I recalculate the required processing time. If a source lists ranges, I pick the longer time for safety.
Safety Steps for Pressure Canning
I follow a clear checklist to reduce risk and get consistent results:
- Use a pressure canner built for home canning; do not use a pressure cooker not rated for canning.
- Inspect the canner: check seals, valves, and the lid before each use.
- Read and follow the manufacturer’s directions for your model every time.
- Leave correct headspace in jars and do not overfill.
- Use proper tools: a jar lifter, funnel, and magnetic lid lifter keep handling safe.
- Bring the canner to the required pressure and maintain it for the full time on the chart.
- Let pressure drop naturally before opening; never force the lid.
- After processing, check seals and discard any jars with unsealed or damaged lids.
I document pressures, times, and outcomes for each batch. That helps me spot problems and keep my home-canned food safe.
Key Takeaways
I rely on a pressure canner to keep low-acid vegetables safe and shelf-stable. High heat and steady pressure destroy harmful bacteria that plain boiling cannot.
I always follow tested recipes and exact processing times for each vegetable. Different vegetables need different pressures and minutes to be safe.
I sterilize jars and lids before filling them. Clean, well-sealed jars cut the risk of spoilage and contamination.
I leave the correct headspace so steam can circulate and create a proper vacuum. Too little or too much space can cause seal or quality problems.
I monitor and maintain the recommended pressure for the entire processing time. Pressure that drops or fluctuates can make the jars unsafe.
I let jars cool slowly and undisturbed to prevent breakage and ensure good seals. Rapid cooling can crack glass or cause seal failures.
I store finished jars in a cool, dark spot to keep flavor and quality longer. Proper storage helps vegetables retain taste and texture.
Frequently Asked Questions
I get asked a lot about pressure canning. Below I answer common concerns in clear, short points.
- What exactly is pressure canning?
I use a sealed pressure canner that traps steam and raises internal temperature above 212°F. That higher heat kills dangerous bacteria and spores that survive boiling water. - Why choose pressure canning for vegetables?
I pressure can low-acid vegetables because heat from the canner reaches levels needed to destroy botulism risk. It also helps me keep garden produce edible for months and cuts food waste. - How does the process keep jars safe?
I pack prepared vegetables into jars, leave the correct headspace, apply clean lids, and process them under the recommended pressure. As jars cool, they form a vacuum seal that keeps out new contaminants. - How do I begin canning vegetables safely?
I follow tested recipes and the canner maker’s instructions. I pick fresh produce, prepare it as the recipe says, use proper jar sizes, and run the exact pressure and time shown for that vegetable. - What should I do if a jar won’t seal?
I inspect the rim for nicks, check headspace, and confirm lids and rings were applied correctly. Unsealed jars go into the fridge and get used within a few days. I reprocess only if I can follow a tested method exactly. - Can I use a pressure cooker instead of a pressure canner?
I only use appliances rated for canning. Not all pressure cookers meet canner standards. I check the manufacturer’s guidance before using any device for long-term preservation. - When is water bath canning okay?
I use water bath canning for high-acid foods such as jams, jellies, and pickles. For low-acid vegetables, I rely on pressure canning because boiling water alone won’t reach high enough temperatures. - How much does a pressure canner cost?
I find basic stovetop models start around $50. More features or larger sizes push prices higher, and electric canners often cost $100–$200. I weigh how much I’ll can before I buy. - Are processing times and pressures the same for every vegetable?
They vary. I follow specific guidelines for each vegetable, jar size, and altitude. Using the wrong time or pressure risks unsafe preserves. - How do I maintain my canner and gauges?
I read the manual, test gauges if advised, and clean and dry the unit after use. Proper care keeps seals working and helps prevent accidents.
FAQs
Q: Can I safely can vegetables in a pressure cooker?
A: Yes. I use a pressure cooker to reach the high temperatures needed to kill bacteria in low-acid vegetables. I follow tested recipes and processing times from trusted sources and make sure my cooker reaches and holds the correct pressure before I start timing.
Q: Which vegetables work best for pressure canning?
A: I can most low-acid vegetables like green beans, carrots, corn, peas, and beets. High-acid foods (like tomatoes) may need added acid or can sometimes be water-bath canned instead. I always use recipes that give specific processing times for each vegetable.
Q: How do I know the right pressure and time to use?
A: I consult current, tested canning charts that list pressure (in psi) and minutes based on jar size, altitude, and vegetable type. I adjust pressure for altitude and never shorten the processing time. The exact pressure and time depend on the recipe and your location.
Q: What equipment and checks should I do before canning?
A: I use a pressure cooker rated for canning with a reliable pressure gauge or dial, jars, lids, a jar lifter, and a funnel. I inspect jars for chips, test the gauge for accuracy, replace old lids, and clean everything well. I also read the cooker manual to ensure it’s safe for canning.
Q: How do I pack vegetables into jars—raw pack or hot pack?
A: I use both methods depending on the recipe. Raw pack means I pack raw vegetables into jars and add boiling liquid; hot pack means I precook vegetables, then pack them hot. Hot pack often reduces air and can improve quality, but I follow tested instructions for which method to use.
Q: How long will pressure-canned vegetables stay safe to eat?
A: I expect sealed, properly processed jars to keep quality for at least a year, sometimes longer, if stored cool and dark. I check seals, look for signs of spoilage (off odors, bubbling, broken seals), and discard any suspect jars.
Q: How does pressure canning compare to water-bath canning?
A: I use pressure canning for low-acid foods because water-bath canning doesn’t reach high enough temperatures to kill C. botulinum spores. Water-bath works for high-acid foods like properly acidified tomatoes, fruits, and pickles. I choose the method based on food acidity and safety guidelines.
Q: How should I maintain my pressure cooker for safe canning?
A: I clean the cooker after each use, inspect the gasket and valves, and replace parts that show wear. I have my pressure gauge tested periodically and follow manufacturer care instructions. Regular checks keep the cooker reliable and safe for repeated canning.
Conclusion
I trust pressure canning as a reliable method for preserving vegetables. It gives me a safe way to store low-acid foods when I follow correct pressures, times, and tested recipes. Using a pressure cooker cuts processing time and uses less energy than long boiling methods, which makes it more eco-friendly.
I emphasize safety: an accurate gauge, proper venting, and clean jars matter. I also recommend choosing a well-made pressure canner or an electric cooker with a dedicated canning setting to ensure consistent results. Quality equipment lasts longer and reduces the risk of spoilage or waste.
Practical benefits I value:
- Faster processing and better nutrient retention.
- Fewer fuels and lower energy use than traditional methods.
- Long shelf life when done correctly.
I encourage you to pick a trusted pressure canner, learn the correct pressures and times for your vegetables, and start with tested recipes. Once you build confidence, pressure canning becomes an efficient, safe, and sustainable way to enjoy home-preserved vegetables year-round.