
Shotgun Shell Reloading Recipes
Reloading shotgun shells blends careful measurement with hands-on skill. I make my own shells to match the exact power and shot pattern I want, while cutting costs and gaining control over each load. Knowing the basic steps and choices makes the process safer and more predictable.
This article walks through dependable recipes and the key steps I use, from picking powders and shot sizes to preparing cases and assembling loads. I focus on practical tips that help ensure consistent, safe results and build confidence at the range.
Key Takeaways
- Learn the core parts and tools needed to reload shells safely.
- Follow clear, tested recipes and steps to get consistent performance.
- Use careful prep and storage to keep loads reliable and safe.
Ingredients for Shotgun Shell Reloading Recipes
Kinds of Shells I Use
I match shell gauge to the job. Common gauges I load include 12, 20, 16, 28, and .410.
Each gauge needs its own recipe because chamber size and pressure limits differ.
I always confirm the gun’s chamber length (2 3/4″, 3″, or 3 1/2″) before selecting components.
Powders I Rely On
Powder controls velocity and pressure, so I pick powders with known burn rates.
I choose powders designed for shotshells and follow the manufacturer’s data for grain weight.
Typical choices and uses:
- Fast powders for light birdshot and some slugs.
- Medium-fast powders for general hunting and target loads.
- Medium-slow powders for heavy shot and turkey loads.
I never exceed published charge weights and always work up loads gradually.
Shot Sizes and Materials I Prefer
Shot size affects pellet count, pattern density, and target type.
Common sizes and uses:
- #9 to #6 for clay and small birds.
- #4 and #1 for larger upland birds.
- BB and larger for waterfowl and heavier game.
I pick shot material based on regulations and performance: - Lead for typical field loads where allowed.
- Steel or other non-toxic shot for waterfowl areas.
- Tungsten or bismuth when I need higher density and better energy transfer.
Primers and Wads I Choose
Primers must be consistent and match the shell design. I use quality primers from reputable brands.
Wads perform gas seal, cushion the shot, and affect pattern. I select wads for the load:
- Cushion wads for most birdshot.
- Heavy shot wads for slugs and large pellets.
- Specialty sealing or patterning wads when I want tighter patterns or reduced felt recoil.
I ensure primer and wad types are compatible with the hull and powder I use.
Hulls and Case Parts I Keep on Hand
Hulls hold everything together, so I sort and inspect them carefully.
Options I use:
- Plastic hulls with brass or plastic bases; brass-base hulls last longer and resize better.
- Correct length hulls that match my gun’s chamber (2 3/4″, 3″, 3 1/2″).
I check each hull for cracks, consistent length, and proper crimping ability.
I store hulls by gauge, length, and maker to keep recipes repeatable.
Bold checklist for safe and consistent reloads:
- Match gauge and chamber length to components.
- Use the powder load data from reliable sources.
- Pick shot size and material for the target and legal rules.
- Select primers and wads that work together with the chosen powder and hull.
- Inspect and sort hulls to reduce variability.
Essential Tools and Equipment
Reloading Press (Main Shell Station)
I rely on a strong, smooth press as the center of my reloading bench.
A good press holds the hull steady while I resize, seat wads, and set the shot.
I prefer a model with adjustable ram height so it fits different shell lengths.
Single-stage presses give me careful control when I work slowly. Progressive presses save time when I load many shells.
Powder Meter (Charge Control)
I use a precise powder meter to make sure each shell gets the same charge.
An adjustable measure lets me set the specific powder level for each load.
I always check doses with a digital scale to confirm exact weight.
For larger batches, a hopper-fed system speeds the process while keeping consistency.
Primer Seating Tool
I seat primers with a reliable priming tool to ensure uniform ignition.
I choose a tool made for the primer type I use, usually 209 shotgun primers.
Lever-style or hand-held units give me fine control and steady seating force.
A non-slip grip and secure primer handling reduce the chance of mistakes.
Shell Support and Locator
I use a proper shell holder to keep the hull from moving during each step.
Holders must match the shell gauge and length I am working on.
Interchangeable holders are useful when I switch between gauges.
A firm grip on the hull prevents slippage while I add powder, wad, or shot.
Personal Protective Equipment
I always wear eye protection to guard against dust and primer debris.
I use a dust mask when handling powder to avoid inhaling particles.
Hearing protection is mandatory when I test loads at the range.
I keep my workspace clean and free of open flames, sparks, or clutter.
Useful checklist
- Robust press with adjustable ram
- Adjustable powder meter + digital scale
- Proper priming tool and spare primer trays
- Shell holders sized to gauge and length
- Safety glasses, dust mask, hearing protection
I inspect and maintain each tool regularly.
Proper equipment and routine care help me reload safely and consistently.
Preparing to Reload Shotgun Shells
Checking and Cleaning Used Cases
I inspect each spent hull for cracks, dents, bulges, or flattened crimps. Any hull that shows damage goes straight into the discard pile to avoid pressure or feeding problems.
I measure hull length and inside diameter with calipers to confirm they still meet the original specs. Keeping only correct-size hulls helps ensure consistent seating and crimping.
For cleaning, I soak hulls in warm water with a mild detergent, scrub lightly if needed, rinse, and dry them fully. Moisture or residue left inside can affect powder flow and primer seating, so thorough drying is essential.
Organizing All Parts
I group components to avoid mix-ups during assembly. Hulls get sorted by gauge and type, and I label containers or trays so I can tell at a glance what is what.
Primers stay separated by size and lot when possible; I check dates and appearance to confirm they look normal. Powders are kept in their original containers and organized by burn rate and recipe use, and shot is sorted by size and material.
I keep a simple checklist at my bench: hulls, primers, powder, shot, wads, and any specialty parts. Clear labeling and a staged workflow cut mistakes and speed up the reloading process.
Essential Safety Steps
I always wear safety glasses while reloading and keep a well-lit, clean workspace free from food, drink, and clutter. I avoid static-prone materials and never smoke or use open flames near primers or powder.
I store powder and primers in cool, dry places and follow manufacturer limits for charge weights exactly. I also use hearing protection when testing loads and keep a fire extinguisher rated for chemical and electrical fires within reach.
Before I start assembling a batch, I review the recipe and verify equipment settings. By keeping these safety checks routine, I reduce risk and help ensure each shell performs as intended.
Shotgun Shell Reloading Recipes
Practice and Clay Loads
I build practice loads for steady recoil and consistent shot patterns. I use 12 gauge most often, a clean-burning pistol/shotgun powder, and charge between 18.0–20.0 grains depending on the powder’s burn rate. I pick shot sizes like 7.5 or 8 and keep shot weight near 1 to 1 1/8 ounces for even, reliable spreads.
Key steps I follow:
- Measure powder with a calibrated powder measure.
- Seat a quality target wad to protect shot and shape pattern.
- Add the chosen shot weight and seat it evenly.
- Crimp uniformly so shells feed and eject without deforming.
Quick reference (typical):
- Gauge: 12
- Powder charge: 18.0–20.0 gr
- Shot size: #7.5 or #8
- Shot weight: 1–1 1/8 oz
- Primer: 209-style
Game and Field Loads
I make hunting loads for more energy and controlled terminal performance. I choose 12 or 20 gauge based on the species and range. Powder charges range higher, often 20.0–24.0 grains, and I match shot size to the quarry: #4 or #6 for upland birds, BB or #2 for larger waterfowl. I use heavier shot weights (1 1/8–1 1/4 oz) and a rugged wad to keep the pattern tight and velocity steady.
How I assemble them:
- Select powder charge for the desired velocity and pressure.
- Pick shot size to suit the target species and expected range.
- Use a heavy-duty wad rated for higher charges.
- Inspect crimps and final shell length to ensure safety and feeding.
Typical load table (example):
- Gauges: 12 or 20
- Powder: 20.0–24.0 gr
- Shot size: #6–#4 for upland; BB–#2 for waterfowl
- Shot weight: 1 1/8–1 1/4 oz
- Primer: reliable 209-style
Home Defense and Close-Range Loads
I design defensive rounds for immediate, reliable performance at short distances. I stick mainly to 12 gauge and prefer fast-burning powders with charges around 18.5–21.0 grains to balance recoil and stopping power. I load #00 buckshot with roughly 1 1/4 ounces of shot to put multiple large pellets on target. I always use a wad made for buckshot to keep pellet columns tight.
My checklist for defensive loads:
- Measure powder precisely for consistent muzzle energy.
- Load #00 buckshot for effective pellet size and penetration.
- Use a buckshot-specific wad to preserve pellet grouping.
- Crimp tightly and inspect each shell for defects.
Typical defensive specs:
- Gauge: 12
- Powder charge: 18.5–21.0 gr
- Shot size: #00 buck
- Shot weight: ~1 1/4 oz
- Primer: high-reliability 209-style
Safety reminders I follow:
- Always check reloading manuals for safe combinations of hulls, powders, and primers.
- Work within published pressure limits and start at the lower end of recommended charges.
- Inspect primers, wads, and finished shells for defects before use.
Step-by-Step Reloading Instructions
Seating Primers in the Hulls
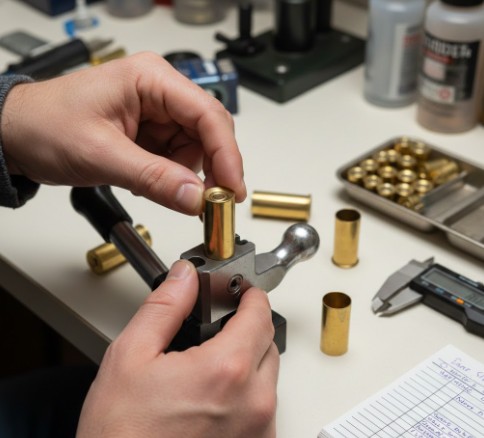
I place cleaned hulls in the shell holder and seat new primers one at a time.
I use a priming tool made for the shell gauge and align the primer pocket with the tool.
I press the primer in until it sits slightly below flush.
I check each primer to confirm consistent placement; any misaligned primer can cause ignition problems.
Measuring and Adding the Powder
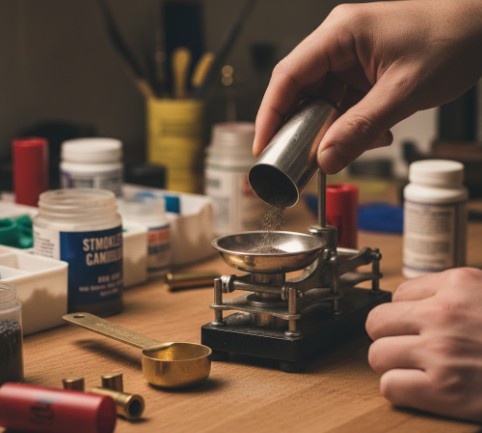
I set an adjustable powder measure to the recipe’s specified weight and double-check the powder type.
I dispense the charge into the primed hull and confirm the weight on a digital scale.
I record the charge used for each batch to keep loads consistent.
Safety note: I always verify powder type and weight before seating any wads or shot.
Seating the Wad
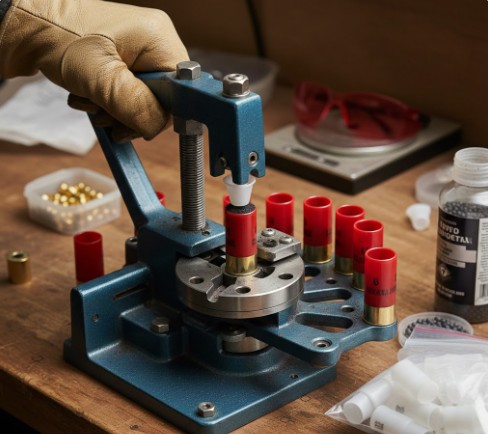
I select the proper wad for the load’s purpose and drop it into the hull with the correct orientation.
I use the press to seat the wad to the recommended depth so it forms a tight seal over the powder.
I ensure the wad sits evenly and that the seal between powder and shot is firm.
The wad choice affects pattern and recoil, so I match the wad to the load intent.
Pouring and Checking the Shot
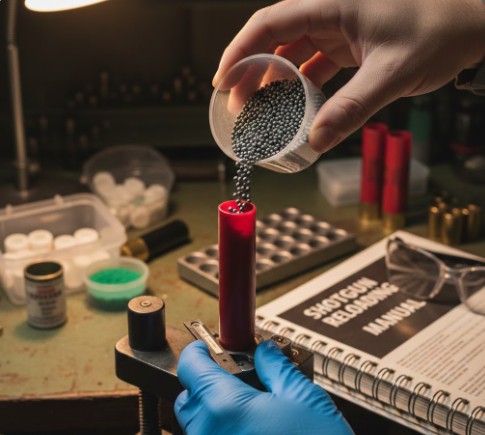
I measure the shot charge with a consistent scoop and pour it into the hull on top of the wad.
I confirm shot size and material (for example lead or steel) match the recipe.
I level the shot and inspect visually to ensure the correct amount and even distribution.
I log shot weight and size for each set to maintain repeatable patterns.
Forming the Crimp
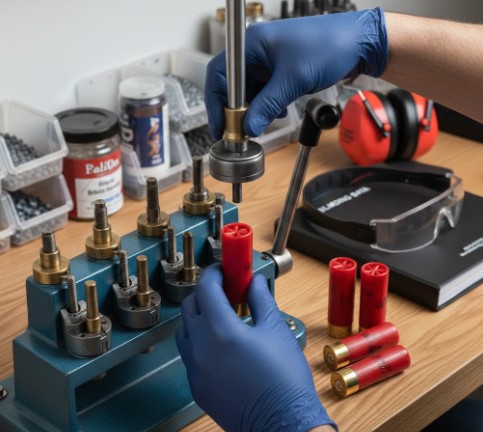
I position the hull in the press crimping station and choose the crimp type—star or roll—based on the hull and load.
I actuate the crimp tool to fold the hull mouth uniformly and check the fold for tightness and symmetry.
I inspect each finished shell for consistent crimp height and secure closure so the shell feeds and ejects reliably.
I remove any deformed shells and set them aside for safe disposal or rework.
Tips for Accuracy and Safety
Precise Powder Weighing and Checking
I always weigh powder by the grain and never guess volumes. I set an adjustable powder measure, then verify each charge on a digital scale. I use the same scale and measure for a whole session to keep things consistent.
- Use an adjustable powder measure plus a digital scale.
- Record each charge weight in a log.
- Stay within powder maker limits; never exceed published maximums.
Preventing Common Reloading Errors
I inspect every hull and component before I start. I keep powders, primers, and shot in separate, labeled containers so I never mix them up.
- Check hulls for cracks or dents before reloading.
- Keep components separate and clearly labeled.
- Seat primers uniformly and flush to avoid misfires.
- Make crimps consistent to protect pattern and safety.
- Work slowly and without distractions — rushing causes mistakes.
Safe Storage and Handling of Reloaded Rounds
I store reloaded shells upright in clean, dry containers away from heat and sunlight. I always label containers with the reload date, powder type, and charge weight.
- Store shells vertically in a dry, cool place.
- Keep reloaded rounds separate from factory ammo.
- Avoid dropping or rough handling that could damage primers.
- Use reloaded shells within about six months for best reliability.
- Never store near flames, heaters, or reactive chemicals.
Bold checklist for quick reference:
- Weigh every charge
- Log your loads
- Inspect parts before use
- Label and separate ammo
- Store cool, dry, upright
I follow these steps every time to keep my loads consistent and safe.
Make-Ahead Instructions and Storage
Batch Prep for Large Quantities
When I reload many shells ahead of time, I keep safety and consistency first. I sort all hulls by gauge, shot size, and powder charge so nothing gets mixed.
I work in stages: I prime every hull, then add powder for the whole group, then seat wads, then shot, then crimp. Doing one step across the batch cuts mistakes and speeds the process.
I use a sturdy press and an adjustable powder measure. I check powder charges on a digital scale every 50–100 shells to catch any drift. I also mark trays or boxes with load details — powder type, charge weight, shot size, and date — so I can identify each batch at a glance.
Checklist for big batches:
- Sort by gauge and load
- Complete each step across the batch
- Use calibrated tools and a reliable press
- Perform spot checks on charge weight
- Label trays with full load data
Best Ways to Store Finished Shells
I store finished shells in a cool, dry place away from sunlight. Moisture causes corrosion on primers and can affect powder and shot, so I keep shells in sealed containers with desiccant packs.
I aim for a steady temperature between 50°F and 75°F (10°C–24°C). Extreme heat or cold can degrade powder or affect primer performance. I avoid windows and direct sun, and I use opaque boxes to block light.
I always keep loose powder and propellants in their original sealed containers and store them separate from loaded shells to prevent mix-ups. Every storage box gets a clear label with the load data and the reloading date so I can rotate stock and find what I need quickly.
Storage quick guide (what I follow):
- Moisture control: airtight boxes + silica gel
- Temperature: keep within 50°F–75°F
- Light: use opaque containers, avoid sunlight
- Segregation: store powders separately from loaded shells
- Labeling: include load details and reload date
Following these routines helps me save time at the range and keeps loads consistent and safe.
Final Thoughts
I value the control and savings that come from making my own shotgun shells. With proper recipes, tools, and safety steps, I can produce consistent loads that match my needs. This hands-on work improves my skill and makes shooting more reliable. Whether I load for practice, hunting, or home defense, well-made shells give me greater confidence and better results each time I fire.
Frequently Asked Questions
What are the key advantages of reloading my own shells?
Reloading saves me money and lets me make loads that fit my needs. I can tune shot size, powder charge, and velocity for hunting, target shooting, or home defense. It also gives me greater control over consistency and helps me understand ammunition better.
Which parts do I need to reload shotgun shells?
I need hulls, primers, powder, wads, and shot. I also use a reloading press and basic hand tools to assemble components. Having consistent, quality components helps produce safe, reliable rounds.
How do I pick the right powder and pellet size?
I choose powder by its burn rate and the type of load I want: lighter for targets, stronger for hunting. I pick shot size based on purpose: smaller shot for clay target work, medium to large for birds, and larger or specialty shot for big game or defense. I check published load data before using any combination.
What equipment is must-have for safe, accurate reloading?
I use a sturdy press, an adjustable powder measure, a digital scale, and a priming tool. I also keep a shell holder, calipers, and eye and ear protection on hand. Clean work surfaces and good lighting reduce mistakes.
How do I get hulls ready before I reload them?
I inspect hulls for cracks or deformities and discard any damaged ones. I clean so they’re free of dirt, check length and crimp dimensions, and sort by gauge and brand so my batches are uniform.
What are some typical loading setups people use?
Common setups include:
- Target: moderate powder, small shot (e.g., 7.5–9), and soft wads for even patterns.
- Hunting: higher velocity, medium shot (e.g., 4–6) and sturdy wads.
- Defensive: reliable primers, heavier shot or specialty pellets, and tested powder charges. I always follow tested recipes from manuals or manufacturers.
Can I prepare batches of reloaded shells in advance?
Yes. I can reload batches ahead to save time and keep consistency. I label batches with load details and date, and store them in a cool, dry place to preserve performance.
How do I keep reloading accurate and safe?
I weigh powder charges, inspect every component, seat primers correctly, and follow a written procedure each step. I wear safety gear and work in a clean, ventilated area to reduce errors and hazards.
How should I store my finished shells?
I keep reloaded shells in airtight containers away from heat and sunlight. I store them in a dry, cool spot and mark containers with load data and date for easy identification.
Why must I follow a strict step-by-step reloading process?
Following steps prevents mistakes in priming, powder charge, wad placement, and crimping. I stick to a checklist so every round meets the same safety and performance standards.
FAQs
Q1: How effective are custom shotgun shell loads compared with factory shells?
I find custom loads can match or exceed factory shells for specific tasks when I follow tested recipes. Tailoring shot size, powder type, and charge weight helps me optimize pattern density and recoil for hunting or clay shooting. I must use published load data and start at minimum charges to stay safe.
Q2: Are homemade shotshells safe to use?
They can be safe if I follow proper procedures, use quality components, and consult reliable reloading manuals. I always wear eye and ear protection, use the correct primers and powders for the gauge, and avoid substituting unknown components. I never exceed published pressure limits or mix powders.
Q3: How do I control spread and coverage area with reloaded shells?
I adjust shot size, shot weight, wad selection, and velocity to change pattern spread. Larger shot and heavier payload usually give denser central patterns, while smaller shot and higher velocity can widen coverage. Testing patterns at the range with a pattern board lets me fine-tune for the intended target distance.
Q4: What maintenance does shotshell reloading equipment need?
I clean and inspect my press, dies, and powder measure regularly. I remove powder residue, check for worn parts, and lubricate moving components as the manufacturer recommends. I also sort and inspect hulls for cracks or deformations before reuse.
Q5: How do reloaded shells compare cost-wise to factory ammo?
Reloading often saves money when I reuse hulls and buy components in bulk. My per-shell cost depends on primer, powder, shot, and hull price. For high-volume shooting or specialty loads not made by manufacturers, reloading usually becomes more economical.
Q6: Can I reuse spent hulls safely for reloading?
Yes, I can reuse hulls if they remain in good condition. I check for cracks, split crimp folds, and stretched length. I trim, clean, and sometimes resize hulls; if a hull shows damage or excessive wear, I discard it.
Q7: How should I learn load recipes and avoid dangerous combinations?
I rely on published, tested recipes from reputable reloading manuals and powder manufacturers. I never mix informal “recipes” from unverified sources. I follow their step-by-step data, start at minimum charges, and work up slowly while watching for pressure signs.
Closing Thoughts
I recommend focusing on safe, proven reloading recipes that match your shotgun, ammunition type, and shooting purpose. I favor combinations with published data from trusted manuals and manufacturers to ensure consistent performance and reduce risk.
Key points I follow:
- Use tested powder, wad, and shot pairings from reliable sources.
- Follow exact measurements and inspect components for defects.
- Prioritize safety gear, proper storage, and range testing before regular use.
- Consider environmental impact by choosing non-toxic shot when appropriate and disposing of waste responsibly.
If you want long-term value, stick with quality hulls, primers, and powders, and keep records of your loads and results. I encourage you to learn from manuals, join experienced reloading groups, and progress slowly. Take the next step: pick a trusted recipe, assemble correct components, and test carefully to make your loads safe, effective, and reliable.


