

Bobby Flay Pizza Dough Recipe
I love pizza, and I wanted to make my own dough instead of ordering in. I tried Bobby Flay’s recipe and found it changed how I make pizza at home.
This piece will share what I learned from that experience and give clear, practical guidance so you can make great dough too.

Key Takeaways
- I explain why this dough works well for homemade pizza.
- I list simple ingredients and step-by-step guidance I used.
- I offer quick tips for storing, serving, and varying the dough.
What Bobby Flay’s Pizza Dough Actually Is
I make a dough that’s simple and reliable: flour, warm water, yeast, salt, and a little oil. The mix yields a crust that stays light and airy inside while getting crisp at the edges.
- Texture: soft crumb with a thin, crunchy rim.
- Ease: uses common pantry items and a short, straightforward process.
- Use: holds sauce and toppings without getting soggy; works for thin or slightly thicker pies.
I find this dough balances flavor and structure so you can top it however you like. It’s a practical recipe I return to when I want consistent, restaurant-style results at home.
Why I Love This Bobby Flay Pizza Dough
I get a crust that hits the sweet spot — not too thin, not too thick. The dough has a mild garlic note that lifts the flavor without overpowering the toppings.
I use quick-rise yeast, so I don’t wait hours. That speed makes this recipe easy on weeknights and fun for last-minute gatherings.
I can dress the dough any way I want. It holds up to classic pepperoni, lots of veggies, or even a dessert topping. The texture stays crisp at the edges and chewy in the center, which I appreciate every time.
Making it from scratch feels satisfying. Kneading and shaping the dough gives me a simple, hands-on cooking moment that ends with a tasty, shareable result.
- Quick to make
- Flexible for many toppings
- Balanced flavor and texture
The Ingredients
I gather everything before I begin to keep the process smooth.
- Warm water: 1 1/2 cups (about 110°F)
- Quick-rise yeast: 1 packet (≈ 2 1/4 tsp)
- Honey: 1 tablespoon
- Sugar: 1 teaspoon (fine granulated)
- Flour: 3 1/2–4 cups all-purpose or bread flour, plus extra for dusting
- Salt: 2 teaspoons flaky sea salt
- Garlic powder: 1/2 teaspoon
- Olive oil: 2 tablespoons (plus 2 tsp for brushing)
Step by Step Instructions
Step 1: Get Ingredients Ready
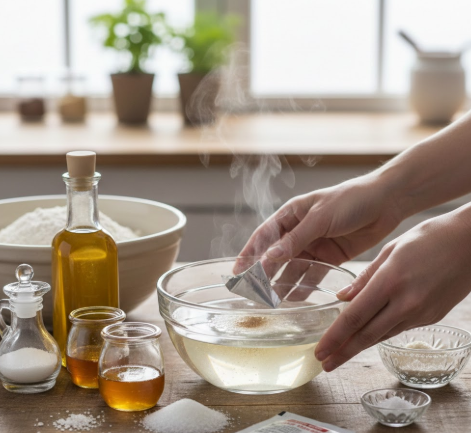
I gather and measure everything before I start.
I check that the water is warm—not hot—so it won’t kill the yeast.
I set out the honey, sugar, yeast, olive oil, and flour so I can work smoothly.
Step 2: Wake the Yeast
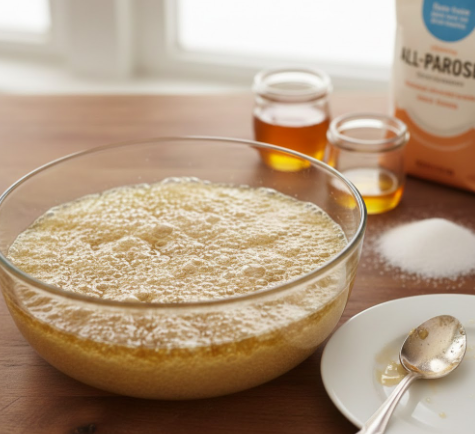
I mix the warm water with honey and sugar until dissolved.
I sprinkle the yeast on top and wait 5–10 minutes until it becomes foamy.
If it doesn’t foam, I discard it and start with fresh yeast.
Step 3: Combine the Dry Items
I whisk the bread flour, sea salt, and a pinch of garlic powder in a bowl.
I leave a little extra flour nearby to adjust the dough if needed.
This keeps the seasoning even and the dough texture right.
Step 4: Bring Wet and Dry Together
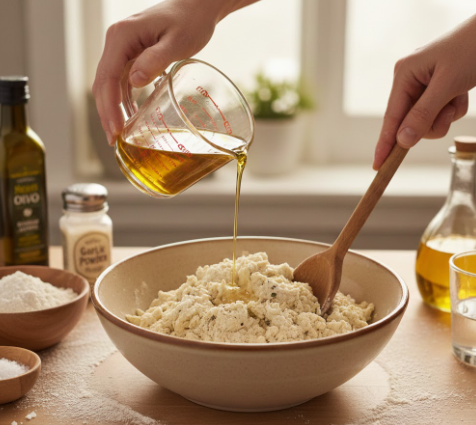
I pour the olive oil into the activated yeast mixture.
I add the dry ingredients slowly while stirring until a shaggy dough forms.
I use a wooden spoon or a mixer with a dough hook to combine everything.
Step 5: Work the Dough
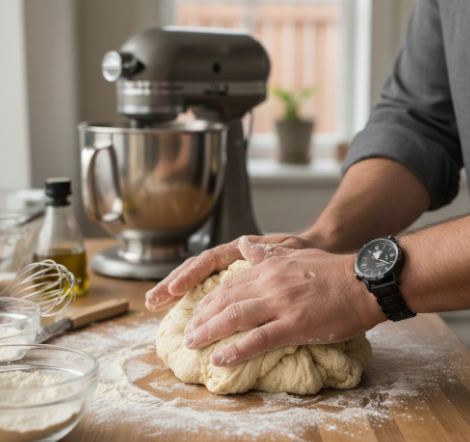
I turn the dough onto a lightly floured surface.
I knead for 5–7 minutes until the dough feels smooth and elastic.
If it sticks, I dust a bit more flour, but I avoid adding too much.
Step 6: Let It Rise Once
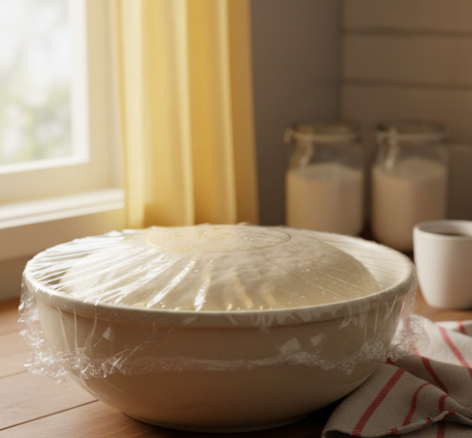
I shape the dough into a ball and grease a bowl lightly.
I cover the bowl with plastic wrap or a damp towel.
I let it sit in a warm spot about 1 hour, until it roughly doubles in size.
Step 7: Deflate and Portion
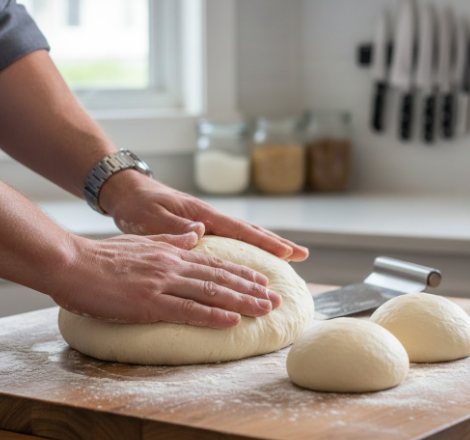
I press the dough gently to release trapped air.
I divide it into two equal pieces for two pizzas, or keep it whole for one large pie.
I shape each piece into a smooth ball to keep the gluten structure.
Step 8: Short Second Rest
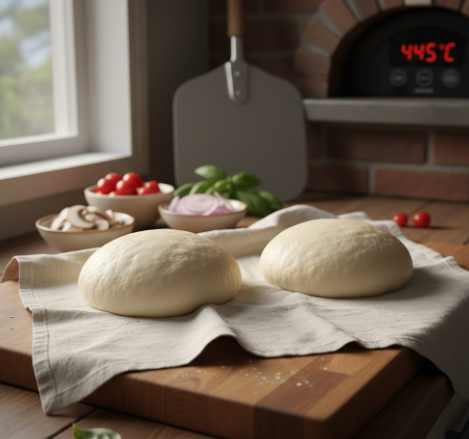
I cover the dough balls again and let them rise about 30 minutes.
This rest makes the dough easier to stretch and reduces large bubbles.
I use this time to prepare toppings and preheat the oven.
Step 9: Form the Crust
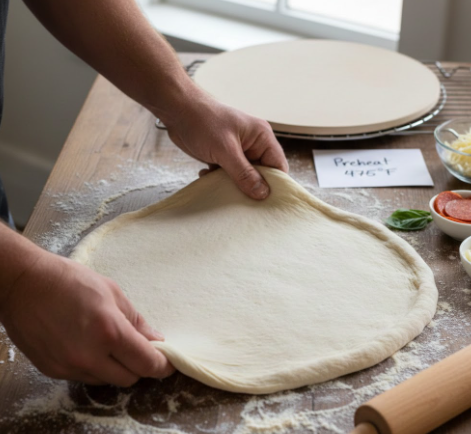
I lightly flour the surface and flatten a dough ball with my hands or a rolling pin.
I stretch it to the thickness and shape I want, leaving a slightly thicker edge.
I check the size fits my baking stone or pan.
Step 10: Bake the Crust
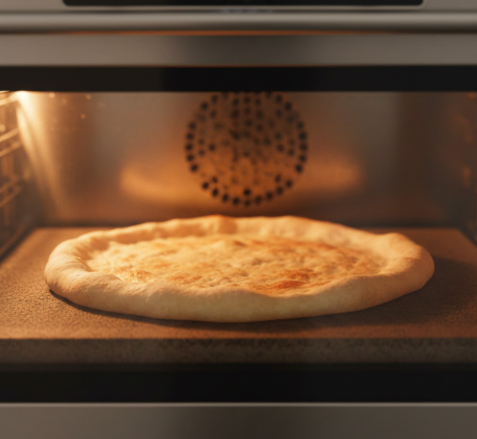
I preheat the oven to 475°F (245°C).
I bake the plain crust 5–7 minutes to set it, then add toppings and return to bake until done.
I watch the crust so it turns golden and the center cooks through.
Tips & Tricks
- I preheat a pizza stone to get a crisp bottom. The stone holds heat so the crust browns faster and stays crispier.
- I prefer bread flour for a chewy texture, but I sometimes blend in whole wheat for a mild, nutty note.
- I let dough rest in the fridge overnight when I have time. Chilling develops flavor; I always bring the dough back to room temperature before shaping.
- I start with simple toppings—fresh mozzarella and basil let the crust shine.
- I brush a thin coat of olive oil on the dough edge before toppings to boost flavor and help the crust brown.
Nutrition Information
I list key nutrition facts per typical serving (one pizza crust portion):
- Calories: ~220–320 kcal
- Carbohydrates: 35–45 g
- Protein: 6–9 g
- Fat: 4–8 g (olive oil adds healthy monounsaturated fat)
- Fiber: 1–3 g
- Sodium: 300–600 mg (varies with added salt)
Notes:
- Values change with flour type, portion size, and added oil or sugar.
- To lower calories or carbs, use less dough per pizza or switch to whole-grain flour.
Can I Keep Bobby Flay’s Dough for Later?
I store risen dough in the fridge wrapped tightly in plastic or in an airtight container.
It will stay good for up to 3 days; I let it warm to room temperature before shaping and baking.
For longer storage I freeze individual dough balls after the first rise.
I wrap them well and label the date; frozen dough keeps up to 3 months.
To use, I thaw frozen dough overnight in the fridge, then bring it to room temperature before stretching.
What to Serve with Bobby Flay’s Pizza Dough
I like pairing the dough with a bright tomato sauce and fresh salad.
I often turn extra dough into cheesy breadsticks or garlic knots.
For dessert, I bake a crust and spread Nutella with sliced fruit.
I usually serve a medium-bodied red wine or sparkling water to balance the meal.
Variations on Bobby Flay’s Pizza Dough
I like to tweak the dough to match the meal or mood. Try swapping half the all-purpose flour for whole wheat to get a nuttier, denser crust. Stir a teaspoon or two of dried oregano or basil into the dry mix for an herby aroma. For a savory surprise, fold grated mozzarella or Parmesan into the dough while kneading so cheese melts into the crust. If I want heat, I add red pepper flakes or a pinch of cayenne to the dry ingredients. For gluten-free pizza, I use a quality gluten-free flour blend and often add xanthan gum per the blend’s directions to improve texture.
Bobby Flay Pizza Dough Recipe
Tools I Use
- Large mixing bowl for combining ingredients.
- Wooden spoon or stand mixer with a dough hook for mixing.
- Measuring cups and spoons.
- Rolling pin or clean hands to stretch the dough.
- Baking sheet or pizza stone and a pizza peel or spatula.
- Plastic wrap or a damp towel to cover dough during rises.
What Goes In
- 1 1/2 cups warm water (about 110°F)
- 1 packet (2 1/4 tsp) quick-rise yeast
- 1 tbsp honey
- 1 tsp granulated sugar
- 3 1/2 to 4 cups bread or all-purpose flour, plus extra for dusting
- 2 tsp flaky sea salt
- 1/2 tsp garlic powder
- 2 tbsp extra-virgin olive oil, plus 2 tsp for brushing
I list ingredients in the order I add them so prep feels straightforward.
Step-by-step Method
- Warm and measure the water. Stir in honey and sugar so they dissolve. Sprinkle the yeast over the surface and wait 5–10 minutes until foamy.
- Whisk the flour, salt, and garlic powder in a separate bowl. Keep extra flour nearby for adjusting dough texture.
- Add olive oil to the yeast mixture. Pour the wet mix into the dry ingredients and stir until a rough dough forms. Use a stand mixer with a dough hook for ease if you have one.
- Turn the dough onto a lightly floured surface. Knead by hand about 5–7 minutes until smooth and elastic. Add small amounts of flour only if the dough is too sticky.
- Shape the dough into a ball and place it in a lightly oiled bowl. Cover with plastic wrap or a damp towel. Let it rise in a warm spot for about 1 hour, until doubled.
- Punch the dough down to release air. Divide into two equal portions and shape each into a ball.
- Cover the dough balls and let them rest for 30 minutes for a second, shorter rise.
- Dust your work surface and stretch or roll each ball to your desired thickness. Brush the edges with a little olive oil.
- For a crisper base, preheat the oven to 475°F and prebake the crusts 5–7 minutes before adding toppings. Then add sauce, cheese, and toppings and bake until the crust is golden and cheese is bubbly.
I recommend a quick prebake if your toppings release moisture or you like a crispier bottom.
Helpful Tips and Variations
- Use a pizza stone if you have one; preheat it for a better crust.
- Try a blend of bread and whole wheat flour for more flavor and texture.
- For deeper flavor, refrigerate the dough overnight and bring it back to room temperature before shaping.
- Brush the crust with olive oil before topping to help it brown and add flavor.
- Keep toppings simple at first—fresh mozzarella with basil shows how good the dough can be.
I find these small changes make a big difference without extra work.
Estimated Nutrition
- Servings: 2 pizzas
- Calories per total recipe: about 1106 kcal
Nutrition varies with topping choices and portion sizes. I report the dough-only calorie estimate; add cheese, sauce, and other toppings to calculate the full meal.
Frequently Asked Questions
1. Can I swap regular yeast for quick-rise yeast?
Yes. I can use active dry (regular) yeast instead of quick-rise, but I let it sit longer to activate. I follow the yeast package for proofing time and water temperature to make sure it bubbles before mixing.
2. How can I tell when the dough has risen enough?
I look for the dough to about double in size. I also use the poke test: press lightly with a finger — if the indent springs back slowly or stays slightly, the dough is ready.
3. What should I do if the dough sticks too much?
I add flour by the tablespoon while kneading until the dough is tack-free but still soft. I avoid adding too much at once so the dough doesn’t get dry.
4. Is it okay to use a bread machine to make the dough?
Yes. I use the machine’s dough cycle and keep the same ingredient amounts. I check the dough during kneading in case it needs a touch more flour or water.
5. How long will pre-baked pizza last in the fridge?
I store cooled, pre-baked pizza in an airtight container or wrapped tightly. I eat it within 3–4 days for best taste and safety.
Final Thoughts
I find this dough easy to make and built for playing around. A few pantry staples, a short list of steps, and a bit of practice give you a crust that turns out crisp at the edge and tender inside. I use the recipe as a base and tweak hydration, flour mix, or rise time to match my oven and taste.
Try shaping different sizes, pre-baking for a crunchier base, or adding herbs to the dough for subtle flavor. I like making several balls of dough, freezing extras, and pulling one out for a quick weeknight pizza. That habit saves time and keeps pizza nights frequent.
Tips I follow:
- Let the dough rest long enough for flavor to develop.
- Use a very hot oven or pizza stone for best crust texture.
- Stretch gently to keep air pockets.
This approach keeps pizza simple, repeatable, and fun. I invite you to experiment, make mistakes, and enjoy sharing the results with friends and family.
FAQs
Q: How do I know this dough will make a good pizza crust?
I base this dough on techniques that produce a crisp outside and a tender, chewy inside. Using enough gluten-forming flour, proper kneading, and a rest or cold rise gives the dough structure and flavor. Bake at a high temperature for the best result.
Q: Is this recipe safe for people with food allergies?
I use common ingredients: wheat flour, yeast, water, salt, sugar, and oil. That means it is not safe for people with gluten allergies or celiac disease. For nut or dairy allergies, the standard recipe is usually safe, but always check labels and your toppings.
Q: Can I store or freeze the dough? How long will it last?
You can refrigerate dough for up to 3 days; it will slowly ferment and gain flavor. For longer storage, freeze portions for up to 3 months. Thaw overnight in the fridge before shaping, then bring to room temperature before stretching.
Q: How should I maintain the dough if I plan to make pizzas several times a week?
I recommend making a larger batch, dividing it into portions, and freezing most of it. Keep one portion in the fridge if you’ll use it within 24–72 hours. Use airtight containers or plastic wrap to prevent drying and odors.
Q: How does this dough compare to store-bought dough or other recipes?
Homemade dough gives fresher taste and better control over texture than most store-bought versions. Compared with other homemade methods, I focus on a simple ingredient list and a flexible rise time so you can make thin or thicker crusts with the same base.
Q: What is the most common mistake that ruins the dough?
The biggest error is under- or over-kneading. Under-kneaded dough won’t develop structure and will be dense. Over-kneaded dough becomes too tight and hard to stretch. Aim for smooth, elastic dough that springs back slightly when poked.
Q: Will this dough work in a home oven or do I need special equipment?
A home oven works well if you preheat it fully and use a hot surface like a pizza stone or steel. Those surfaces mimic a pizza oven by giving quick bottom heat for a crisp crust. If you don’t have them, use the hottest oven setting and a heavy baking sheet.
Conclusion
I recommend Bobby Flay’s pizza dough approach for home cooks who want a reliable, restaurant-style crust. The method uses simple pantry ingredients and clear techniques that produce a crisp edge and a chewy center when mixed, rested, and baked correctly.
- Effectiveness: I find the dough delivers consistent texture and flavor across thin and slightly thicker pies.
- Safety and cleanliness: I advise following basic food-safety steps—use fresh yeast, keep ingredients at proper temperatures, and store dough in the fridge when not using it right away.
- Eco- and kitchen-friendliness: The recipe needs few ingredients and little energy beyond standard oven use, so it fits a low-waste cooking routine.
- Long-term value: Learning this dough gives you a versatile base for many pizza styles and saves money versus takeout.
I encourage you to try the dough, adjust hydration and bake times to your oven, and keep practicing—small tweaks lead to big improvements in every pizza you make.


