Ginger Beer Recipe 20 Litres — Step‑by‑Step Brewing Guide
I love making ginger beer at home because it lets me control how strong, sweet, and fizzy it turns out. A homemade batch has a fresh, spicy taste that beats many store brands, and it’s great for sharing at parties or keeping on hand for warm days.
This recipe makes about 20 liters, so it works well when I need a large supply. With a few common ingredients, basic equipment, and some patience for fermentation, I can produce a reliably bubbly, flavorful drink that fits my taste.
Key Takeaways
- The recipe yields a large batch suitable for gatherings or stocking up.
- Simple ingredients and basic equipment make the brew approachable.
- Fermentation and patience create natural fizz and adjustable flavor.
Ingredients for a 20-Litre Batch of Ginger Beer
Below I list everything I use to make a 20‑litre batch. Quantities and brief prep notes sit beside each item so you can measure and prep quickly.
- Fresh ginger root — 400 g
Peel and finely grate. Fresh ginger gives the spicy backbone of the drink. - Granulated sugar — 3 kg
Dissolve in the water. Sugar feeds the yeast and sets the sweetness level. - Fresh lemon juice — 500 ml
Squeeze and strain. Lemon adds acidity and brightens the flavor. - Water — 20 L
Use filtered or boiled and cooled water for a clean fermentation base. - Active dry yeast — 5 g
Measure precisely. This starter produces natural carbonation. - Cream of tartar (optional) — 2 tsp
Add if you want more stable fermentation control; it’s not required.
Notes and quick tips (bold for emphasis):
- Use fresh ginger for best flavor.
- Weigh sugar and yeast accurately to control fermentation and fizz.
- Keep water clean (filtered or boiled then cooled) to avoid off-flavors.
- Cream of tartar is optional; include it only if you want extra stability in carbonation.
I recommend measuring and preparing all ingredients before you start. This makes each step faster and helps avoid mistakes during the brewing process.
Equipment Needed
Fermenting Container
I use a large food-safe container that holds more than the final 20 L to leave room for bubbling. A wide-mouth plastic or glass fermenter with a tight-fitting lid works best. Choose a non-reactive material so the ginger beer keeps a clean taste and avoids contamination.
Bottles and Closures
I fill bottles that can handle pressure—either sturdy PET plastic or strong glass with secure caps. Good options are 500 ml to 1 L sizes for easy pouring and storage. Use crown caps or swing-top seals, and make sure every bottle closes tightly so carbonation stays trapped.
Measuring Gear
I rely on accurate tools to repeat the recipe consistently:
- A kitchen scale (grams) for sugar and fresh ginger.
- A clear measuring jug or graduated cylinder (milliliters) for liquids.
- Teaspoon and tablespoon measures for small items like yeast or tartar. Accurate measuring keeps flavor balance steady and helps control how fizzy the final drink becomes.
Cleaning and Sanitizing Kit
I sanitize every item that touches the brew. My kit includes:
- A food-safe sanitizer (or a proper diluted bleach solution used carefully).
- Brushes and clean cloths for scrubbing bottles and the fermenter.
- Disposable or reusable gloves to protect hands and reduce contamination. I clean and sanitize all surfaces and equipment before mixing to prevent off-flavors and spoilage.
Preparation Steps
Making the Ginger Mix
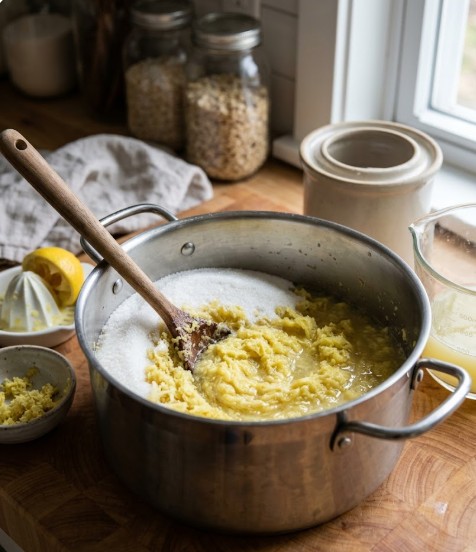
I peel and grate about 400 g of fresh ginger until it is very fine. I put the grated ginger into a large, non-reactive container that will hold the full 20 L batch.
I add 3 kg of granulated sugar on top of the ginger, then pour in 500 ml of fresh lemon juice. I stir the mix well so the sugar, lemon, and ginger combine and start to release flavor.
This concentrated ginger blend sets the main taste for the whole batch.
Heating the Liquid
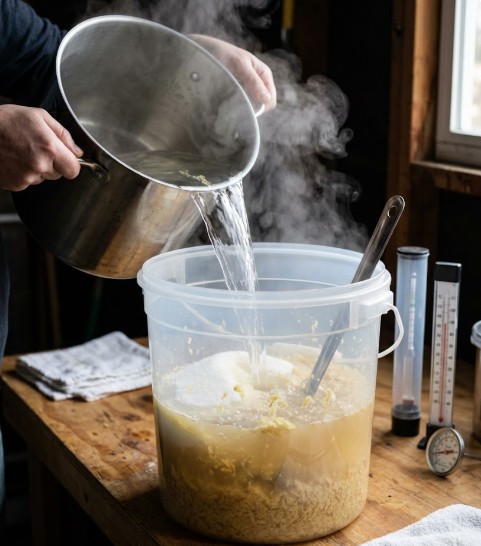
I bring 20 liters of filtered or previously boiled water to a full boil in a big pot or kettle. I then pour the hot water carefully over the ginger-sugar-lemon blend in the fermenter.
If I choose to use it, I add 2 teaspoons of cream of tartar now to help with carbonation stability. I stir until the sugar fully dissolves and the ginger oils disperse.
Quick reference:
- Water: 20 L — main liquid
- Sugar: 3 kg — sweetness and fermentation fuel
- Lemon juice: 500 ml — acidity and brightness
- Cream of tartar (optional): 2 tsp — helps carbonation
Cooling Down and Pitching Yeast
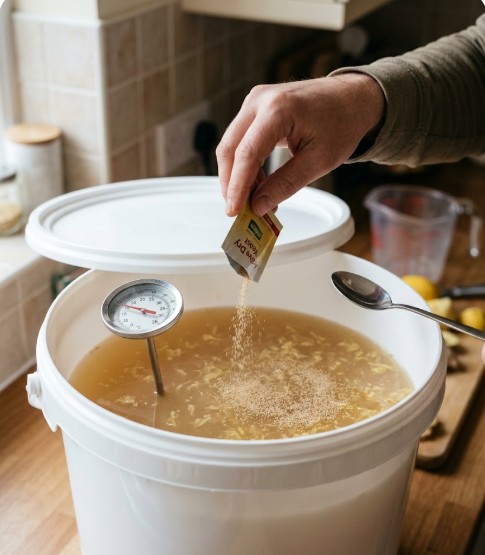
I let the hot mixture cool to between 25–30 °C (77–86 °F). I check the temperature with a reliable thermometer; adding yeast too early can kill it.
When the liquid reaches the correct range, I sprinkle 5 g of active dry yeast evenly over the surface. I fold the yeast in gently with a spoon; I avoid vigorous stirring to limit air exposure.
Finally, I loosely cover the fermenter so gas can escape while keeping out dust and insects. This careful cooling and yeast addition start the fermentation that creates natural fizz.
Brewing Process
Initial Ferment Stage
I transfer the ginger, sugar, lemon, and cream of tartar mix into a clean, sanitized fermenter. I add the cooled water, making sure the liquid sits between 20°C and 25°C (68°F–77°F). Keeping that temperature range protects the yeast and keeps fermentation steady.
I sprinkle 5 g of active dry yeast across the surface and let it sit without stirring for about 10 minutes. When the yeast begins to foam, I stir gently to mix it through the brew. I fit an airlock or a loosely seated lid so CO2 can escape while contaminants stay out.
I let the mixture ferment for roughly 24–48 hours. During this time the yeast eats sugars and produces alcohol and CO2, which gives the drink its natural fizz and sharp flavor.
Key points
- Temperature: 20°C–25°C (68°F–77°F)
- Yeast: 5 g active dry yeast
- Vessel: large, sanitized, with airlock
- Time: ~24–48 hours
Tracking Fermentation
I watch the airlock for bubbling as the main sign of activity. Strong, steady bubbles mean the yeast is active; slow or stopped bubbling shows fermentation is slowing down or finished.
I also smell and look at the brew each day. A light yeasty and ginger scent is normal. Any sour, rotten, or otherwise strange odors require me to discard the batch to avoid health risk.
When bubbling drops significantly or stops (or after about 48 hours), I get ready to bottle. I take care to transfer the beer without splashing or adding oxygen, since oxygen can ruin the flavor. I handle bottles and caps in sanitized conditions and leave a small headspace to allow final natural carbonation.
Bottling Instructions
Getting Bottles Ready
I clean and inspect bottles that can handle pressure, like PET or capped glass. I wash them with warm water and mild soap, rinse thoroughly, then sanitize. I use either a food-safe sanitizer or soak bottles for at least 10 minutes in a solution made with 1 tablespoon unscented bleach per gallon of water.
I let bottles air-dry upside down on a clean rack and avoid touching the opening. I discard any bottles or caps with cracks, chips, or worn seals to prevent leaks or breakage under pressure.
Quick checklist
- Clean with soap and warm water
- Rinse until no suds remain
- Sanitize for 10 minutes minimum
- Air dry on a clean surface
- Reject damaged bottles or caps
Recommended bottle types
| Type | Typical sizes | Reusable? |
|---|---|---|
| PET plastic | 500 ml–2 L | Yes |
| Glass with crown caps | 330 ml–1 L | Yes (check seals) |
| Swing-top glass | 500 ml–1 L | Yes |
Moving the Ginger Beer into Bottles
I set up a clean workspace and sanitize any tools I’ll use, such as a siphon, funnel, or ladle. I transfer the ginger beer slowly using a siphon when possible to keep sediment in the fermenter.
I leave about 2–3 cm (roughly 1 inch) of headspace in each bottle to allow safe carbonation. I avoid splashing or aerating the beer to protect flavor and prevent off-aromas.
Step-by-step transfer
- Sanitize siphon, funnel, and caps.
- Start the siphon, fill bottles slowly.
- Stop with 2–3 cm headspace.
- Wipe rims clean before sealing.
Sealing and Storing the Bottles
I seal bottles tightly. For crown caps or swing-tops I ensure a firm closure. For PET bottles I screw the caps on snugly but not overly tight so pressure can build safely.
I store the bottles in a cool, dark place around 18–22°C (64–72°F) for 24–48 hours to allow carbonation to develop. I check bottles daily for firmness to judge carbonation. Once the desired sparkle appears, I move them to the refrigerator to halt further fermentation and reduce the risk of over-pressurization.
Simple storage guide
- Conditioning: 18–22°C for 24–48 hours
- After carbonation: refrigerate to slow fermentation
- Monitor: check bottle pressure by feel each day
Safety reminders
- Never open a warm, highly carbonated bottle near your face.
- Release pressure slowly if needed.
- Refrigeration after conditioning reduces chance of exploding bottles.
Carbonation and Maturation
Testing the Fizz
I check carbonation by feeling bottle pressure and sampling carefully. For plastic bottles, a gentle squeeze tells me a lot: they should be springy and firm without feeling rock-hard. I open a bottle after 24–48 hours to listen for a clear pop and watch for active bubbles when I pour.
I also use a simple visual checklist:
- Bottle firmness: soft = under-carbonated, very hard = over-carbonated.
- Sound on opening: quiet hiss = low fizz, sharp pop = good pressure.
- Pour behavior: steady streams of tiny bubbles = lively carbonation.
If fizz looks weak, I leave bottles at room temperature a bit longer. If pressure seems too high, I move bottles to the fridge right away to slow fermentation and cut the risk of ruptures.
Best Time to Let It Mature
I follow a two-step timeline to balance flavor and sparkle. First, I allow the beer to condition for 24–48 hours at roughly 20–25°C (68–77°F). This period lets yeast finish generating CO2 while flavors begin to settle.
Next, after bottling I store the bottles somewhere cool and dark—about 15°C (59°F)—for another 3–5 days. That lower temperature helps carbonation stabilize and the ginger bite to round out.
When the brew reaches the carbonation I want, I refrigerate at or below 4°C (39°F). Chilling stops most yeast activity so bottles stay safe and taste consistent.
Benefits I look for during maturation:
- Fuller, smoother ginger flavor.
- Persistent, pleasant carbonation that holds up while drinking.
- Reduced sharpness from active yeast or immature alcohol notes.
I check a sample bottle before serving a whole batch. If flavor or fizz isn’t right, I adjust time or temperature in future batches to get the balance I prefer.
Serving Suggestions
1. Serve Very Cold for Best Refreshment
I always chill my ginger beer well before serving. Pour over lots of ice so each sip stays crisp and fizzy. Cold temperatures bring out the sharp ginger notes and keep the carbonation lively.
2. Add Fresh Garnishes for Aroma and Color
I like simple garnishes that add scent and visual appeal. Try thin lemon or lime wheels, a sprig of mint or rosemary, or thin ginger slices. These accents echo the drink’s citrus and spicy flavors.
3. Match with Spicy, Flavorful Dishes
I pair ginger beer with bold foods that can handle its punch. Think grilled jerk chicken, spicy tacos, or curries with chili heat. The sweet fizz cuts richness and calms heat, making meals taste brighter.
4. Mix into Cocktails and Mocktails
I use ginger beer as a mixer to add fizz and spice. Popular choices include:
- Moscow Mule: vodka, lime, ginger beer — serve in a copper mug.
- Dark ’n’ Stormy: dark rum, lime, ginger beer — a strong, refreshing mix.
- Ginger beer lemonade: ginger beer, fresh lemon juice, mint — a non‑alcoholic cooler. These blends are easy and let the ginger flavor lead.
5. Present in Attractive Glasses
I serve ginger beer in tall glasses, mason jars, or copper mugs for cocktails. Use a reusable straw for comfort and style. Good glassware makes the drink feel more special.
Quick Chart: Best Temperature and Garnish Ideas
| Item | Recommendation |
|---|---|
| Serving temperature | 4–7°C (39–45°F) — keep it cold |
| Ice | Plenty to preserve chill and fizz |
| Garnishes | Lemon, lime, fresh ginger slices, mint, rosemary |
| Glassware | Tall glass, mason jar, copper mug for cocktails |
These choices help me serve ginger beer that looks good, tastes sharp, and pairs well with food and cocktails.
Storage and Shelf Life
Best Place and Temperature for Keeping It
I store bottles in a cool, dark spot where the temperature stays steady. Aim for about 10–15°C (50–59°F) to slow fermentation and protect flavor.
Once the fizz level is right, I move bottles to the fridge at about 4°C (39°F) to slow fermentation almost completely.
Keep bottles away from sunlight and heat sources to avoid pressure build-up and flavor loss.
How Long You Can Expect It to Last
Use this as a quick guide for a 20‑litre batch:
- Cool, dark storage (10–15°C): 2–3 weeks — carbonation stays steady and flavors continue to round out.
- Refrigerated (4°C): up to 6 weeks — fermentation slows and freshness holds.
- Warm or sunny places: less than 1 week — risk of overfermentation and off flavors.
These times assume good bottling technique and clean equipment.
Ways I Handle Bottles to Keep Quality
- I handle bottles gently to avoid shaking out carbonation.
- I open bottles slowly over a sink to prevent foaming and loss of fizz.
- I check bottles now and then for bulging, leaks, or excessive pressure. If I see those signs, I either chill and use quickly or discard if contamination is likely.
- Keep a simple log of bottling dates so older bottles get used first.
Warning Signs That It’s Gone Bad
Watch for these clear signs:
- Sudden cloudiness or unusual sediment beyond normal settling.
- Strong sour or solvent-like smells that suggest overfermentation or contamination.
- Dramatic loss of fizz or a sharp, unpleasant taste.
- Bulging caps or leaking bottles — unsafe to keep at room temperature.
If any of these appear, do not drink it. When in doubt, discard the bottle.
Troubleshooting Tips for Ginger Beer Recipe 20 Litres
Problem A: No or Very Weak Fizz
- Cause: The yeast may be inactive or the batch got too cold.
- What I do:
- Check yeast freshness before starting.
- Keep fermentation between 20°C and 25°C.
- Don’t chill the wort too much before adding yeast.
- If bottles show no fizz after 24 hours, gently roll or tilt them to wake the yeast.
- Quick note: Sanitize any tool I use to move the bottles to avoid contamination.
Problem B: Too Much Pressure in Bottles
- Cause: Fermentation ran too long or got too warm, making excess CO2.
- What I do:
- Squeeze plastic bottles daily to watch pressure.
- Move bottles to the fridge when carbonation looks right to slow yeast.
- Use strong, pressure-rated bottles.
- If pressure builds, I open a bottle briefly over a sink to release gas, then reseal.
- Safety tip: Vent slowly and stand back from the bottle mouth.
Problem C: Off Tastes or Sour/Alcoholic Notes
- Cause: Over-fermentation or contamination.
- What I do:
- Stop fermentation early by chilling when flavor and fizz are where I want them.
- Clean and sanitize all gear before use.
- Use fresh ginger and lemon; discard anything that smells or tastes off.
- Minimize air exposure after adding yeast to reduce bugs entering the brew.
Problem D: Grit or Sediment in the Glass
- Cause: Yeast and ginger particles naturally settle.
- What I do:
- Pour from the bottle carefully and leave the last bit with sediment.
- Store bottles upright so solids settle to the bottom.
- When bottling, transfer slowly and stop before drawing up sediment.
Problem E: Not Spicy Enough
- Cause: Not enough ginger or poor extraction.
- What I do:
- Grate fresh ginger finely to release more flavor.
- For a stronger bite, I increase ginger to about 450 g for a 20 L batch.
- Let the ginger steep longer before adding yeast to pull out more heat.
Quick Reference Troubleshooting Table
| Symptom | Likely Cause | Fast Fix | How I Prevent It |
|---|---|---|---|
| No carbonation | Yeast inactive / too cold | Check yeast, raise temp, agitate bottles | Keep 20–25°C, use fresh yeast |
| Overcarbonation | Fermented too long / warm | Chill bottles, vent carefully | Monitor pressure, use strong bottles |
| Off flavors | Contamination / over-ferment | Chill, discard bad bottles, sanitize | Sanitize gear, stop fermentation on time |
| Sediment | Natural settling | Pour gently, leave last pour | Bottle carefully, store upright |
| Weak ginger taste | Too little ginger / short steep | Use more grated ginger, steep longer | Use fresh ginger, extend steeping |
Conclusion
I took a simple set of ingredients and turned them into a bright, fizzy 20‑liter batch that fits my taste. By keeping equipment clean, watching fermentation, and bottling with care, I get consistent flavor and good carbonation. Making ginger beer at home lets me set the spice and sweetness exactly how I like them while costing less than store options.
- I control the heat of the ginger and the amount of sugar.
- I check bottles for pressure and chill them before serving.
This process gives me a satisfying, homemade drink ready for gatherings or warm afternoons.
Frequently Asked Questions
What main items do I need to make ginger beer at home?
I use fresh ginger root, a good amount of sugar, fresh lemon juice, clean water, and a small amount of active dry yeast. I sometimes add a pinch of cream of tartar to help stabilize bubbles, but it is optional. I weigh ingredients and measure liquids to keep the batch consistent.
What tools are required to brew about 20 liters?
I use a food-grade fermenter of at least 25 liters, strong bottles that can hold pressure (PET plastic or capped glass), a digital kitchen scale, measuring jugs, and a reliable sanitizer. I also keep funnels and a siphon or ladle for safer bottling.
How long should I let the ginger beer ferment?
I let the primary fermentation run about 24–48 hours at roughly 20–25°C (68–77°F). This window lets the yeast convert sugar to gas and a small amount of alcohol while keeping flavors bright.
How do I get good fizz in my ginger beer?
I use fresh yeast and the correct sugar amount, keep the fermentation temperature steady, and avoid disturbing the lees when I bottle. I leave some headspace in each bottle for gas expansion. Adding cream of tartar can help, but it is not required.
Where should I store my finished bottles?
I store bottles in a cool, dark place at about 10–15°C (50–59°F) for 2–3 weeks to let carbonation mature. For longer storage and to slow further fermentation, I refrigerate the bottles; chilled bottles keep well for up to six weeks.
What can I do if my ginger beer lacks fizz?
I check three things: yeast vitality, fermentation temperature, and sugar level. If yeast is old, I replace it. If fermentation was too cool, I move bottles to a warmer spot briefly. If sugar was low, I can add a small priming dose before reconditioning in sealed bottles.
Why does overcarbonation happen and how do I avoid it?
Overcarbonation occurs when fermentation runs too long or gets too warm, causing excess gas. I watch fermentation times, use correct yeast and sugar amounts, and chill bottles as soon as they reach the carbonation level I want to stop further gas buildup.
Any serving tips for homemade ginger beer?
I serve it very cold with ice, lemon slices, or fresh mint. It pairs well with spicy foods and works great in mixed drinks. I choose sturdy glassware to show bubbles and protect carbonation.
Why must I sanitize all equipment?
I sanitize to stop unwanted bacteria and wild yeasts from spoiling the batch or creating off tastes. Clean gear helps me get a crisp, reliable final drink every time.
How can I make the ginger taste stronger?
I use very fresh ginger and grate it finely to extract more oils. I let the ginger steep with the sugar and lemon before I add yeast so the spicy flavor develops fully.
FAQs
Q: How do I make 20 litres of ginger beer safely at home?
I recommend using clean, food-grade equipment and following a tested recipe. Boil fresh ginger in water, dissolve sugar, cool the mix to about room temperature, then add yeast. Ferment in a sanitized fermenter until bubbling slows, then bottle in strong PET or glass bottles made for fermentation. Keep everything clean to avoid contamination.
Q: How long does fermentation take and how do I know it’s ready?
Primary fermentation usually takes 3–7 days at room temperature. I watch the bubbling and check gravity with a hydrometer if I have one. When the foam drops and activity slows, or the specific gravity stops changing over 48 hours, fermentation is likely complete.
Q: Is homemade ginger beer safe to drink and store?
Yes, when made and stored correctly. I use proper sanitation and leave enough headspace in bottles. For alcoholic ginger beer, keep it refrigerated after conditioning to slow fermentation. For non-alcoholic versions, use short fermentation and refrigerate promptly. Discard any batch with off smells, mold, or slimy textures.
Q: How fizzy will a 20-litre batch get, and how do I control carbonation?
Carbonation depends on residual sugars and yeast activity. I control fizz by adjusting priming sugar at bottling or by cold-conditioning in the fridge. Less priming sugar gives gentle fizz; more gives stronger carbonation. Use pressure-rated bottles and burp them if needed to avoid bursts.
Q: How long does ginger beer keep, and how should I store it?
Refrigerated homemade ginger beer can last several weeks to a few months. I store bottles cold to slow yeast and preserve flavor. For long-term storage, pasteurize in bottles or freeze, but both change taste and mouthfeel.
Q: Can I make an alcoholic version and how strong will it be?
Yes. I can make hard ginger beer by using higher sugar and fermenting to dryness with a suitable yeast. Typical home batches reach about 3–5% ABV depending on starting sugar and yeast. Measure with a hydrometer to calculate alcohol level safely.
Q: How does homemade ginger beer compare to store-bought options?
Homemade versions let me control sweetness, spice, and fizz. They often taste fresher and may contain live yeast if unfiltered. Store-bought ginger beers offer consistency and convenience but usually lack the customization I get when I brew my own.
Conclusion
I recommend this 20‑litre ginger beer approach for anyone who wants a reliable, flavorful batch that scales well. The method balances fresh ginger, sugar, and proper yeast choice to produce a crisp, spicy drink while keeping fermentation control and safety in mind.
- Effectiveness: The recipe yields consistent fizz and ginger aroma when you follow brewing times, sanitation, and temperature limits.
- Safety: I stress clean equipment, correct yeast handling, and measured sugar use to avoid off‑flavors and overpressurized bottles.
- Eco‑friendliness: Reusing food‑grade PET or glass bottles and sourcing local ginger and sugar reduce waste and transport impact.
- Suitability: This recipe fits parties, mixers, or stocking the fridge; you can adjust sweetness and alcohol level to taste.
I encourage choosing trusted ingredients and maintaining good brewing hygiene for the best long‑term results. Try a small test batch first, then scale confidently to 20 litres when you’re comfortable.