
Vito Iacopelli Pizza Dough Recipe — Authentic Neapolitan-Style Dough Made Simple
I love making pizza at home, and Vito Iacopelli’s dough method changed how I do it. The key is a simple pre-ferment called poolish — a mix of flour, water, a touch of yeast, and a bit of sweetener that sits until bubbly. That starter gives the dough extra rise, flavor, and an airy crumb that bakes into a crisp outside and a soft, chewy inside.
This dough feels light and stretches easily, so you can shape thin, puffy crusts like the pros. I’ll walk you through the essentials, share practical tips, and show how small steps — like using poolish and proper fermentation — make a big difference in texture and taste.
Key Takeaways
- Poolish starter improves flavor and creates a bubbly, airy dough.
- This method yields a crust that is crisp outside and soft inside.
- Simple steps and proper timing make professional-style pizza at home.
Why I Like This Vito Iacopelli Pizza Dough
I love how this dough develops deep, natural flavor from a full Poolish starter. The crust bakes up crisp on the outside and soft and chewy inside, giving a great contrast in every bite.
I use only a few ordinary ingredients and clear steps, so I don’t need a pro oven to get restaurant-quality results at home. The method lets me control fermentation time and texture, so I can make lighter, easier-to-digest pizza without sourdough.
- Light, airy crumb
- Crispy exterior, chewy interior
- Simple process, consistent results
Ingredients I Use for Vito Iacopelli–Style Pizza Dough
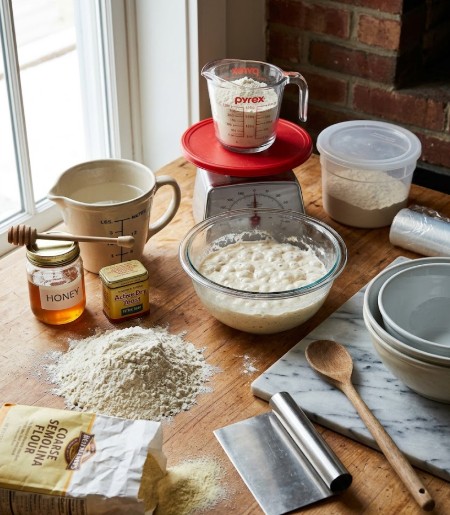
- Poolish (make 16–24 hours before):
- 300 g all-purpose or bread flour
- 300 ml room-temperature water
- 5 g active dry yeast
- 5 g honey
- Final dough additions:
- 135 g all-purpose or bread flour
- For shaping and baking:
- Semolina flour (for dusting)
- Tools I rely on (not ingredients):
- Kitchen scale, mixing bowls, spoon or dough scraper, measuring cup, plastic wrap, airtight container, pizza stone or steel, clean countertop
Yield: about three 12-inch pizzas.
How I Make a Vito Iacopelli–Style Pizza Dough Copycat
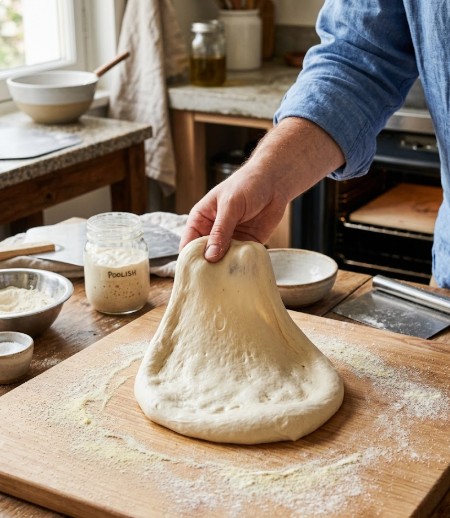
I start by preparing a poolish the day before. I mix equal parts flour and water, a small amount of dry yeast, and a bit of honey. After stirring until combined, I leave it at room temperature for an hour, then refrigerate it to ferment for 16–24 hours.
When the poolish is fully active, I figure the remaining flour needed for the final dough. Using the poolish water as part of the total hydration, I add the calculated extra flour plus salt to the bowl with the poolish. I mix briefly—about a minute—until the mixture just comes together.
I turn the dough onto a clean surface and knead for 5–10 minutes until it feels smooth and elastic. Then I oil a bowl lightly, place the dough inside, cover it, and let it rest for 10 minutes.
After the short rest, I shape the dough into a tight ball and place it in a lightly oiled container. I cover it and let it undergo bulk fermentation at room temperature for about an hour, or until it roughly doubles in size.
Next I divide the dough into three equal portions. I coat each ball with a little olive oil, cover them, and let them relax for 30 minutes at room temperature. This final rest makes stretching easier and keeps the crumb open.
I sprinkle semolina on my work surface to prevent sticking, then gently stretch each dough ball into a 12-inch round. I recommend simple toppings at first—just tomato sauce—to judge the crust and bake quality.
I bake on a preheated pizza stone or steel at the highest oven temperature I can reach (aim for around 500°F / 260°C if possible). Bake times are short: typically 2–3 minutes until the rim puffs and turns golden brown.
Quick reference (measurements approximate):
- Poolish: 300 g flour, 300 ml water, 5 g yeast, 5 g honey
- Final add: 135 g flour, 15 g salt
- Yield: three ~12″ pizzas
I keep the process straightforward and watch the dough closely—timing and feel are as important as exact numbers.
Notable Tips to Make This Vito Iacopelli Pizza Dough Recipe Perfect
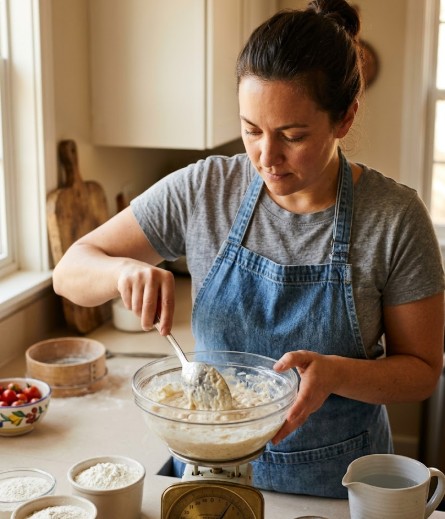
I prepare the Poolish the night before so fermentation has time to develop. I let it rest 16–24 hours in the fridge until it becomes bubbly and aromatic.
I always weigh ingredients. A kitchen scale gives me consistent dough every time. I avoid cups and eyeballing.
I keep the dough warm but not hot during its bulk rise. A steady, cozy spot helps yeast work without stressing the dough.
I lightly oil the bowl and dough to prevent sticking and add a touch of flavor. I handle the dough gently when shaping to keep air pockets intact.
I dust the work surface with semolina before stretching. It stops sticking and adds a pleasant crunch to the crust.
I crank the oven as high as it safely goes and preheat thoroughly. High heat gives a quick oven spring and a well-browned exterior.
I top sparingly. A thin layer of sauce and moderate cheese prevent a soggy center and let the crust shine.
I watch timing closely: fermentations, bench rests, and final proof. Hitting each step’s time window matters more than fancy techniques.
Quick checklist I follow:
- Poolish: make night before, look for bubbles.
- Scale: measure all ingredients.
- Warm rise: steady, gentle temperature.
- Oil: coat bowl and dough lightly.
- Gentle shaping: preserve air.
- Semolina: use on work surface.
- Oven: very hot and fully preheated.
- Toppings: keep them light.
- Timing: respect each rest and proof.
I use these steps to get a crisp outside, tender inside, and reliable results.
Some Delicious Ways to Enjoy This Vito Iacopelli Pizza Dough
How I Store and Reheat the Dough Right
I keep shaped dough balls in the fridge for up to 48 hours in an airtight container. Before I shape or bake, I bring them to room temperature so the gluten relaxes and the dough stretches easily.
For longer storage, I freeze dough balls after shaping, wrapping each tightly in plastic and foil. I thaw frozen dough in the fridge overnight, then let it warm on the counter for an hour before shaping.
To reheat leftover baked pizza, I use a preheated oven or a hot skillet. A 400°F (200°C) oven for 5–8 minutes crisps the crust without sogginess. In a skillet, cover briefly to warm toppings and keep the bottom crisp.
Ingredients I Use
- 300 g all-purpose or bread flour (for the poolish)
- 300 ml room-temperature water (for the poolish)
- 5 g instant dry yeast (for the poolish)
- 5 g honey (to feed the pre-ferment)
- 135 g additional all-purpose or bread flour (to finish the dough)
- 15 g fine salt (for the final dough)
- Olive oil (for resting bowls and coating dough balls)
- Semolina or flour (for dusting work surface)
I recommend quality flour and good olive oil. Small changes in water or flour will change dough feel, so weigh ingredients for best results.
How I Make It — Step by Step
- Make the pre-ferment (poolish): Mix 300 g flour, 300 ml water, 5 g yeast, and 5 g honey until combined. Let it sit loosely covered at room temp for about 1 hour, then refrigerate 16–24 hours.
- Combine final dough: Add the chilled poolish, 135 g extra flour, and 15 g salt in a large bowl. Mix for about 1 minute until the dough begins to come together.
- Knead: Turn the dough onto a clean surface and knead 5–10 minutes until smooth and elastic. Lightly oil a bowl, place the dough inside, and rest 10 minutes.
- Bulk rise: Form a smooth ball and place it in a lightly oiled container. Cover and let it rise about 1 hour or until roughly doubled.
- Divide and rest: Split into three equal balls, coat lightly with olive oil, and let rest 30 minutes at room temperature before shaping.
- Shape and bake: Dust the counter with semolina, stretch each ball to about 12 inches, top as desired, and bake on a hot stone or steel at the highest oven heat you can (around 500°F/260°C if possible). Bake 2–3 minutes until puffed and golden.
Tips:
- Use a very hot oven and a preheated stone or steel for the best crust.
- If testing the crust, bake with just sauce and salt to judge doneness.
- Keep toppings light so the crust bakes evenly.
Video Reference I Like
I watch a short demo when I need a visual reminder of stretching and baking technique. The video shows how to handle a poolish-based dough, shape rounds, and use high heat for quick baking. It helps me match oven timing and dough feel to the results I want.
Practical Notes and Quick Tips
- Fridge storage: Keep dough balls in airtight containers for up to 48 hours. Bring them back to room temperature before shaping to avoid tearing.
- Freezing: Wrap shaped balls tightly in plastic, then foil, and freeze. Thaw in the fridge overnight, then sit at room temperature an hour before use.
- Baking note: If your oven won’t reach 500°F, bake on the hottest setting with the stone or steel as high as it safely goes and increase bake time slightly.
- Serving ideas: Try classic Margherita with fresh basil and buffalo mozzarella, spicy soppressata with hot honey, or a white ricotta and garlic-oil pizza. I also like topping pizzas with arugula and prosciutto after baking, or turning the dough into a thick focaccia-style bread for starters.
- Pairings: A crisp Italian white wine or a fresh tomato salad balances rich cheeses and meats well.
Keep things simple when you want to judge the dough’s quality: a light sauce, sea salt, and olive oil will reveal the crust’s texture and flavor best.
FAQs on This Vito Iacopelli Pizza Dough Recipe
1. Which flour do I use for this pizza dough?
I use a high-protein Type 00 flour, like Italian Caputo, when I want a soft, stretchy Neapolitan crust. If you can’t find 00, pick a strong bread flour with 12–13% protein. Both give good structure and chew.
2. What four basics make up classic pizza dough?
Classic dough needs four simple items: flour, water, yeast, and salt. I sometimes add a little honey to the pre-ferment to help yeast wake up, but the four basics are all you truly need.
3. What does the “55 Rule” mean when making dough?
The “55 Rule” refers to keeping the dough around 55°F (13°C) during early mixing to slow fermentation. I keep dough cool at first to develop more flavor and control the rise, especially when using a pre-ferment.
4. Why do I use a full 100% Poolish instead of a small amount?
I choose 100% Poolish because it gives more consistent structure and a lighter crumb than smaller amounts. It helps timing and oven performance more than just boosting flavor.
5. How long should the Poolish sit before I use it?
I let the Poolish ferment 16–24 hours. I usually leave it an hour at room temp after mixing, then chill it. It’s ready when it’s bubbly and smells yeasty.
6. Can I freeze the dough after I make it?
Yes. I freeze dough after I portion it into balls. Wrap each ball tightly, thaw them overnight in the fridge, then bring to room temperature before stretching and baking.
7. Why does my dough feel very sticky after I mix it?
A wet, sticky feel is normal with a 100% Poolish method. I use olive oil on my hands and give the dough short rests while working it. The stickiness eases as the gluten develops.
8. What room temperature should I aim for while proofing?
I aim for about 70–75°F (21–24°C) when proofing. Cooler slows the rise, hotter risks overproofing. Around 75°F usually gives steady fermentation with a Poolish.
9. Do I need a pizza stone or steel to bake this dough?
You don’t need one, but I recommend a stone or steel for the best bottom crust. A preheated sheet pan can work in a pinch, but a hot steel or stone gives much better oven spring and browning.
10. Does more Poolish make the crust larger or tastier?
More Poolish changes fermentation timing and dough behavior, not directly crust size or stronger taste. I find big bubbles and lift come from proper proofing and oven heat, not just the Poolish amount.
FAQs
- Q: What makes my take on Vito Iacopelli’s dough effective?
- A: I focus on a high-hydration dough, slow fermentation, and gentle handling. These steps help the crust get a thin, crisp edge and a soft, airy center. I avoid overworking the dough so gluten relaxes and the texture stays light.
- Q: Is this dough safe to eat if I ferment it for a long time?
- A: Yes. Long, cold fermentation in the fridge is safe and improves flavor. I keep the dough covered and use clean bowls and tools. If the dough smells very sour or shows mold, I discard it.
- Q: How far in advance can I make and store the dough?
- A: I refrigerate dough for up to 72 hours for best flavor, though some bakers keep it for 4–5 days. For longer storage, I freeze shaped dough balls and thaw them in the fridge 24 hours before use.
- Q: How do I maintain dough quality during storage?
- A: I coat dough balls lightly with oil, place them in airtight containers, and keep them cold. For frozen dough, I flash-freeze on a tray first, then store in sealed bags. Bring dough to room temperature before stretching.
- Q: How does this method compare to using a poolish or biga starter?
- A: A poolish or biga adds deeper flavor and more open crumb. I use them when I want stronger fermentation notes. For quick, reliable results, a direct dough with longer fridge time still gives excellent texture and taste.
- Q: Will this dough work in a home oven or only in a pizza oven?
- A: I get good results in a very hot home oven or on a pizza stone or steel. Preheat at the highest setting and use a baking steel for best browning. A wood-fired or professional pizza oven will give more char and blistering, but it’s not required.
- Q: How do I know when the dough is properly proofed and ready to shape?
- A: I look for dough that has nearly doubled, feels pillowy, and shows small gas bubbles under the surface. When gently pressed, the dough should slowly spring back but keep a light indentation. If it collapses, it’s overproofed.
Conclusion
I recommend trying Vito Iacopelli’s pizza dough approach because it delivers consistent, restaurant-quality results with simple, safe steps. The method uses basic, high-quality ingredients, careful fermentation, and straightforward shaping to produce a crust that is flavorful, well-textured, and easy to handle.
- Effectiveness: The dough gives a good balance of chew, crispness, and flavor whether you cold-ferment overnight or use a quicker rise.
- Safety: The recipe follows normal food-safety practices — keep dough refrigerated for long rests and thaw or proof frozen dough properly.
- Eco-friendliness: Using minimal, staple ingredients and avoiding specialty additives lowers waste and keeps the recipe low-impact.
- Suitability: This dough fits home ovens, grills, and pizza steels or stones, and works for both Neapolitan-style and New York–style variations.
I encourage choosing a reliable technique, weighing flour accurately, and allowing proper fermentation to get steady results over time. Try making a batch this week and refine the timing and hydration to match your oven and taste—small tweaks will pay off.
