
Pepper Belly Pete Chili Recipe: Authentic Spicy Homestyle Chili with Bold Flavor
I’ve cooked a lot of chili over the years, and this Pepper Belly Pete chili keeps rising to the top. It works in any weather, feels like comfort food, and has even earned awards for its flavor, so I trust it for family dinners and cook-offs alike.
You don’t need the original cookbook to make it; I use a practical copycat approach that recreates the same smoky, hearty profile at home. I’ll share the essentials—what goes into it, the gear I use, simple steps to make it, and tips for serving or freezing leftovers so you can enjoy it again later.
Key Takeaways
- A tried-and-true chili recipe that wins awards and suits family meals.
- Clear ingredient and equipment guidance makes the recipe easy to follow.
- Simple make-ahead and freezing tips help you save time and keep great flavor.
Why I Love This Family-Friendly Dinner
I reach for this chili on busy weeknights because it fills hungry bellies fast. The mix of ground chuck and spicy sausage builds deep, layered flavor in every spoonful.
I like that it feeds a crowd and still improves after a day in the fridge. I often make a large pot on Sunday to save time through the week.
I adjust the spice easily so everyone at the table gets the heat they like. Simple prep, big payoff, and reliable leftovers make it a go-to.
Pepper Belly Pete Chili Ingredients
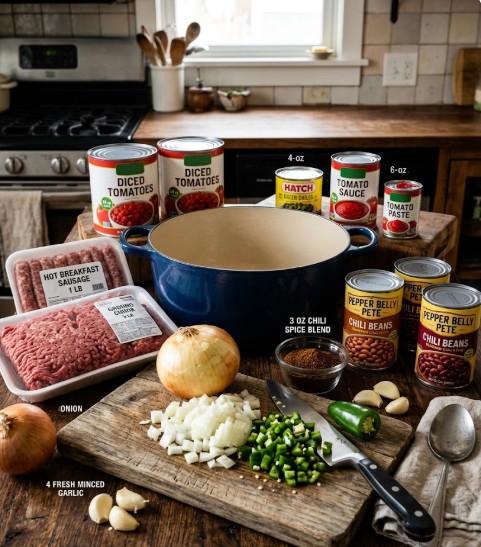
I keep the ingredient list straightforward so the chili builds deep flavor without fuss. Below I list amounts and simple swaps if you need milder or leaner options.
- Ground chuck — 3 lb
I use ground chuck for its balance of flavor and juiciness. Swap with ground beef, turkey, or chicken for a leaner pot. - Hot breakfast sausage — 1 lb
I leave the sausage fat in for extra richness and a smoky kick. Use mild sausage to tame the heat. - Large onion — 1, diced
Yellow or white onions both work. I sweat it until soft to form the flavor base. - Jalapeños — 2–3, chopped
I add seeds for more heat, or remove them for milder chili. Canned green chiles can replace fresh jalapeños. - Garlic — 4 cloves, minced
Fresh garlic gives better aroma. I will use garlic powder only if needed. - Canned diced tomatoes — 44 oz
These give body and texture. Fresh tomatoes can work but need longer simmering. - Hatch green chiles — 4 oz
I use these for a smoky, earthy note. Anaheim or extra jalapeños are good substitutes. - Tomato sauce — 44 oz
This builds the saucy backbone of the chili. - Chili spice blend — 3 oz
I reach for a robust chili mix; any high-quality chili powder blend will do. - Tomato paste — 6 oz
I use paste to thicken and deepen the sauce. - Canned seasoned beans — 3 cans
I use pre-seasoned chili-style beans for convenience. Regular kidney or pinto beans work if you prefer.
Recommended Equipment
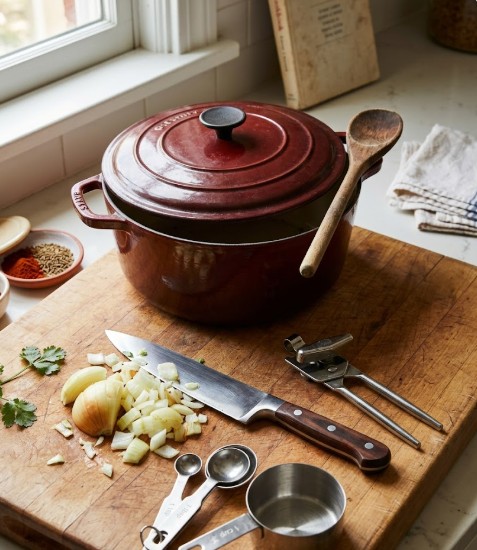
I use a heavy Dutch oven or large pot to cook evenly and hold big batches. A sturdy wooden spoon helps me stir without damaging the cookware. I keep a sharp knife and a stable cutting board for quick, safe chopping. I rely on a can opener for canned tomatoes, beans, and chiles. Measuring cups and spoons make seasoning and liquid amounts consistent.
How I Make Pepper Belly Pete’s Chili
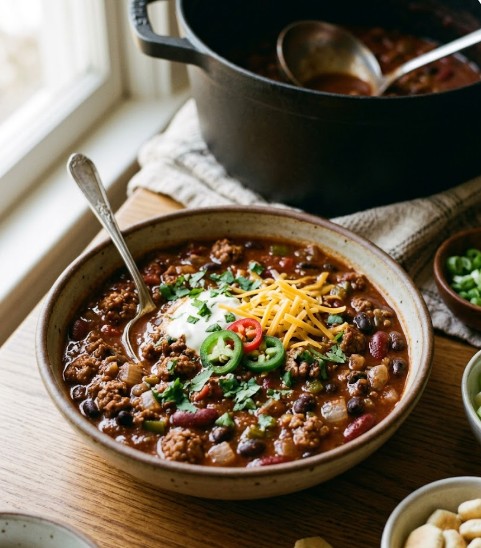
I brown the ground beef in a large pot over medium heat until no pink remains, about 8–10 minutes. I drain the beef fat, then add hot breakfast sausage to the same pot and cook it through without draining so the sausage flavor stays in the chili.
I add the chopped onion, diced jalapeños, and minced garlic to the meat. I cook and stir for about 5 minutes until the onion becomes translucent and the aromatics soften.
I mix in the diced tomatoes, Hatch green chiles, tomato sauce, chili seasoning, and tomato paste. I stir well, scraping the pot bottom so nothing sticks and the sauce comes together evenly.
I cover the pot, drop the heat to low, and let the chili simmer for 1 hour. I stir every 15 minutes to prevent burning and to help flavors meld.
After the hour, I add the canned beans straight from the can—liquid and all—and fold them into the chili. I simmer the pot uncovered for another 30 minutes so the sauce thickens and the beans soak up flavor.
I taste the chili and adjust seasoning with salt or extra chili powder if I want more heat. The chili is ready when it’s thick, bubbling, and clings to a spoon.
Quick reference (timing and notes)
- Browning: 8–10 minutes for beef; brown sausage after beef.
- Aromatics: 5 minutes for onion/jalapeño/garlic.
- Initial simmer: 1 hour, covered; stir every 15 minutes.
- Beans and final simmer: 30 minutes uncovered.
- Finish: Taste, then adjust salt or chili powder.
Chef’s Special Tips
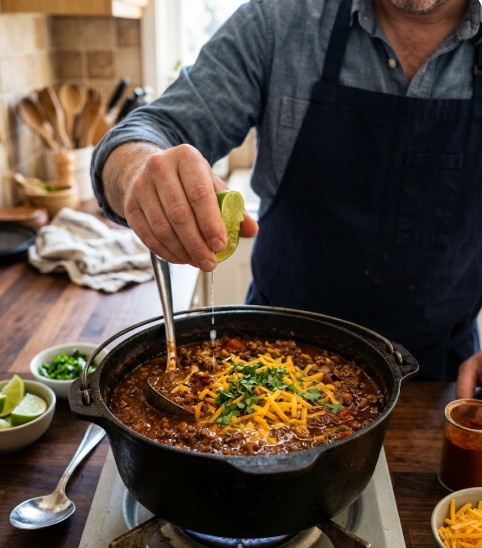
- I finish with a squeeze of lime to lift the flavors and cut richness.
- I stir in a pinch of smoked paprika for a mild, smoky layer.
- I uncover the pot near the end to let excess liquid evaporate and thicken the chili.
- I top with chopped fresh cilantro for brightness and shredded cheddar for creamy contrast.
What To Serve With It
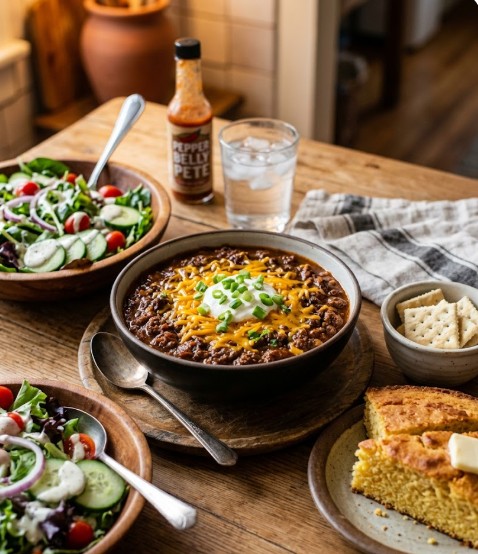
I like simple sides that match the chili’s bold flavor. Top each bowl with shredded cheddar, a spoonful of sour cream, and chopped green onions for cool, creamy contrast.
Warm cornbread adds a touch of sweetness and soaks up the sauce nicely. Keep saltine crackers on the table for a crunchy, easy dip.
If you want something lighter, I serve a green salad with a creamy dressing to balance the meal. All these choices pair well and let people build bowls the way they like.
How To Freeze Leftovers
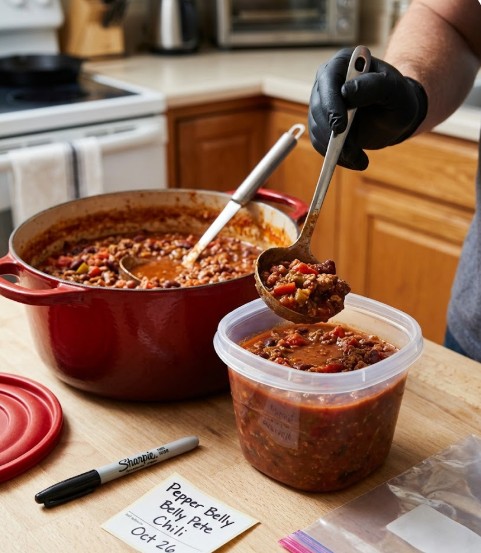
I cool the chili completely before packing it to keep ice crystals and freezer burn away. I use freezer-safe containers or heavy-duty zip bags and leave about an inch of space at the top for expansion.
Label each package with the date and freeze for up to 3 months.
To reheat, I thaw the chili overnight in the refrigerator. I then warm it slowly on the stove over low heat, stirring and adding a little broth or water if it looks too thick.
If the chili smells off, tastes sour, or separates into watery layers, I discard it.
Pepper Belly Pete Chili Recipe FAQs
What goes into my chili
- Meats: I use ground chuck (about 3 lb) and hot breakfast sausage (1 lb).
- Veggies: One large onion, 2–3 jalapeños (seeded for less heat), and 4 cloves garlic.
- Tomato base: 44 oz diced tomatoes, 44 oz tomato sauce, and about 6 oz tomato paste.
- Peppers and spice: 4 oz canned Hatch green chiles and a chili powder blend (about 3 oz).
- Beans: Three 15-oz cans of chili beans (I add them un-drained).
- Optional adjustments: Use mild sausage or remove jalapeño seeds to reduce heat. Add extra jalapeños or hot sauce to increase heat.
I keep measurements simple so you can scale the recipe for more people.
How I make it and common tips
- Brown the ground beef in a large pot over medium heat for 8–10 minutes, then drain excess fat. Brown the hot sausage in the same pot and leave its fat for flavor.
- Add chopped onion, jalapeños, and minced garlic. Cook about 5 minutes until the onion is soft and translucent.
- Stir in diced tomatoes, Hatch chiles, tomato sauce, chili powder mix, and tomato paste. Scrape the pot bottom so nothing sticks.
- Cover, lower heat, and simmer for 1 hour, stirring every 15 minutes so it won’t burn.
- Add the canned beans without draining; simmer uncovered for another 30 minutes so the chili thickens.
- Taste and adjust seasoning with salt or more chili powder. The chili is done when it’s thick and coats a spoon.
- Slow cooker option: I brown the meats first, then move everything to the slow cooker. I cook on low 6–8 hours or on high 3–4 hours.
- No-bean version: I skip the beans and let the chili simmer longer to reach the right thickness.
- Doubling the batch: I double or triple ingredients when feeding a crowd, and I use a much larger pot. Longer cook time helps flavors meld.
Nutrition and serving notes: one serving runs around 480 calories with about 34 g protein. The sodium can be high, so I taste before adding extra salt.
FAQs
- What makes my Pepper Belly Pete chili taste authentic?
I use a mix of toasted dried chilies (like ancho and chipotle) and browned beef to build deep, smoky flavor. I also add spices slowly and let the chili simmer so flavors blend. Toasting chilies and slow cooking give the chili its layered taste. - Is this chili safe for people who don’t like very spicy food?
Yes. I control heat by removing seeds from dried chilies and using milder varieties. I can also balance heat with tomato, broth, or a touch of sugar. If you prefer mild chili, start with less chili powder and add more after tasting. - Can I make this in a slow cooker or on the stovetop?
I use either method. For a slow cooker, I brown meat first, then add other ingredients and cook low for 6–8 hours. On the stovetop, I simmer gently for at least 1–2 hours. Slow cooking gives a deeper flavor; stovetop is faster and still works well. - How do I store and reheat leftovers safely?
I cool chili quickly and refrigerate in airtight containers for up to 4 days. For longer storage, I freeze portions for up to 3 months. To reheat, I thaw overnight (if frozen) and warm on the stove, adding a splash of broth if it gets too thick. - What-side dishes or toppings work best with this chili?
I serve it with cornbread, rice, or tortilla chips. Good toppings include shredded cheese, sour cream, chopped onions, and fresh cilantro. These additions add texture and help balance heat. - How does this chili compare to other chili styles?
I focus on smoky, layered flavors from dried chilies rather than just ground chili powder. Compared with Texas-style no-bean chilies, mine often includes beans and more spice variety. It’s versatile and easier to adjust for heat and texture. - What maintenance does the recipe need while cooking?
I stir occasionally to prevent sticking and check liquid levels to keep the chili from drying out. If it thickens too much, I add small amounts of broth. Tasting as it cooks helps me adjust seasoning and heat. - Is this recipe effective for feeding a crowd?
Yes. I scale ingredients up easily and the chili stores well, making it ideal for parties. Slow cooking in a large pot or crockpot lets flavors deepen and makes serving simple.
Takeaway
I found Pepper Belly Pete chili to be a reliable, crowd-pleasing dish that balances bold spice with hearty, familiar ingredients. The recipe works well whether you use ground beef, a mix of sausages, or added chiles; it yields a thick, smoky chili that holds up as a main course or a topping for nachos and baked potatoes.
- Effectiveness: This chili hits the mark for flavor and texture. Proper browning of the meat, layering spices, and a slow simmer build deep, consistent taste.
- Safety and simplicity: The ingredients and steps are straightforward and safe when you follow normal food-handling and cooking times. Simmering thoroughly ensures food safety and melds flavors.
- Eco- and budget-friendly: You can adapt ingredients to lower-cost or local options (ground beef, canned beans, fresh or canned chiles) without losing quality. Stretching the recipe feeds more people and reduces waste.
- Long-term value: The chili reheats well and often tastes better the next day, making it a practical choice for meal prep and gatherings.
I recommend choosing quality, fresh ingredients and a trusted method when you make this chili. With a few simple adjustments to spice and add-ins, you can tailor the recipe to your taste and get consistent, satisfying results every time.
